
DIY Concrete Leaf Garden Bowl
DIY Concrete Leaf Garden Bowl
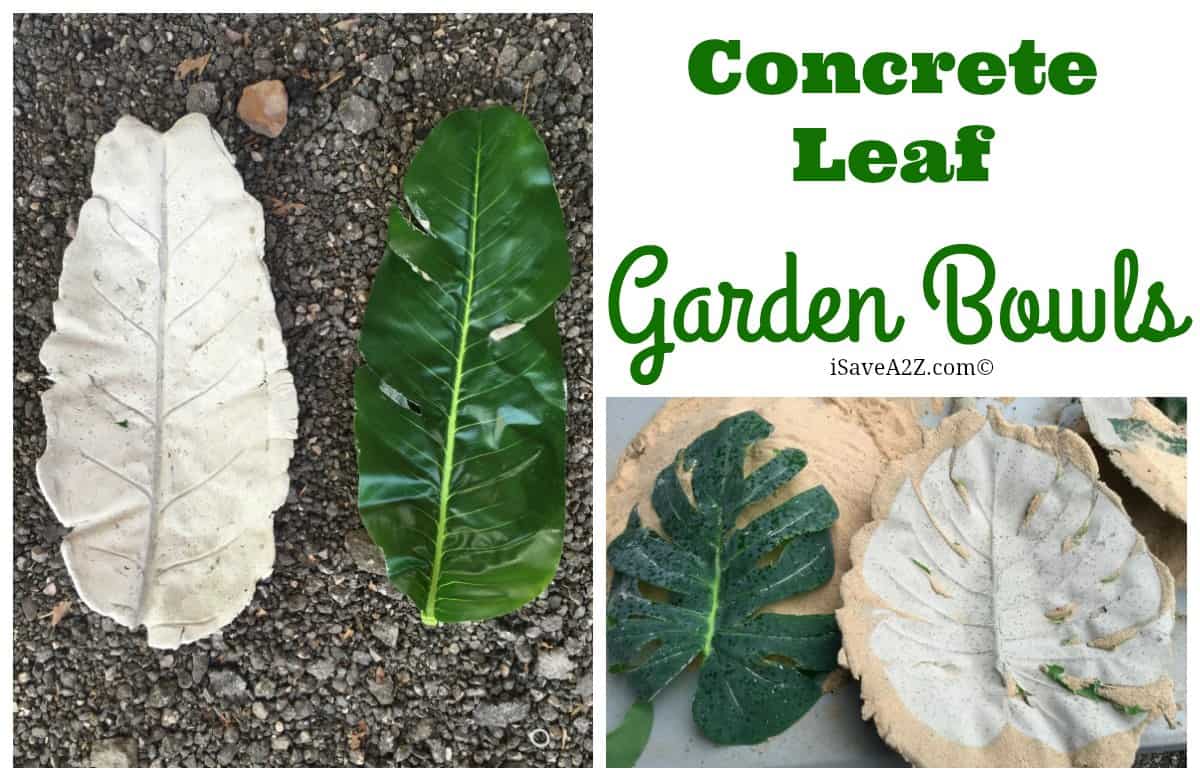
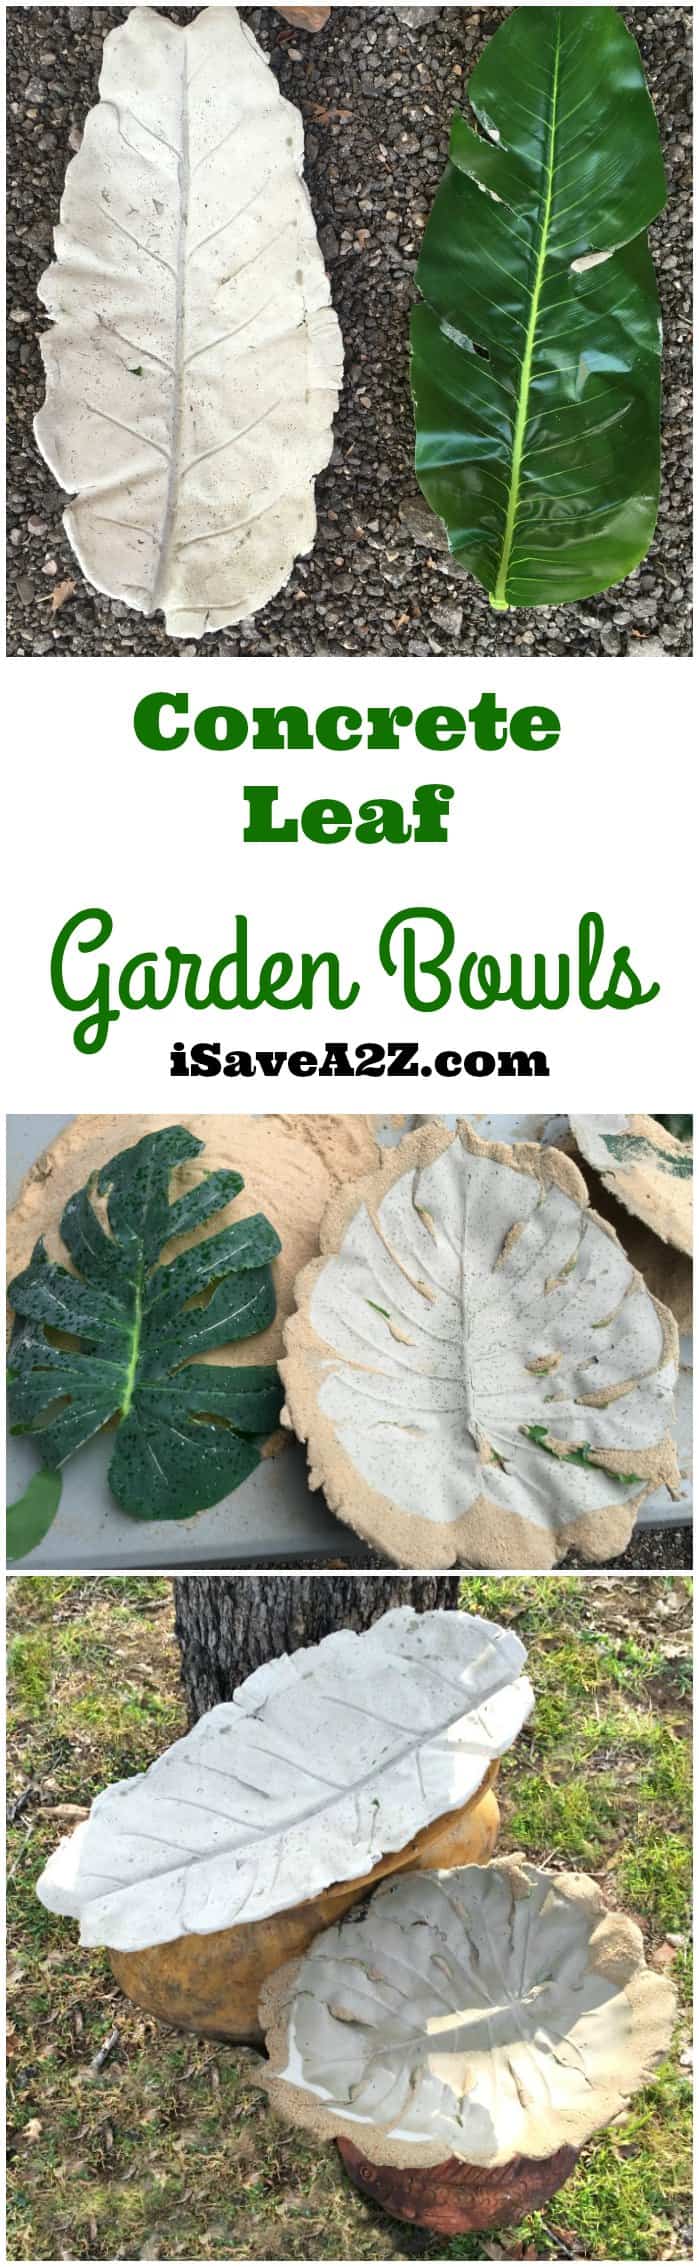
I recently expanded my garden so I decided to make a DIY Concrete Leaf Garden Bowl to help decorate the area. This project is so easy that I ended up making a few! I thought they would make excellent bird baths too! I had learned from a friend that you can make these with real leaves but it can be a bit of a pain when it’s time to peel the leaf off. I was shopping in Hobby Lobby (our local craft store) when I stumbled upon a 50% off sale in their floral department. I saw a huge plastic leaf that I thought would be perfect for the job! Normally this humungous leaf would have been $6 but today it was only $3! Score! I ended up grabbing a wide leaf and a long and narrow leaf that I thought would be perfect for my diy project idea.
I headed to the my local hardware store in search of ShapeCrete. It’s a new moldable form of concrete. I had no luck searching for this product and I didn’t want to use regular Quikrete for this job. I had a guy come up to help me in the concrete isle. He was asking me what type of project I was doing. I kinda brushed him off at first because these guys know about building stuff but not really about craft projects. This guy was persistent in helping me though so I gave in and started asking lots of questions and boy am I glad I did. This guy gave me a mother load of information! I ended up getting a bag of Cement All Rapid Set and let me tell you why. I wanted a very smooth finish for this project. I wanted something that would pick up the details of the leaf without rocks getting in the way. Regular cement has the rocks that I don’t want. If I had to explain what Cement All Rapid Set is to someone I would probably say it’s a mix between Cement and Plaster of Paris. It has the smoothness and speed of setting as the plaster does but it has the strength of cement but stronger! This means I can do small thin projects and they will hold up under pressure! After getting into a very detailed conversation with this guy at the hardware store I just realized that he wasn’t an employee there but an actual representative for Cement All! How did I get so lucky?!! This guy had a wealth of information and he inspired me to do so many projects with this stuff. The only problem? Well, it’s kind of expensive. One 55 pound bag of cement is just under $20 at my local store. It does come in smaller boxes for smaller projects though. This new product is exclusive to Home Depot stores only so if you plan to run out to your store just know it must be a Home Depot.
Here are a few things to know about Cement All Rapid Set:
- It sets in just 15 minutes
- It gets to structure strength in just 1 hour
- It’s super easy to use.
- Just add water – I combined a mixture of 4 parts to 1 part water for the perfect mix
There are three different types of Cement All Rapid Set:
Cement All Multi Purpose and Non-Shrink Grout (Blue Bag): This type of concrete has no rocks in the mix and can be used for just about anything. This is the type I used for this project. You can use this mix in a thickness of 0″ to 4″! That’s not a typo! You can use this on any project in super thin layers with amazing strength! If you did this with regular concrete, pieces would crack, or break off. After 1 hour your mix will be at 3000 psi strength. The rep told me the hardware store flooring strength is at 4000 psi. After 28 days the strength will reach its maximum strength of 9000 psi! That’s unheard of!
Cement All Mortar Mix (Brown Bag): This is a high strength structural repair mortar. This is the stuff you want to use if you are fixing or creating something vertical or overhead. This concrete can stand! This can be spread in a thickness of 1/2″ to 6″ with a strength of 2500 psi after 1 hour to 6500 psi after 28 days! The rep showed me a photo of a cartoon character that was carved in styrofoam and cemented with this mix! I swear it stood 6 feet tall! Impressive! This type of mix would be perfect if you were making concrete countertops too. You don’t need rebar for strength either. He also told me the cheapest countertop concrete edge form can be purchased here on Amazon. I think he just inspired me to redo my countertops in concrete! I wished I could show you the photos he had. He had acid stained concrete countertops that were to die for! I already ordered that edge form and my first project might be an outdoor table in my garden area.
Cement All Concrete Mix (Green Bag): This bag is a very rapid hardening concrete that works just like the blue bag but it does have the rocks. Not the gravel but actual rocks. This would be perfect for building steps, ramps, setting posts etc… This has to be used with a thickness of 2″ to 24″ though. You will get 3000 psi in 1 hour and at 28 days it will reach it’s maximum of 6000 psi. Still stronger than the hardware stores floor!
I wanted to really explain the differences between these mixes because if your project if different from mine you really need to know which type of Cement All will work for you.
Now let me tell you how I made my DIY Concrete Leaf Garden Bowl.
DIY Concrete Leaf Garden Bowl Supplies:
- Leaf or Leaves (plastic or real it’s up to you)
- Plastic Wrap
- Sand
- Cement All Rapid Set (Blue Bag)
- Small Bucket to mix the concrete
- Large Spoon or hand shovel
- Measuring cup
- Water
- Non stick cooking spray
- plastic gloves
DIY Concrete Leaf Garden Bowl Directions:
- Place a pile of sand in the middle of your work area. Lightly add a small amount of water to the top of your sand so it stays in place. The taller your sand pile the deeper your bowl.
- Tear off some plastic wrap to cover the sand pile. You might need a couple of pieces to cover the whole pile.
- Place the leaf down on the plastic wrap. Be sure the side with the most impressions are facing up to be in contact with the cement.
- Lightly spray your leaf with the non stick cooking spray. Make sure you cover the whole leaf. This will help stop the leaf from sticking to the concrete. (It helped for my plastic leaves)
- Once your ready for concrete then start mixing it. The mix is 4 cups of concrete to 1 cup of water. The mixture should look a bit thick. Almost like a thick chocolate milk shake but it’s also very smooth. There should not be any clumps in it. I would grab a bit of the mixture in my hands and try to hold in in my hands. If it just runs through your hands then the mix has too much water. If you can hold a bit in your hands and it slowly moves from a wet ball to a small pancake then it’s perfect. Do not mix your concrete until you are ready! This stuff sets in only 15 minutes so you don’t have a lot of time to work with. This would be a good time for me to tell you that you can slightly extend that set time if you add an additive to your concrete mix to slow the process. The concrete additive looks like this and costs only about $3 at your local store. Adding this to your concrete may give you an extra 15 minutes before it sets. This would be helpful in bigger projects for sure. I didn’t need this because I was basically pouring it over my template and didn’t need much time for that. Only mix the amount you think you will need for your project.
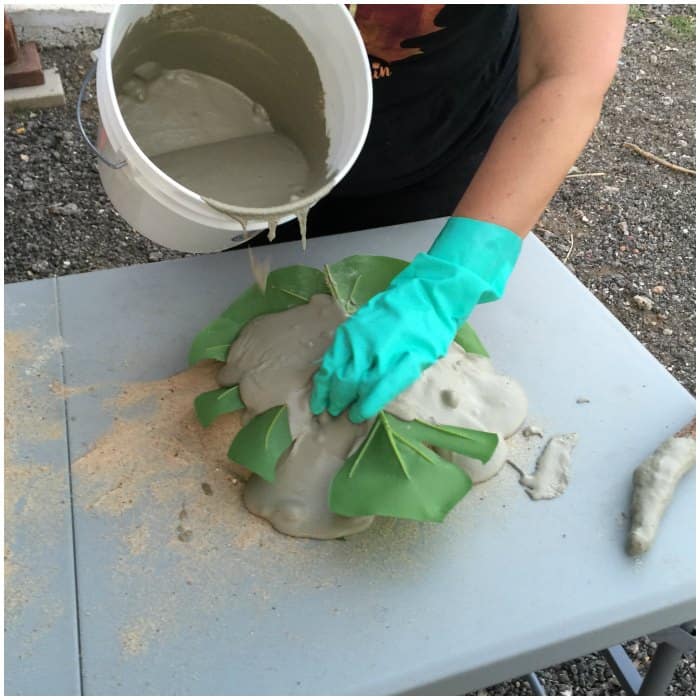
- Slowly add a little bit at a time to the center of the leaf allowing it to slowly slide down the edges. Then add more concrete to the areas that need it eventually covering the whole leaf. Now here’s the best part… if you still need to mix more concrete you can! Don’t worry about your project setting. This is the only type of concrete that you can add over existing concrete. If this happens, just spray a small amount of water over the project before adding another batch of cement. My garden bowl leaves are only about 1 inch thick. They came out perfect! I also made another leaf for a pond and I curved the end of the leaf to make a spout for the waterfall. It’s absolutely gorgeous.
- Let your leaf set for about 1 hour to give it the strength it needs before you add water to your bowls. There’s no need to seal this concrete either. (that’s what the rep told me anyway). He also mentioned that this concrete will set underwater! This stuff really is amazing.
- This last step is optional. You can paint your leaf if you want to. You can use any kind of paint too. It doesn’t have to be stain for concrete. This cement will accept paint without prep work. I used regular acrylic patio paint (My favorite set of paints for outdoor use) on some stones I made for the garden too. The paint came out vibrant!
Here are some tips from this project with photos.
This photo shows two different thicknesses of my concrete mix. The mix on the right side of the photo has too much water. When I poured it on it just ran down the sides and barely stuck at all. Aren’t you glad I can tell you all the mistakes so that you won’t make the same ones that I do? The mix on the left side is perfect! I also made another mistake you should know about. I didn’t lay down plastic here either. I wanted to see what it would look like without it. The sand adhered to the concrete for a rough edge finish. I kind of liked the look. It all depends on what you are going for with your project.
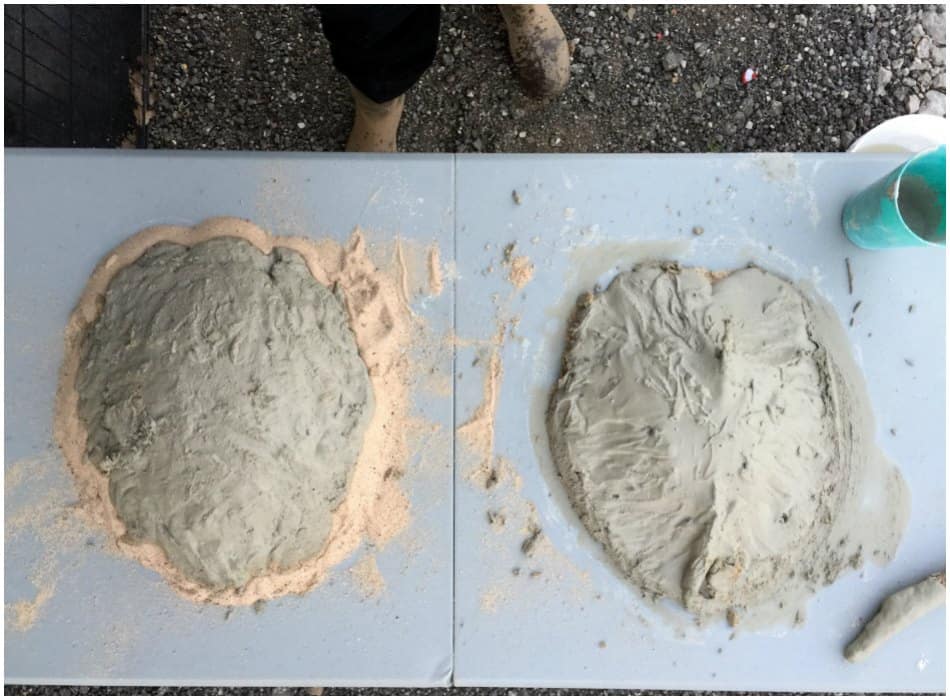
This is a perfect example of concrete that is too runny! See how there is no weight to it? It just slides like water down a hill. I had to stop and add more concrete mix to thicken it up a bit.
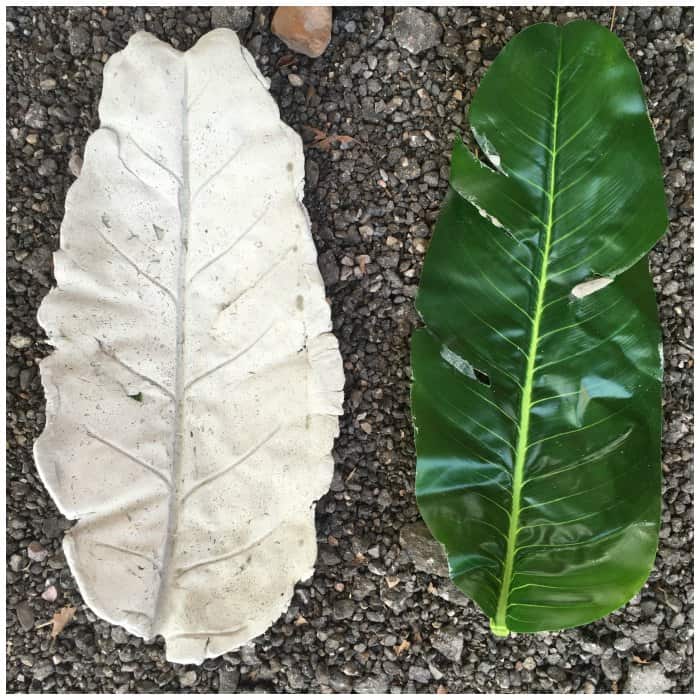
This is what it looks like when I pulled the dried piece off after about an hour. See how the sand stuck to the edges when I didn’t use plastic wrap? I did use the non stick cooking spray and that made it easy to pull the leaf off. This concrete will mimic what ever surface you use. If you stick this cement to glass the finish will be nice and smooth without you even buffing it! You can see just how smooth the surface is when I pull the leaf back.
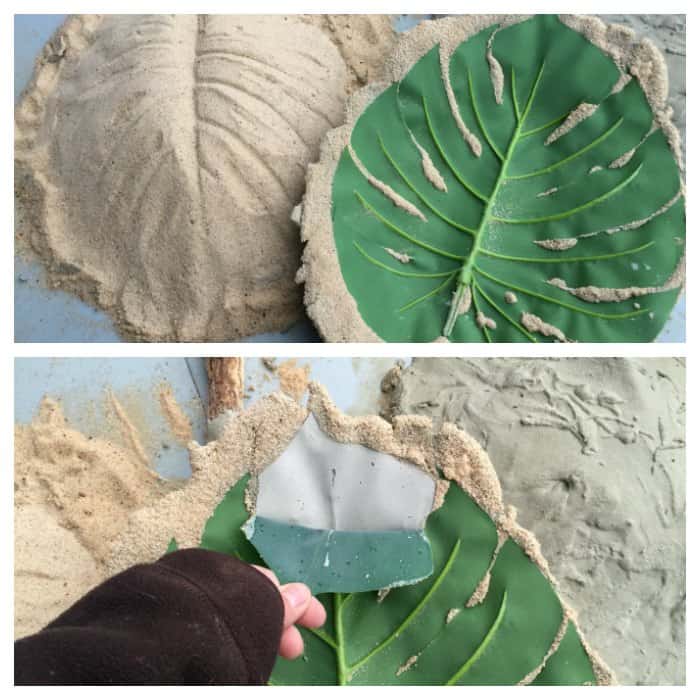
I took a photo of the one leaf I used with plastic and the other (wider leaf) without plastic to show you how the sand stuck to the edges.
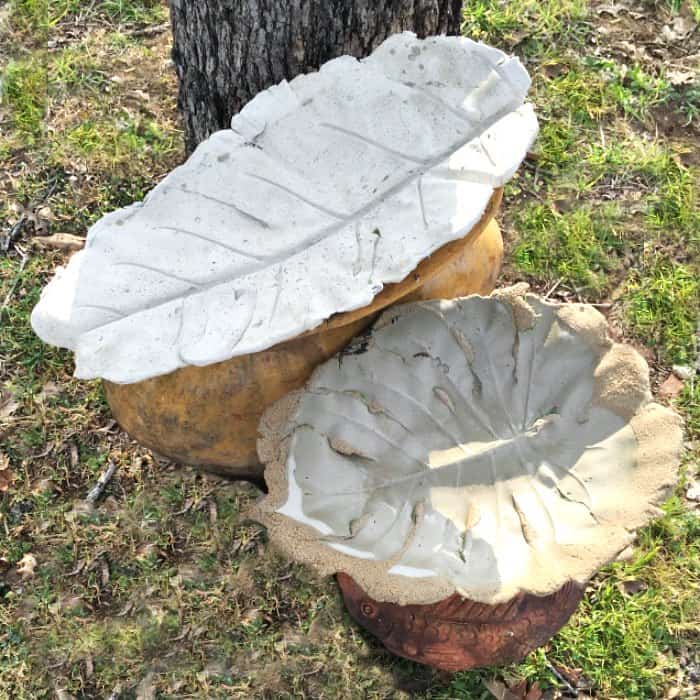
This one is my favorite leaf design! You can’t really tell from this photo but it is shaped like a long bowl and it does hold a good amount of water! It’s big!
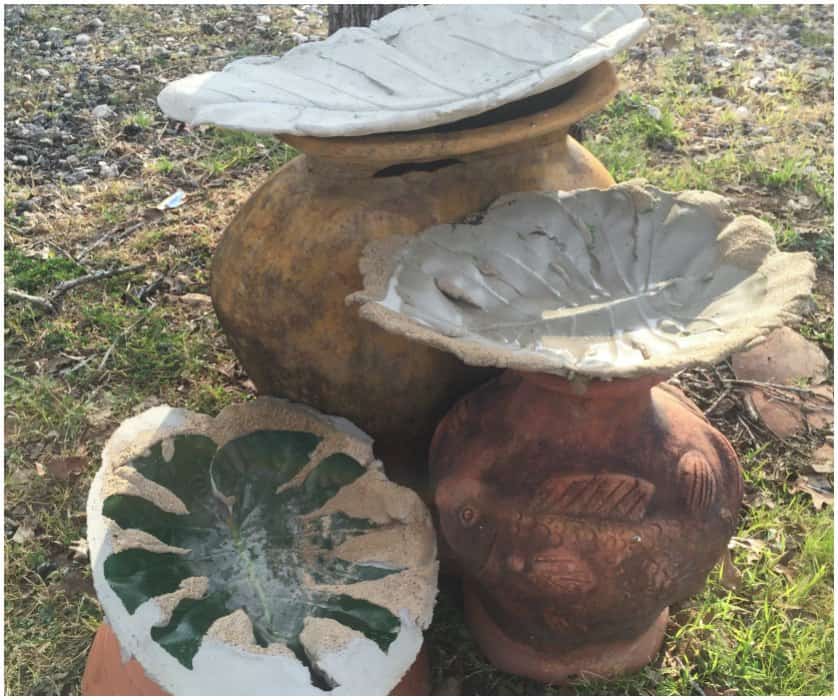
And for now I just placed them on some empty decorative pots until I get my garden area complete. I have the three different bowls in the photo. I even have the one that I ruined with a watery concrete mix. It was so watery that it completely stuck the plastic leaf in the bowl. It was way to strong for me to take out so I just left it in there.
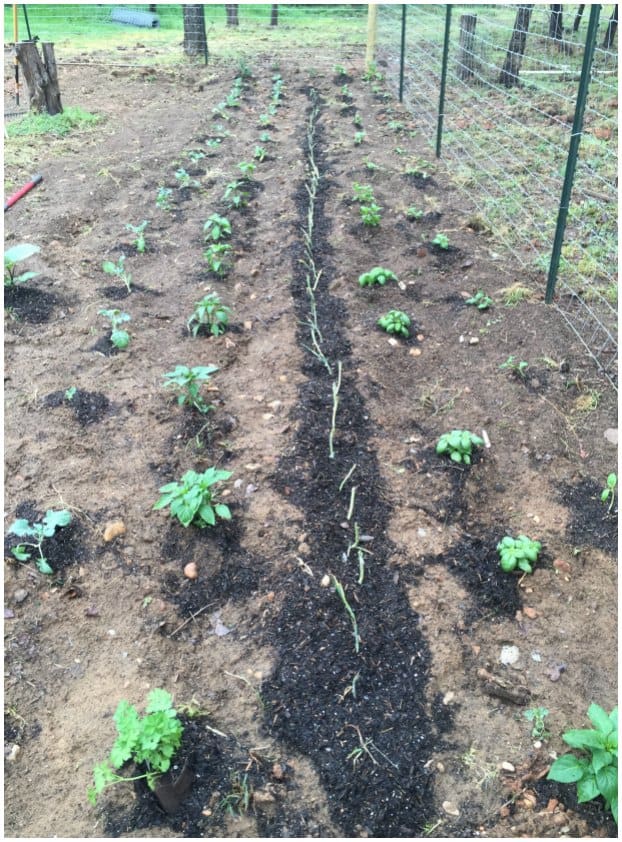
Now back to work on the garden. Speaking of gardens… I was just remember how far I’ve come in garden from my very first raised garden bed that was made out of cinder blocks. Remember that? We’ve been having weather that has hit 80 degrees already! We have planted squash, onions, peppers, tomatoes, broccoli and some herbs so far!
I will paint mine when I have a bit more time and update this post with the final result. I hope you enjoy this project as much as I enjoyed making it! I feel as though I’ve learned so much. Stay tuned for a DIY Concrete countertop too! I can hardly wait for that DIY project!
Feel free to pin this project using this photo below for later on Pinterest:


Can you re-use the plastic leaves?
Try it! I don’t see why not as long as they don’t break.
Thanks for this. I’m gonna share this to my fb.
Great project
can’t wait to try this !!