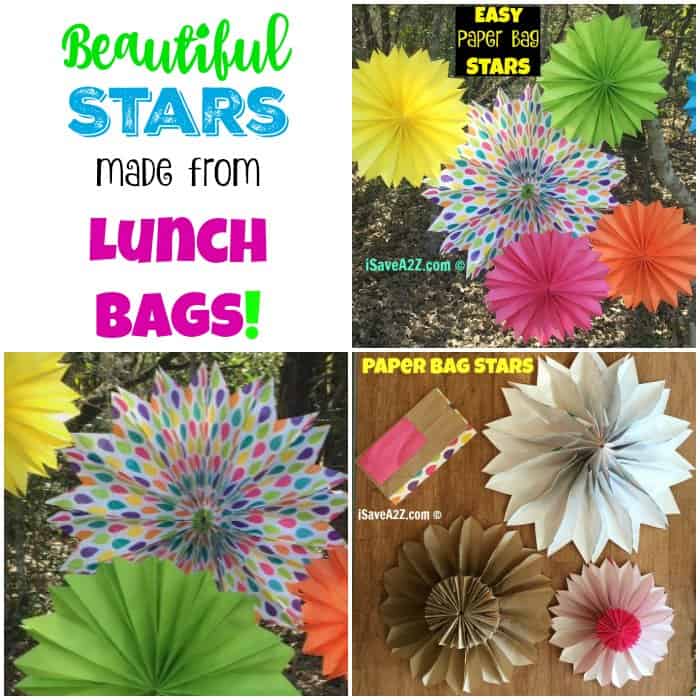
Easy Paper Bag Stars
 Easy Paper Bag Stars
 Easy Paper Bag Stars
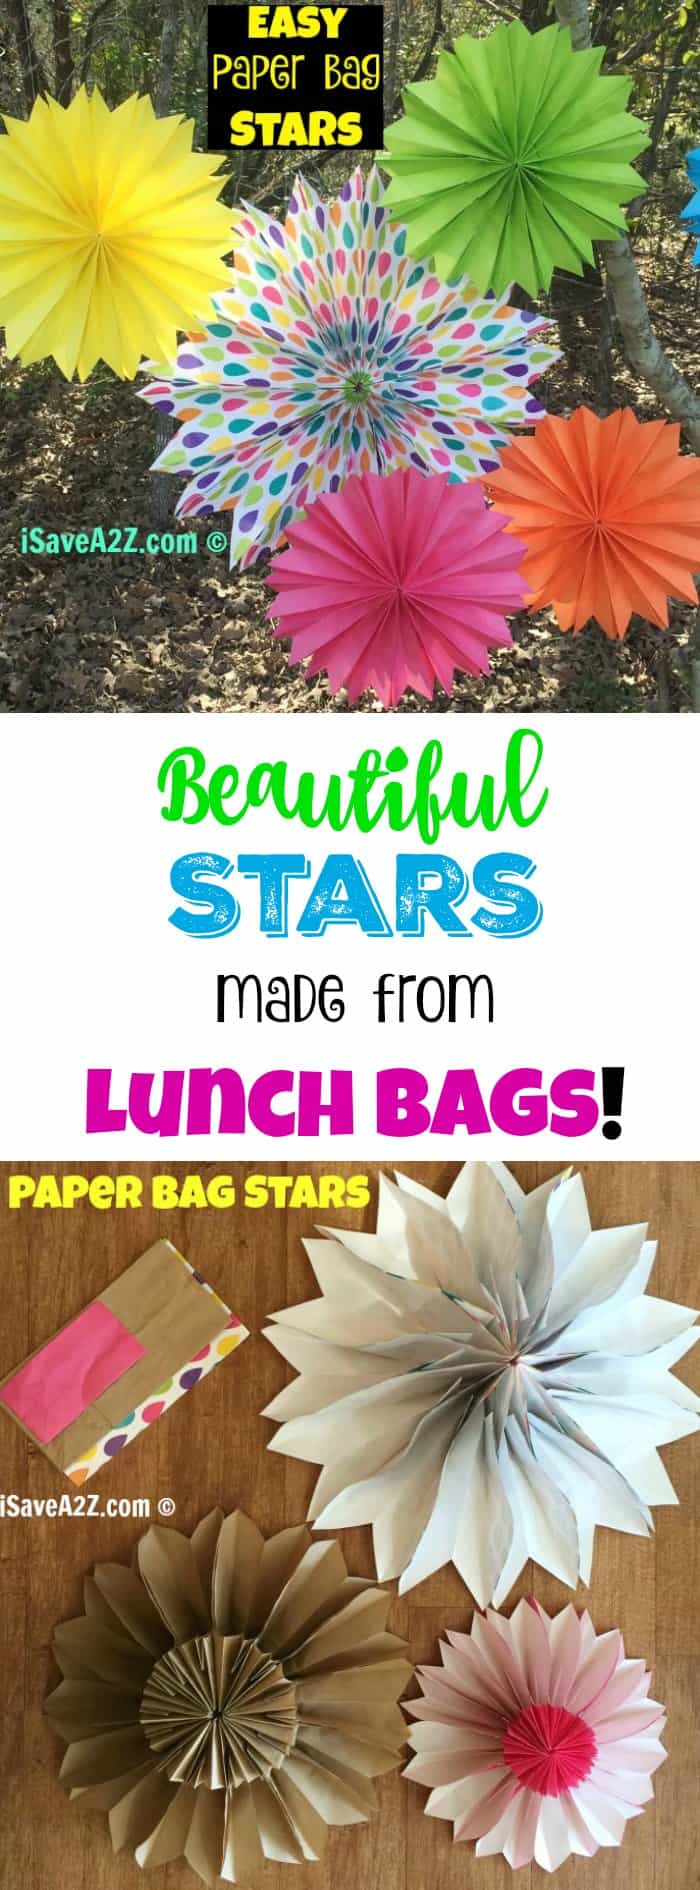
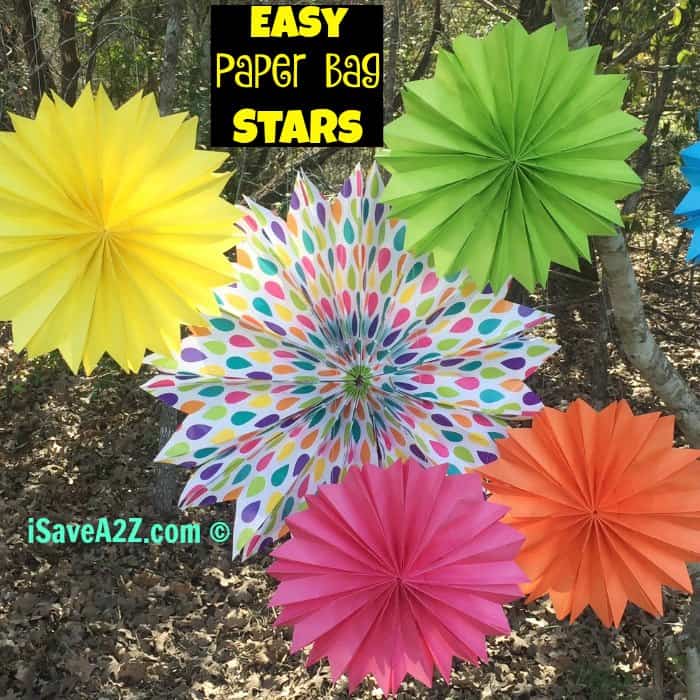
Who would have thought that these easy paper bag stars would have turned out to be so darn cute? We started this project with a simple brown paper lunch bag but then immediately knew we could add all sorts of colors and make this into something special. Lunch bags come in all different colors and sizes. They are pretty cheap too! All you have to do is cut out the template and glue each side together to make a bunch of easy paper bag stars!
Wouldn’t this be a cute decorated for a party?!! My daughter saw them and immediately requested special colors to match the theme in her bedroom. Heck, I was thinking these would make fun decorations in a class room too.
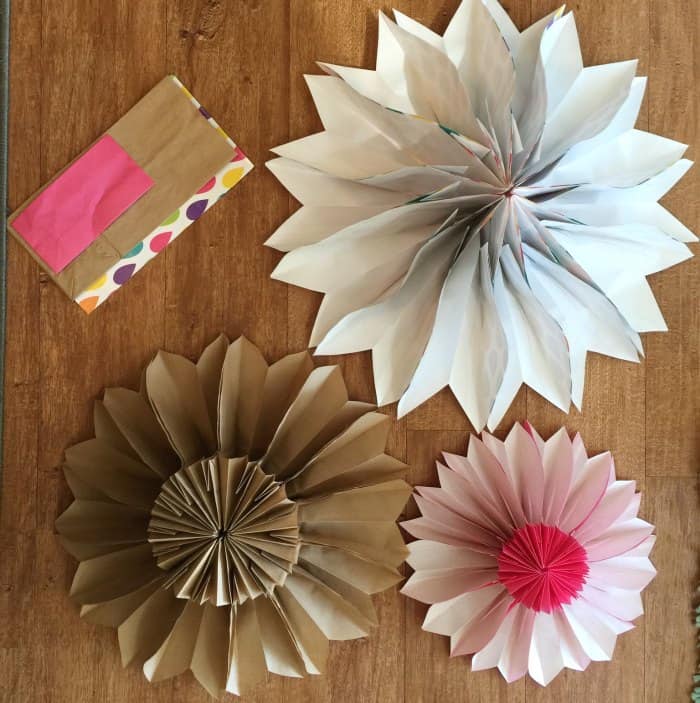
I used three different sizes so you could see the difference in the stars when they were complete. We used a mini, medium and big size paper lunch bag for these designs. The mini lunch bags are a perfect size to make multiple colors with! In the photo above the green, yellow, pink and orange stars are made form the mini bags.
The mini paper bag stars are 13 inches wide.
The regular brown lunch bag stars are 17 1/2 inches wide.
The large lunch paper bag make the stars 26 inches wide.
There are so many different lunch bag colors and designs to choose from. Hobby Lobby has the primary colors in the store. They only have different designs around the holidays. For example, I was able to find some heart paper bags because Valentine’s Day is right around the corner.
Could you imagine how big the star would be if you made them out of the paper grocery bags! WOW!
Here’s how I made these Easy Paper Bag Stars:
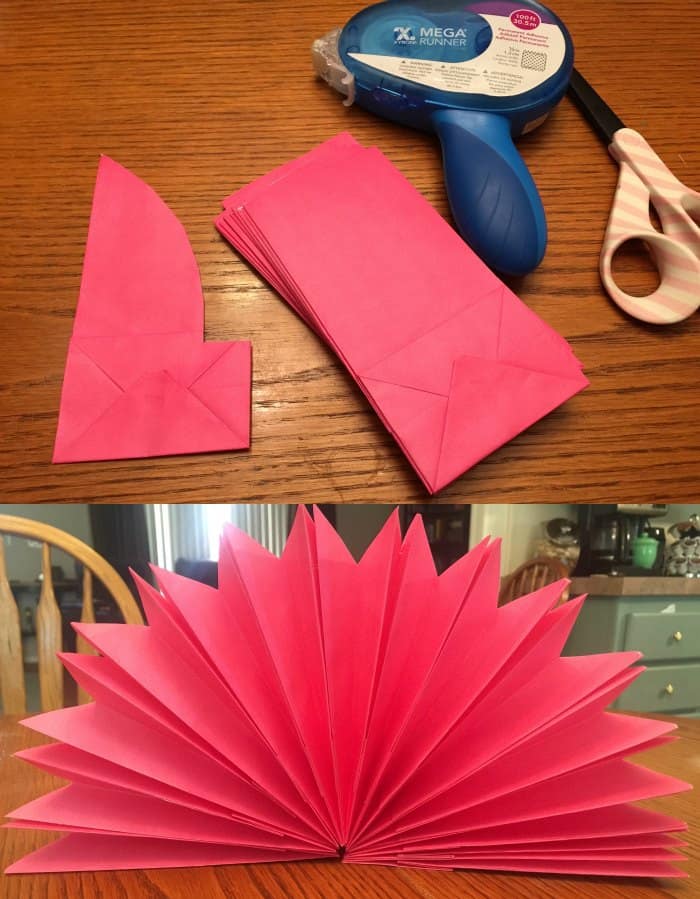
I use between 12 and 15 bags per star depending on the size of the star. The mini bags need less than the bigger stars.
I cut out my template. There are a couple different ways to cut the bag.
You can cut it like this to make the flower stick out a bit more in the center:
The finished design looks like this on each side:

Or you can cut them straight across just like this:
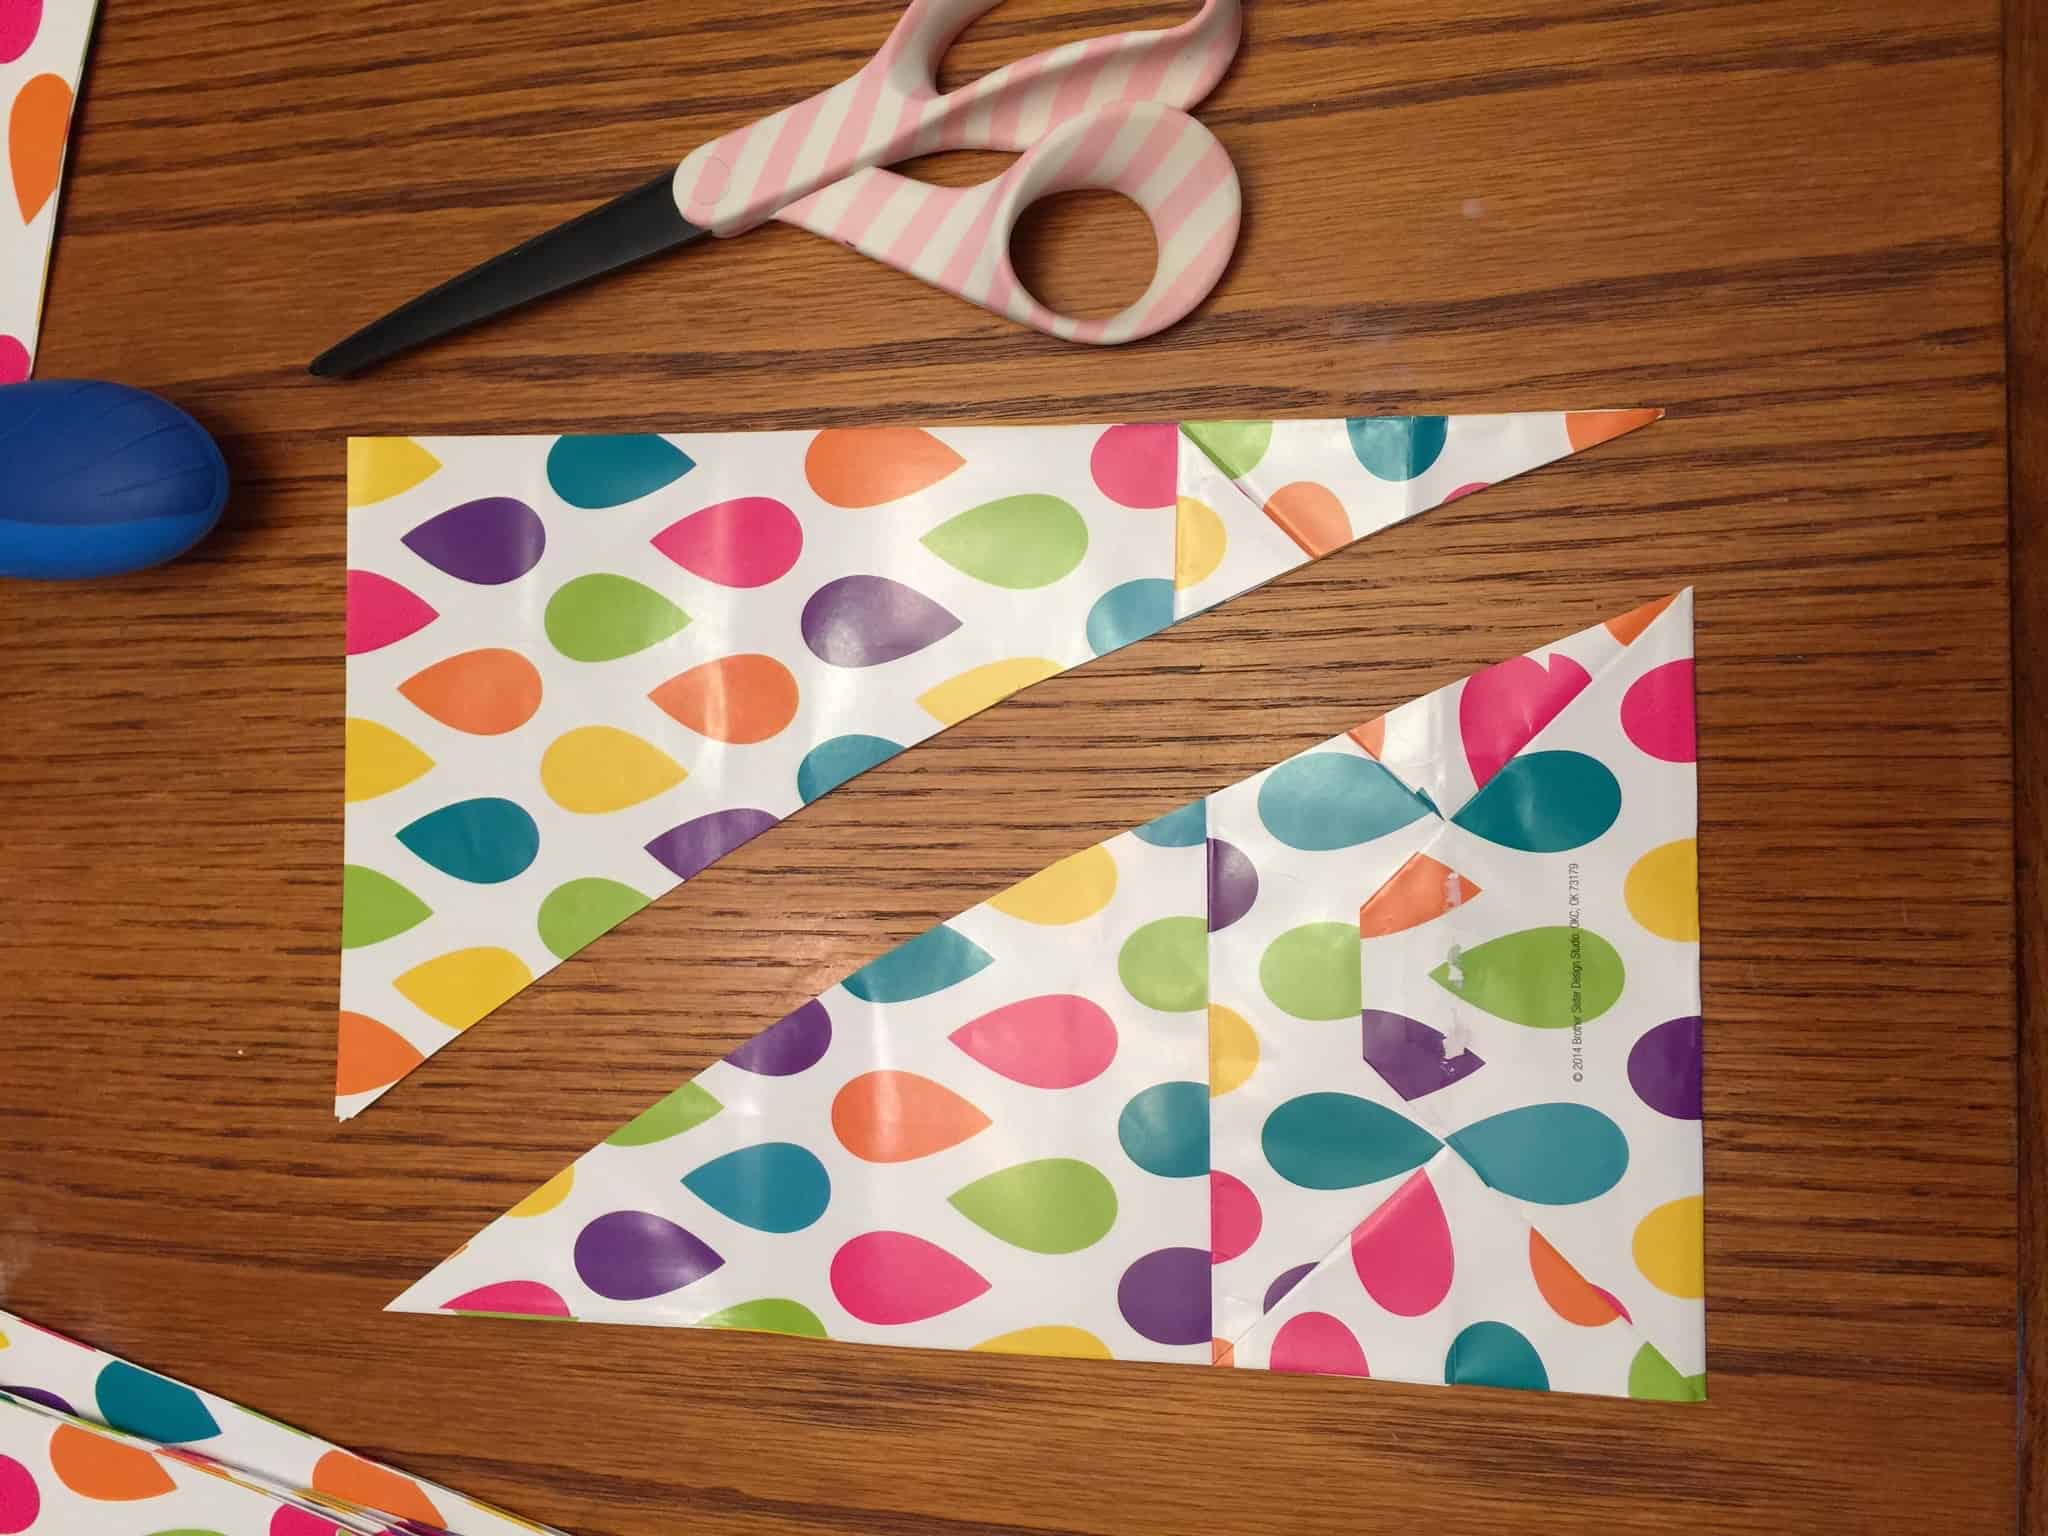
The finish project will look smooth on both sides like this:
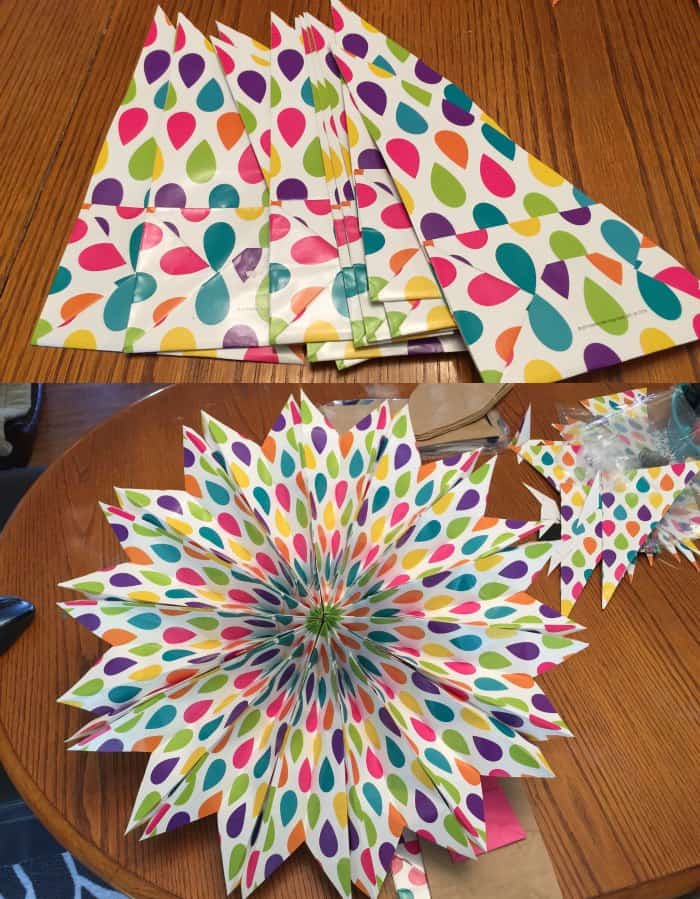
Here’s a really good photo of the differences between the cuts and the different lunch bag sizes I used:
After you decide the look you want you cut out the first bag. Use that bag as a template for the remaining bags you need to cut. They don’t have to be perfect either.
Once you finished cutting out all the paper lunch bags the start taping (or glueing) each of the sides together. Be sure the bags are facing the same way when you do this. I like using the tape gun that has dots as seen here. It’s got a big handle and it’s easy for me to use. The bigger your bag the heavier your final project will be. You might have to use a stapler to staple in between some of the bags to keep it together. If I were to use these outdoors on a windy day I would do that for extra hold.
Here’s a video that shows me taping the very last bag and finishing the paper bag star.
Finally, you can use a hole punch and a hole or two and hang these beautiful paper bag stars with fishing line. I really like using fishing line because it holds nicely and you won’t even notice it. There is a trick to tying a knot with fishing line though. Be sure to double loop the fishing line before pulling it tight to create the knot. Do a second knot with another double loop and it will not come loose at all. Works every time.
We created a few of these paper bag stars for Valentine’s Day parties, Birthday parties, baby showers, office parties and so much more! They are easy to make and cute to look at!
Enjoy!
Feel free to Pin It here for later: