
Ikea Copy Cat Homemade Occasional Table
Ikea Copy Cat Homemade Occasional Table
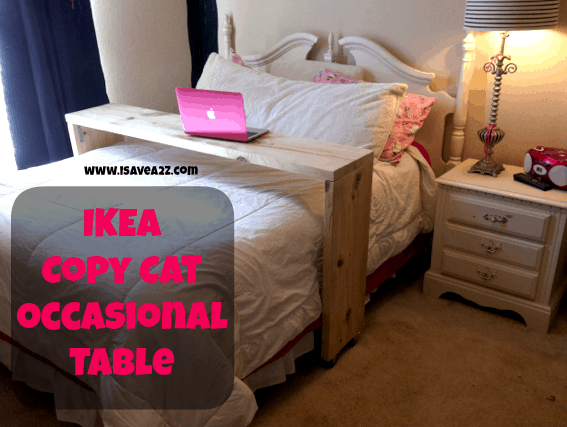
I just completed my very own Ikea copy cat homemade occasional table! It was so easy!!! I say if you can use a drill or a screw driver you can do it too!
My daughter and I were shopping at Ikea the other day. We were trying to find some shelving for all of her stuffed animals and knickknacks. We found the coolest bed set up with a occasional table on wheels to use while you are in bed! It’s definitely different but in our age of laptops and tv it’s a fun idea!
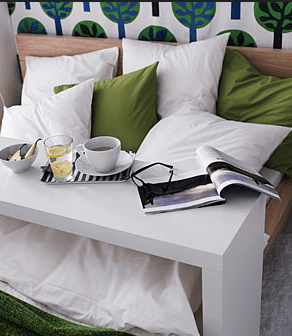
My daughter wanted it but guess what, it costs $129! That wasn’t the only problem. It’s made for an Ikea bed that was extremely low to the ground. My daughter has a double bed that has a plush mattress. Extra plush! It’s high off the ground. There’s no way that Ikea occasional table would even fit over her bed. Besides. It was really light, hollow and very wobbly. I didn’t like how it was made. I told her we could easily make that for a fraction of the price and with a higher quality of wood. She said “Let’s do it Mom!” Oh boy, what did I get myself in to. I told her that we would go to our local hardward store and price the wood and see if we could come up with something.
Here are the supplies we used:
1 – 2x12x12 Top Choice board $12.35 (We asked the employees to cut this to the exact measurements we needed so we didn’t have to do any cutting. There is a 25¢ charge for each cut. Well worth it in my opinion!)
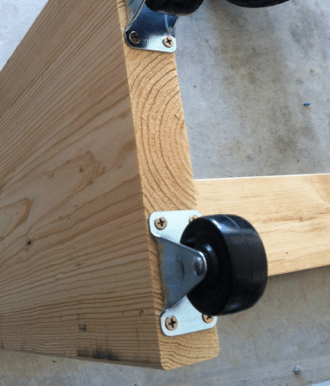
4 – 2″ Ridgid locking Casters (wheels that only move backwards and forwards and don’t swivel) $11.32
Don’t use the Caster wheels that swivel as seen here. Your table will move in a different direction. You only want you table to move forward and back.
1 box of wood screws 8 x 1 1/2 $5.30
Sandpaper $3.78
Cost total: $33.50
Directions for a Double/Full sized bed:
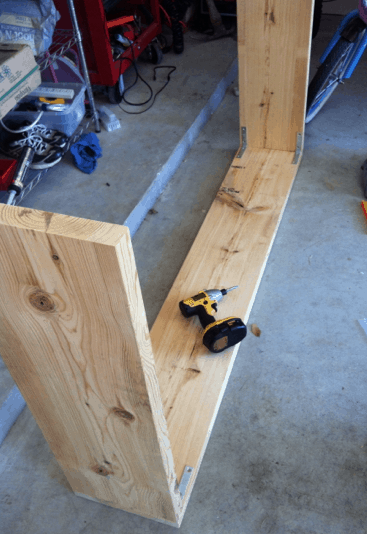
Get your local hardware store to cut 2 pieces at 29 1/2 inches and once piece at 60 inches. (If you are attempting to make this for a different size bed I would add an extra 3 to 3.5 inches on each side of the bed to allow for the comforter space.)

After it’s cut, just screw the “L” brackets into place and sand it.
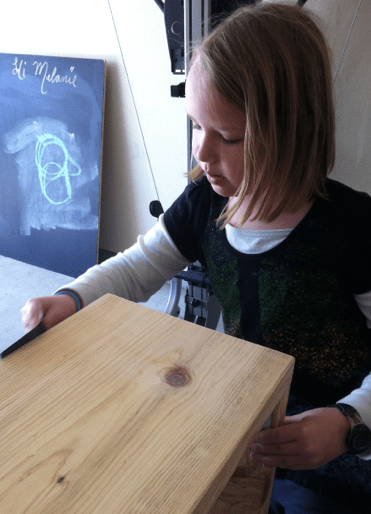
She insisted on helping me do some sanding!
Screw the wheels into the bottom and Voila! It’s done! Well kinda, we plan to paint ours black but my daughter just had to see how it worked first!
Stay tuned for the updated photo after it’s painted. Not bad for only $33.50! We saved almost $100~
UPDATE:
Here’s the painted version! We painted it with Black Chalk board paint!

Enjoy!


This was fantastic. I drilled a couple of holes in the top for cup holders and added some sleeves on the side for holding papers, pencils, etc.
NICE! I would love to see a photo!
Everyone saying it cost $37.00, mine was like $80! Still beats IKEA and it was fun but I’m really wondering why mine was so damn expensive.
THank you thank you thank you. We tried to make one on our own. It was a miserable failure. Then I found this. I’m going to make one for my new house.
Thank you SO much! This is saving me. I work from home and due to a health condition, from bed on my laptop. My corp just implemented a new policy where all meetings are video — and wouldn’t you know I just moved into a dept. where I’m stuck in meetings hours a day (I don’t know how anybody gets anything done. Big companies, gah!). I cannot sit for even an hour let alone six on a chair even with pillows so it’s a disaster for me.
Then I got to thinking about ideas for doing it from bed, using my bookshelf stand-alone headboard as if it ‘were’ a bookshelf (who would know?) behind me, but I’d have to have a way the computer could be elevated to the right height and would not touch the bed so my motion didn’t disturb it at all. I can use my personal laptop for the camera and my second (work) laptop in case I need to ‘do stuff’ during the meeting.
I have an ultimate bed which has 12 massive drawers at the sides (and a superlong thin one all down the middle) so it’s high — it’s a captain’s bunk, I can get in without a ladder but it’s a bit ‘up’ — so something custom is perfect.
It’s even affordable. My dad’s going to make it for me. And it looks like I won’t be in big trouble at work after all for avoiding video — and I won’t look like a tree sloth since I have to work from bed, hopefully nobody will know.
Really appreciate your putting the great pics and simple instructions online!
Note: you left the 4 L brackets out of your supplies list I think 🙂
PJ
Another option- I LOVE high gloss – lack shelves so what i did was buy 3 shelves in high gloss in white- 1x 62 abs 2x 32 . Used the same hardware that comes with all ikea furniture- i didnt want any hinge hardware , I like pieces to look seamless . Drilled a few holes- used some wood doles and locking screws.-it looks just like the 299.00 Besta – it cost me 37.00 .
Hello Patchouli,
I love high gloss furniture too. Do you have any picture of your bed table ? What’s the hole size and the screws’ size ?
Thank you
Deb
You can use the original instructions and then use a high gloss paint and sealer right?
Hi Jennifer,
I love this and am making my own right now. What grit sandpaper did you use? Did you sand by hand? I’ve never sanded before…my wood seems really rough (a lot of big splintering pieces) so I’m not sure how to tackle this part. Any advice? Thanks so much for your post!!
I sanded it all by hand. Actually the kids helped me. We started off using a medium grid sandpaper and then finished it with a fine sandpaper. Here’s an article that explains these types a bit better: http://en.wikipedia.org/wiki/Sandpaper
It should feel pretty smooth when you are done. You definitely don’t want splinters. Good luck and let me know how it goes Nicci.
Love this! I am planning to make this soon. I noticed you have carpet like I do. Are the wheels okay on carpet? It’s not wobbly or anything even though you’d be rolling it on carpet? The wheels, carpet, and sturdiness really concern me (because of food, books, or a laptop being used on it). Anything you would improve or tips on building?
Overall, your table looks great!
Good questions Anne. I like that I have carpet and it makes it easier not to roll. My daughter is only 8 so I don’t want it to roll easily. I actually keep it at the end of the bed area when she sleeps. She can pull it forward but she has a hard time pushing it to the end of the bed. I used really heavy wood on purpose. It’s really, really sturdy for that reason. If you use smaller would I would be afraid it may be too wobbly. Just to give you an idea, my daughter fills the whole thing up with all sorts of toys and my laptop if she watches a movie. I never worry about the sturdiness of it at all.
What size boards would you recommend for a queen sized bed?
I would highly recommend measuring it out. Sometimes your bed could be a tad bit higher because of a pillow top or maybe you have an extra thick comforter. I don’t really want to quote a size because my guess is that it wouldn’t be right for you.
I’m curious what you do with it when not in use?!
I move it to the end of the bed and it stays there at all times.
Hey I am just wondering why you wouldn’t want to use swivel casters? I have thought about making a table like this and always thought that if you were to use swivel casters it would make it be easier to move. Do you think it would make it too unsteady?
At Ikea they didn’t use the swivel casters either. You don’t want this table to slide crooked. It’s really easy to manage when it slides straight.
This looks great! I’ve always liked this table, but our beds are also too tall for the Ikea version. I think it will be so nice to add this in our guest room!
Sarah
Can I ask how stable this is? I was thinking of doing something similar but to go behind the couch like a sofa table. I was hoping to use it as my primary dining table in my small studio. Is it wobbly?
Our table is not wobbly at all. I think it’s because we used a thick piece of wood. It would be safe to do as a sofa table just don’t put the wheels on it and you will be fine.
@Jordan
I was thinking the same thing! I would love to put one BEHIND my couch as a low sofa table, then roll it around in FRONT for use when we need more dining space, instead of using lame TV trays. Depending on the heights of couches and people legs, I’m wondering if then it could triple as an ottoman/footstool. Thanks Jordan, and a huge thanks to Jennifer for this idea, including all the research, photos and especially that awesome supply list! I think I can do this without my husband, which will make him so happy! Haha!
Hi There!
Thank you for sharing this idea! I really love it! I saw it on Pinterest! I made a stitched photo, since I really love the Ikea photo as well for reference , as well as your pinnable first photo. Of course with a proper link to this post on your website. I hope you don’t mind?
You can see it here:
http://pinterest.com/pin/567523990513294624/
xxDebbie
Oh Debbie you did good! I LOVE IT!!!
I wonder if it would be possible to make one for only half the bed? That way if each side of the bed had it’s own then each person could put it where it would be most comfortable for them. Not sure if it would be steady enough. Any thoughts?
I’m not sure… Would be interesting to try though!
For sure that would work!! Think about when your at the hospital, those little tables in your room are essentially just that 🙂 we recently moved and are building shelves all over the place.. My boyfriend will be elated to know he has another thing to add to his building list 😉
I would maybe make it more of a half square shape though. You wouldn’t be able to push it completely away from the bed, because it would get caught, but it would add stability. I think without it, it would tip over. (the hospital beds are semi squared shaped too!)
Jennifer, I have a king size bed, I went and got my boards cut and all the materials, I have primed and waiting for it to dry before I paint. My question is, the board is 7 ft long, will it bow in the middle, it seems very heavy. I have 3 ft sides but i am concerned any ideas on how to make it more sturdy in the middle?
I do not have trouble with it bowing in the middle with the middle board I used.
I bet you could use a Kreg joint for this and not use L-brackets. Maybe just wood glue and the joining screws…. Gonna try this. Thanks!
Good Idea SeaWorld Mommy! I’m not that sophisticated though… The L brackets are placed on the inside and are not even seen. (FYI) Let me know how your project turns out!
My daughter saw this and sent it to me, she wants us to make one for when she moves off campus next year. I love it all and read your readers on their take, I just love how we get inspired from one person/s and make our own.
I’d like to see if we can make it where we can easily fold for transport to her apt. I’ll keep checking back to see of other ideas I can get inspired off. Thanks for sharing.
I’ve admired these before… how high off the mattres did you make it? I’m worried I would make it and it wouldn’t fit over my legs!
Kathie,
Here’s what I did. I measured the height with me in bed and the covers on top (my covers are thick so I needed to add room for them), then I added the height of the wheels to determine the exact height I needed it to be. So you will take the height of your bed from the floor, add the measurements of the bed and covers (comforter height with you in it) and then add the wheels and that’s the height you need to make it. Does that make sense?
I made one of these for my blind aunt….I used 2 18″ used slab doors. I left the door hole for the cords for her appliances. She was blind and almost deaf (but very active and alert). She had a queensize bed. I did the same that you did, but I used the old utility brackets. They were 12″ x 12″. I simply cut the second door to the appropriate height for her and she was delighted. Room for her CD player that she listened to books on, phone, box for all the things she kept at hand. Brush, pencils..etc. She also had room for a full size food tray. I did add a handle for her to be able to push and pull the whole thing up easily. It’s good to see that others see this table as useful.
Bonnnie
Oh my goodness Bonnie! What a great idea! If you want to send me a photo of your project I would love to show it to all the iSave readers! My email is Jennifer@isavea2z(dot)com