GIF Meaning and How to Create a GIF File
GIF Meaning and How to Create a GIF File
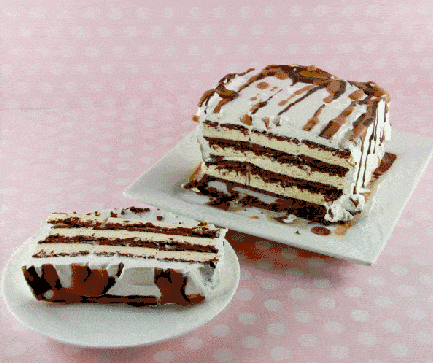
I recently wanted to update a few old photos to some really good content posts so I decided to make a GIF file. I love adding a bit of personality to photos I’ve created especially when it involved my Ice Cream Sandwich Cake recipe! This is the perfect post to create a GIF file for!
Here’s an example of a GIF file in action:
GIF stands for Graphics Interchange Format.
GIF Meaning: A form of computer image that moves as an animation, because it consists of frames, like a movie with no sound.
Basically I took a bunch of photos and created a mini animated display for all of them in a certain order.
There are many different Frame Animation programs to use but in this case I used Ezimba.com.
I like this program because it’s fairly easy to use and it’s FREE! Gotta love free!
Here are the step by step instructions for turning your own photos into a GIF file:
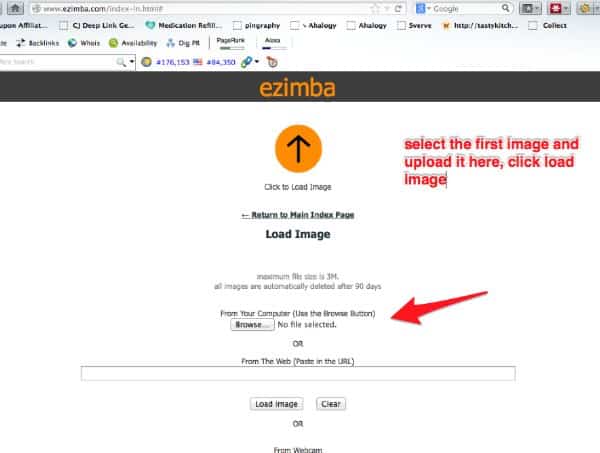
First step is to head over to Ezimba and upload your first photo. Make sure you are loading the very first image you want to be seen in your GIF file.
(Tip: you don’t have to worry about creating an account or signing it either)
This is what the screen looks like when you first access the site:

Click the browse button to upload your first image:
After you uploaded your first image, click on Frame Animation to upload the rest of your images.
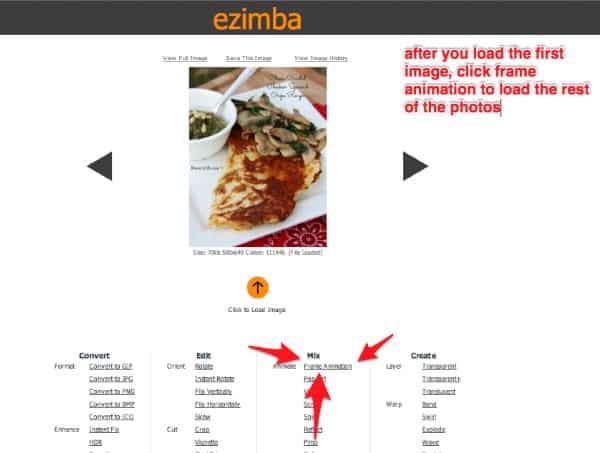
After you click the “Frame Animation” button it will take you to a screen just like this one where you can upload the rest of your photos in the order you prefer:

Once you have all the photos entered in the order you want them played you will scroll down to the bottom of the screen for a few more options.
Here you will choose the speed of you photos and the loop. You also have an option to auto resize your photos too. Ezimba shows you can upload as many as 52 images on a file. I can tell you from experience that I could not do that many. If you files are big in size it will error out and tell you to reduce the file size. I’ve done up to 20 before with n0 issues.
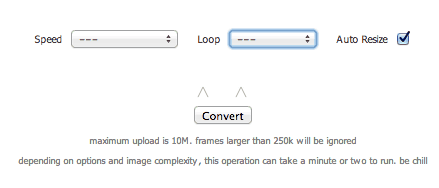
After you choose all the settings you want, you can view the image and how it plays out at the top of your screen. You can play with these settings until you have the photos play exactly the way you want them. I believe the Ice Cream Cake Recipe GIF is at a speed of 2 with an infinite loop. I didn’t have to worry about the photo sizes because I edited all the photos sizes in PicMonkey before I started. I also reduced the file sizes when I saved it in PicMonkey too.
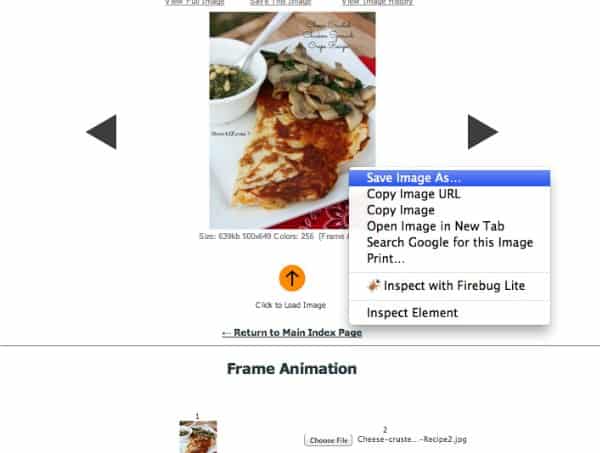
Once you have the GIF file set exactly the way you want it, save it to your computer. You can right click on the GIF file at the top of your screen in Ezimba to save it. When you right click on your photo you will see a box pop up like this:
Voila! You’re done! You just create your very own GIF file! I hope this inspires you to get creative with your own photos!
Here are a few tips and tricks:
- If you want a certain photo to play longer, just add the photo another time right after the first time you load it in order.
- You can create words or sayings on photos and in frames. I use PicMonkey to do this also.
- I’ve noticed a glitch in Firefox when I use Ezimba. Sometimes it doesn’t show the convert button at the bottom of the page. Chrome browser always works perfectly for me.
I’ve also learned that GIF files can be played in Pinterest and in Google+. They automatically play in Google+ which I love! Check out my Google+ status here to see it in action.
Enjoy!