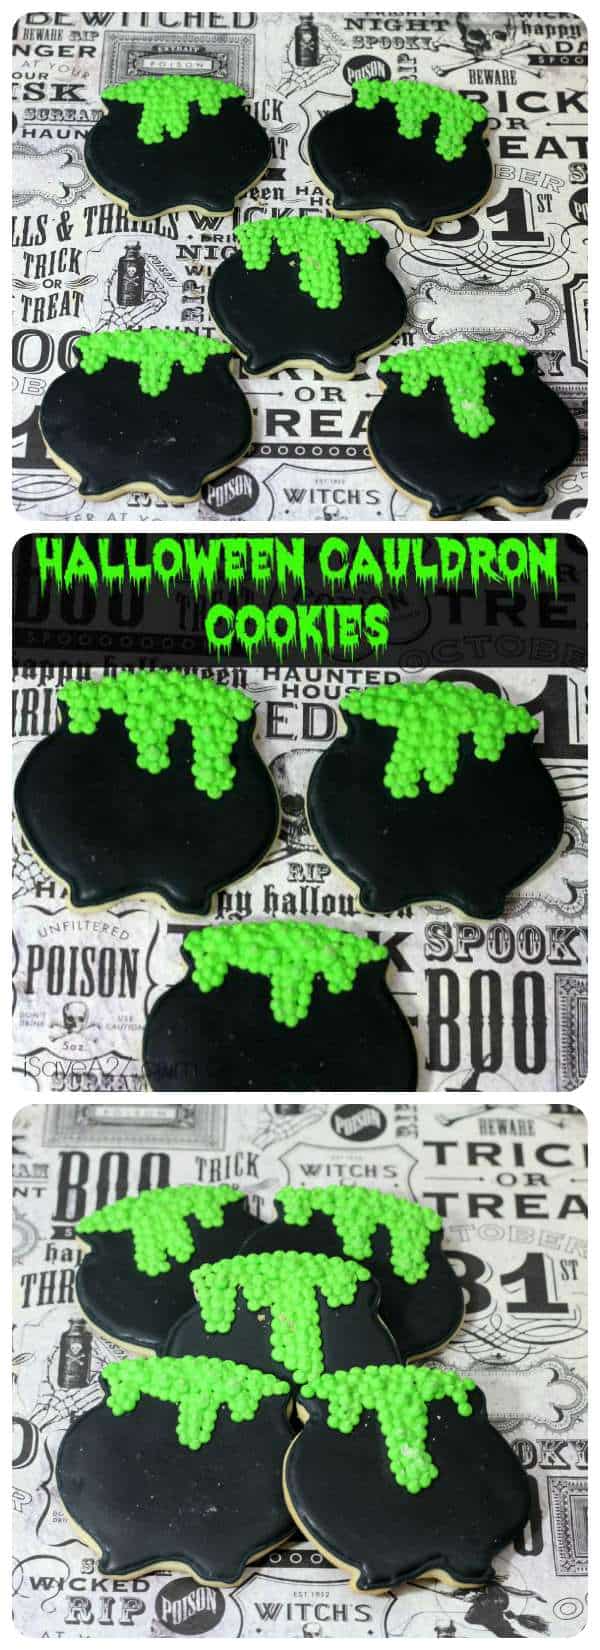
Halloween Cauldron Cookies
Halloween Cauldron Cookies
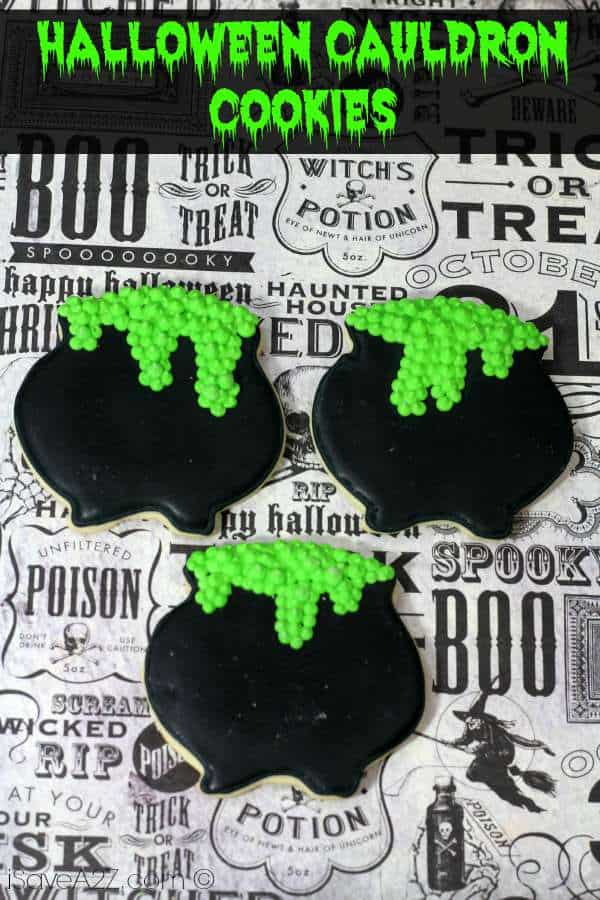
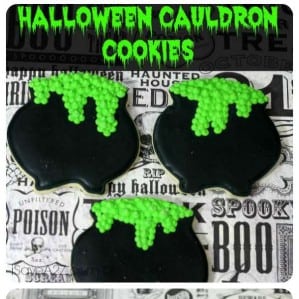
Guess what I’m making right now? Halloween Cauldron Cookies just in time for our Halloween party! We love how these cookies hold their shape. There’s only two colors in the icing to use in this recipe which makes it super easy.
Halloween Cauldron Cookies
Ingredients
- Cookie Ingredients:
- 5 C flour
- 2 tsp baking powder
- 1 tsp salt
- 1 1/2 C soft unsalted butter
- 2 C granulated sugar
- 4 eggs
- Icing Ingredients:
- 4 egg whites
- 2 C powder sugar
- 1 tsp cream of tartar
- Black green, ivory,grey, yellow, and red gel food coloring
- Candy eyes
Instructions
- Cookie Directions:
- – Cream the soft butter with the sugar until the combination is smooth not grainy to the touch in a mixing bowl.
- -Add all 4 eggs at one time…Continue to mix. -Add the vanilla.. Continue mixing.
- -Sift the four, baking powder, and salt together.
- -Add the dry mixture to the wet mixture.
- -Continue mixing to make sure all ingredients are thoroughly blended.
- -Make the dough into a ball, wrap it in cling wrap completely covering the entire dough ball.
- -Put in the refrigerator for about 6 hours or overnight. Check to see if the dough is firm.
- -Preheat oven to 325 degrees.
- -Pull the cookie dough out of the refrigerator and sit it out to soften up a bit.
- – Put flour out on the wood cutting board, rub flour on the rolling pin, and work some flour into the batter. (if necessary).
- -Roll the dough out on the cutting board and using your cookie cutter begin to make your cookies.
- -Line the cookie sheet with parchment paper.
- -Using a metal spatula move the cut cookie to the parchment lined cookie sheet.
- -Bake at 325 degrees for 8 minutes. Check to see if the cookie are thoroughly baked.
- -Take the cookies off of the cookie sheet and put on a wire rack to cool completely. (About 10 minutes).
- Cookie Cutters:
- Gingerbread Man (Zombie)
- Black Cat Head
- Frankenstein Face
- Witches Cauldron
- Tips Needed:
- #5 round tip
- Icing Directions:
- -Combine all ingredients in a mixing bowl mixing on medium speed for 4 minutes. (except your food coloring)
- -If icing is not stiff enough add 1/4 C powder sugar.
- – Pull out 6 bowls and begin to divide the icing.
- – Bowl #1, put 4 TBSP of icing in , add several drops of grey gel food coloring stirring well until all of the color is blended. Bowl #2, put 4 TBSP of icing, add several drops of red gel food coloring stirring well until all of the color is blended. Bowl #3, put 3 TBSP of icing, adding several drops of golden yellow gel food coloring stirring well until all of the color is blended. Divide the rest of the icing into thirds. Bowl #4, put 1/3 of icing, add several drops of black gel food coloring stirring well until all of the color is blended. Bowl#5, put 1/3 of icing, add several drops of green gel food coloring stirring well until all of the color is blended.
- Bowl #6, put 1/3 of icing , add several drops of ivory gel food coloring stirring well until all of the color is blended.
- -Spoon each of the icings into individual frosting bags with a #5 tips…. twist the open end of the bag to push the icing to the tip.
- Basic Directions for icing:
- -Follow the colors and accent colors as displayed on each cookie.
- -First step for each cookie is to outline them .
- -Allow the icing outline at least 30 seconds to dry before filling the body of the cookie in with the other icing*. ( After outlining all of these cookies you squeeze some the remaining icing into a bowl and add the 1 tsp of water and mix well to get the right consistency .) Leave some of the icing in the frosting bag for additional accent work on each of the cookies. Using a butter knife to spread it from the outlined part inwards to the center.
- The Cauldron
- – Outline the cauldron in black except for the very top of the cauldron.
- -Using the thinner icing fill in the cauldron. Allow to dry slightly.
- -Outline the green for the cauldron just on the very top of the cauldron.
- – Holding the frosting bag with tip, pointed directly down, begin making your first layer of the brew, as this icing slightly drys, apply another layer of icing brew until you have three layers close to the top of the cauldron. Making this look as though the brew is bubbling over the top of the cauldron.
- -Allow 5-10 hours to dry.
Nutrition facts are provided as a courtesy.