Fabric Christmas Tree with Printable Template
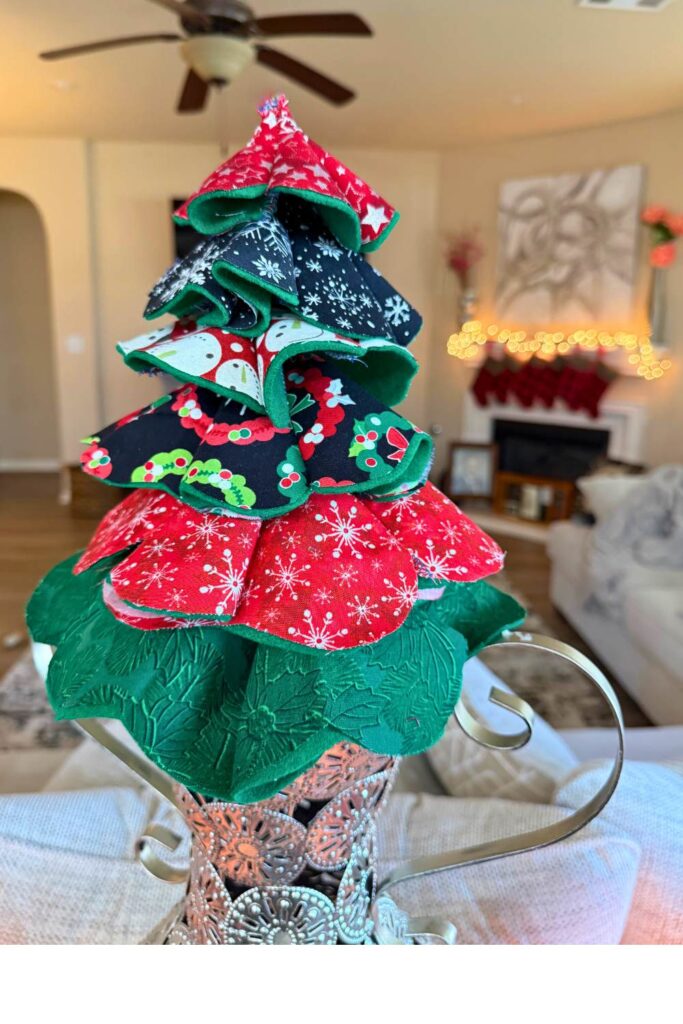

This fabric Christmas Tree project is a fairly simple project that requires a small amount of sewing. This project took me about 2 hours from start to finish and that was also time including to create the template.
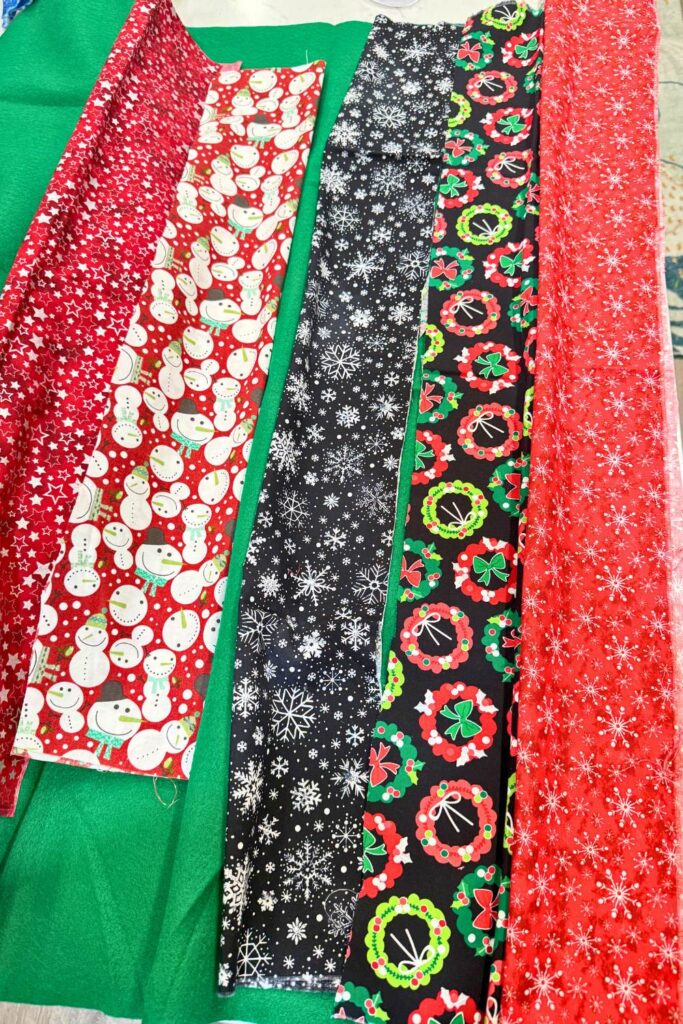
I ended up using some left over scrap Christmas themed material and instead of a stabilizer on the material I used felt because that’s what I had on hand. I would suggest using a stabilizer of some sort so your tree holds it’s shape when it’s done unless you have extra thick material.
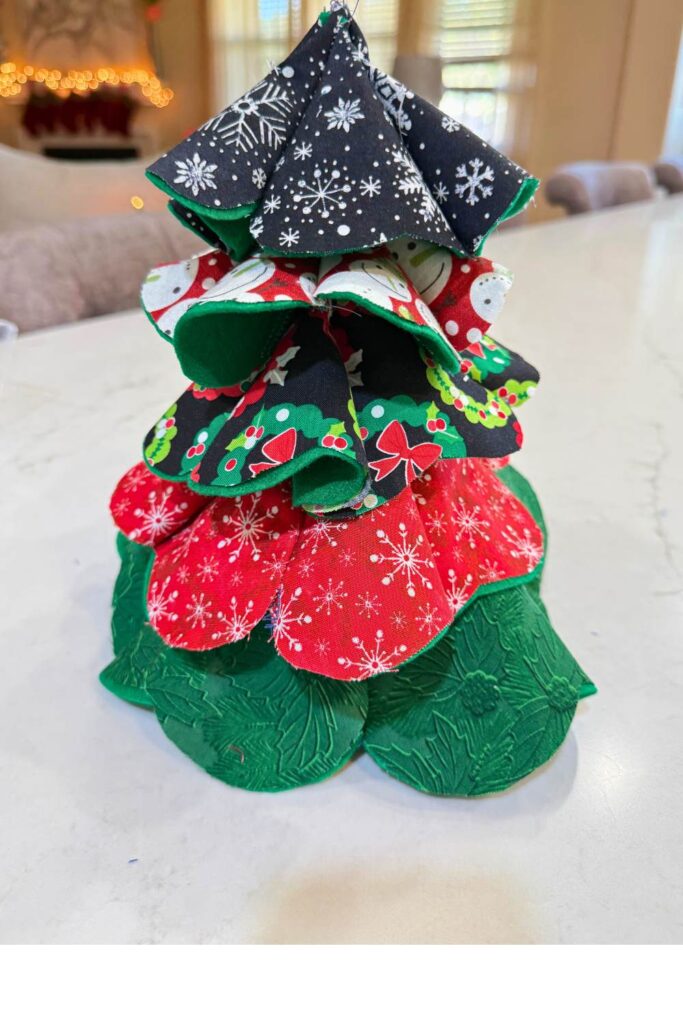
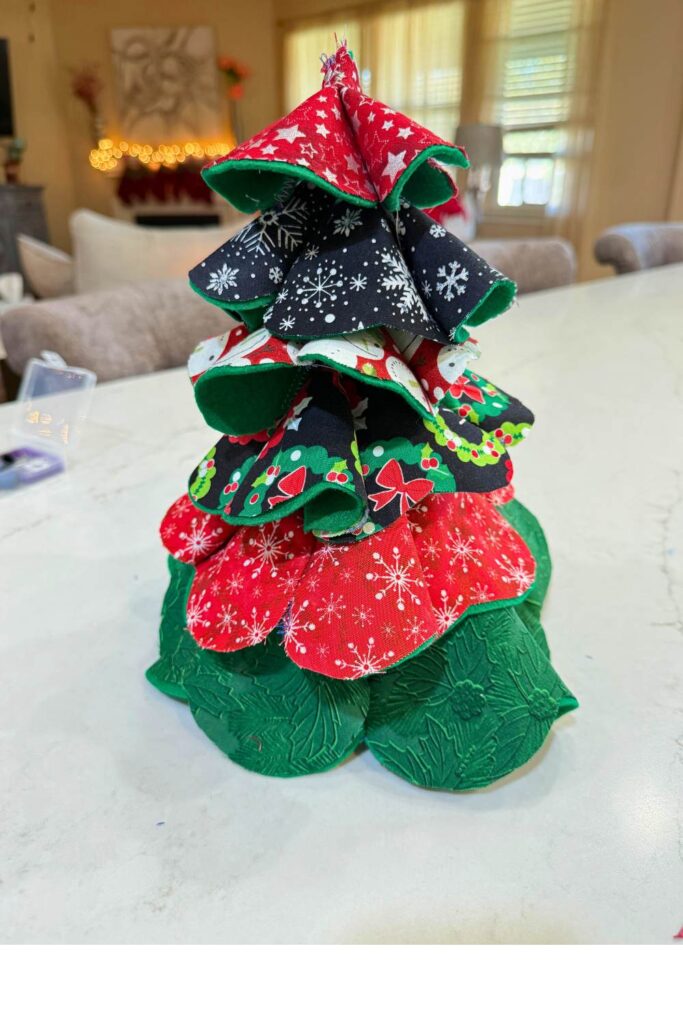
You can make your tree all one color or different colors as I did.
Material List:
Scrap material
Stabilizer or felt as a backing
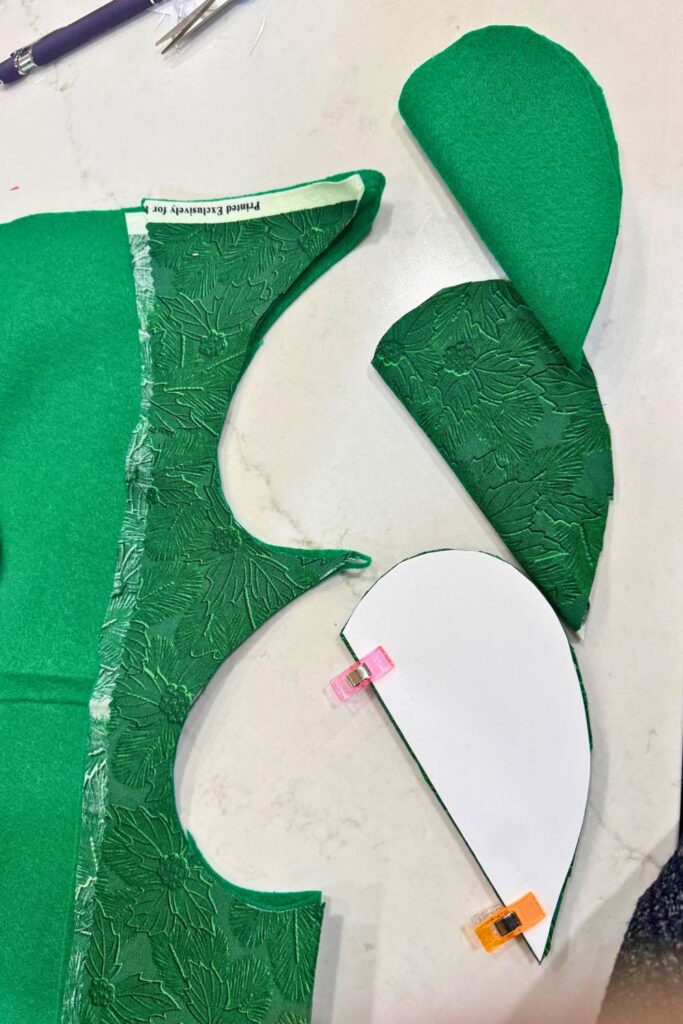
Fabric Christmas Tree Template linked below (printed out six times so you can cut each size out)
Fabric Christmas Tree Instructions:
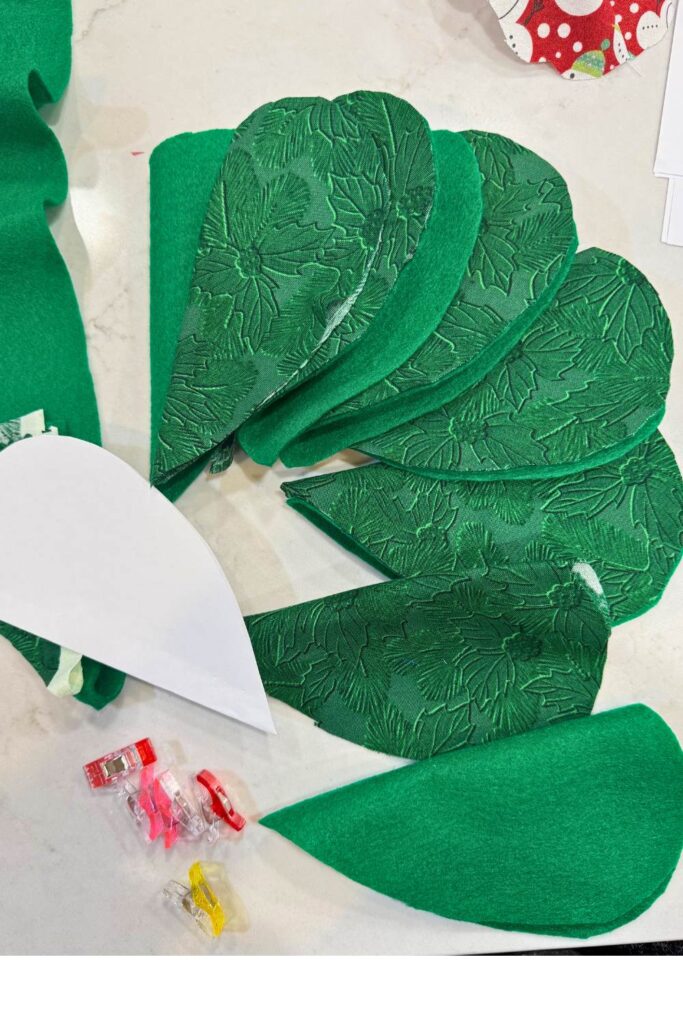
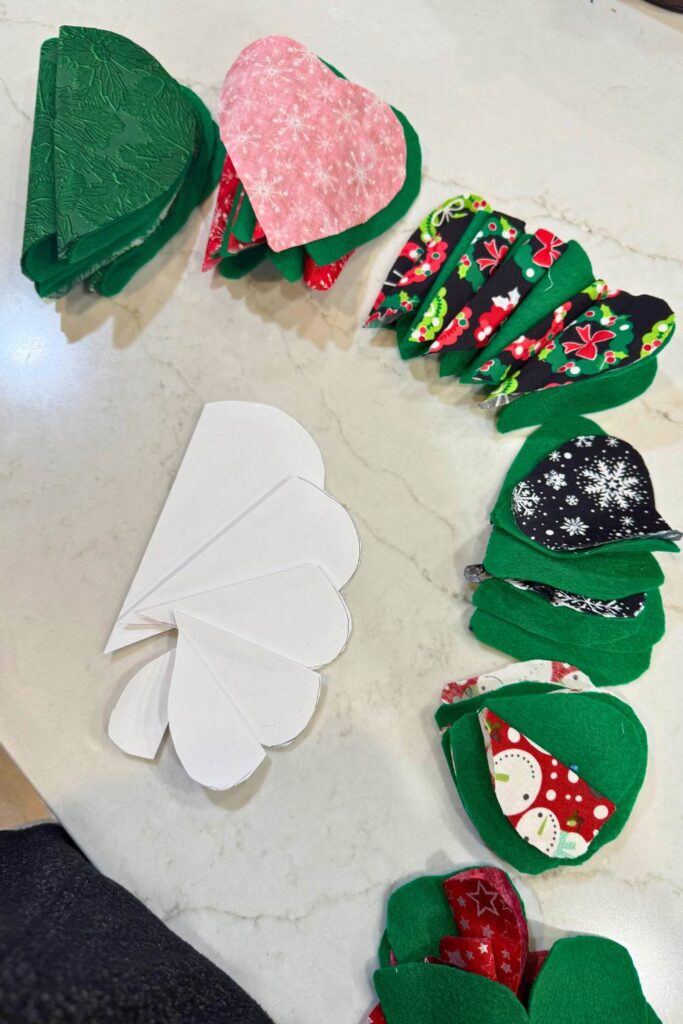
Start by printing out the template six different times and cutting each template size out. Be sure to fold the paper before you start cutting. The shape will resemble almost a heart shape when complete.
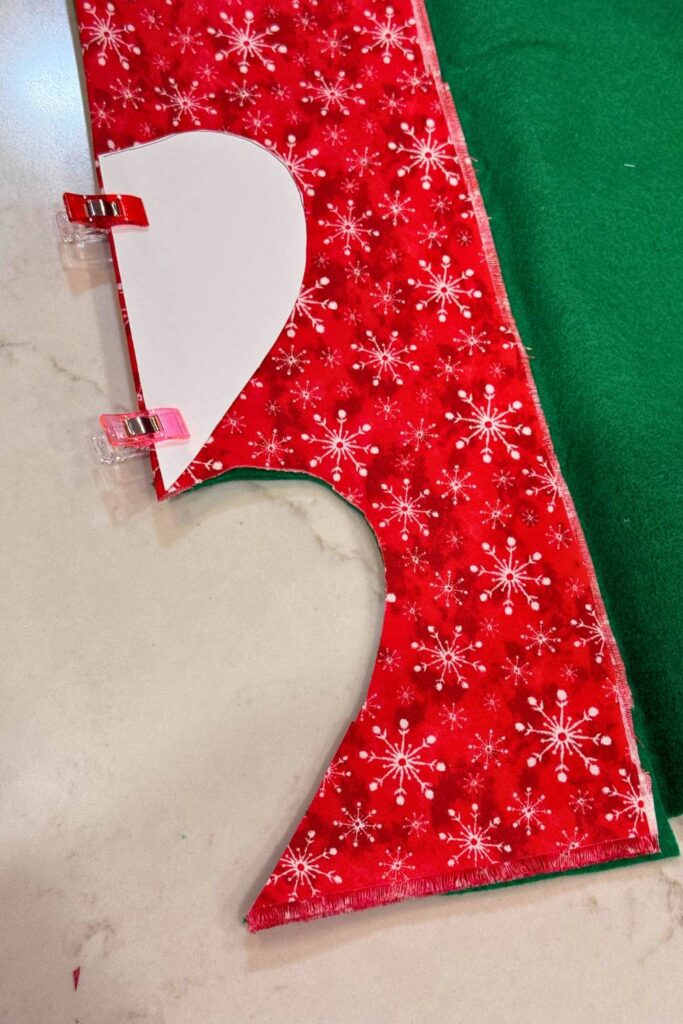
If you are using a stabilizer that is ironed on, this is where you will add the stabilizer. Right before you start cutting out your shapes.
Lay your material out and cut out each shape. You will cut six of each size for a total of 36 cut out total. Be sure to keep each size together so you don’t get them confused if you are using the same color material for each size. Be sure to cut the felt for each shape too if you are using felt and not a stabilizer. I ended up putting the felt down and the material on top of it and cut them at the same time.
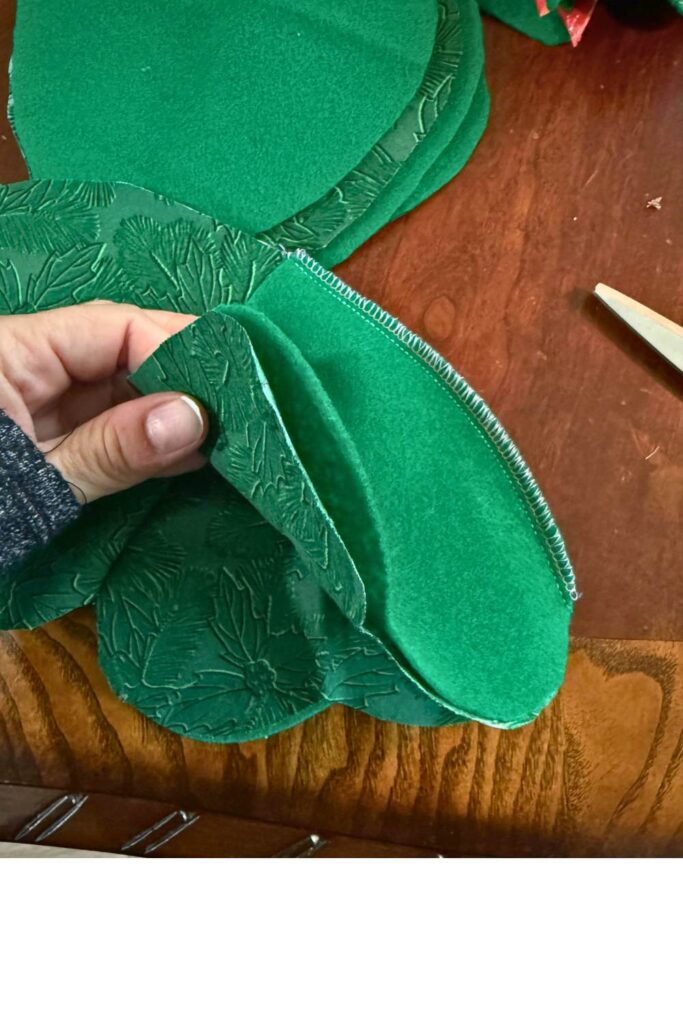
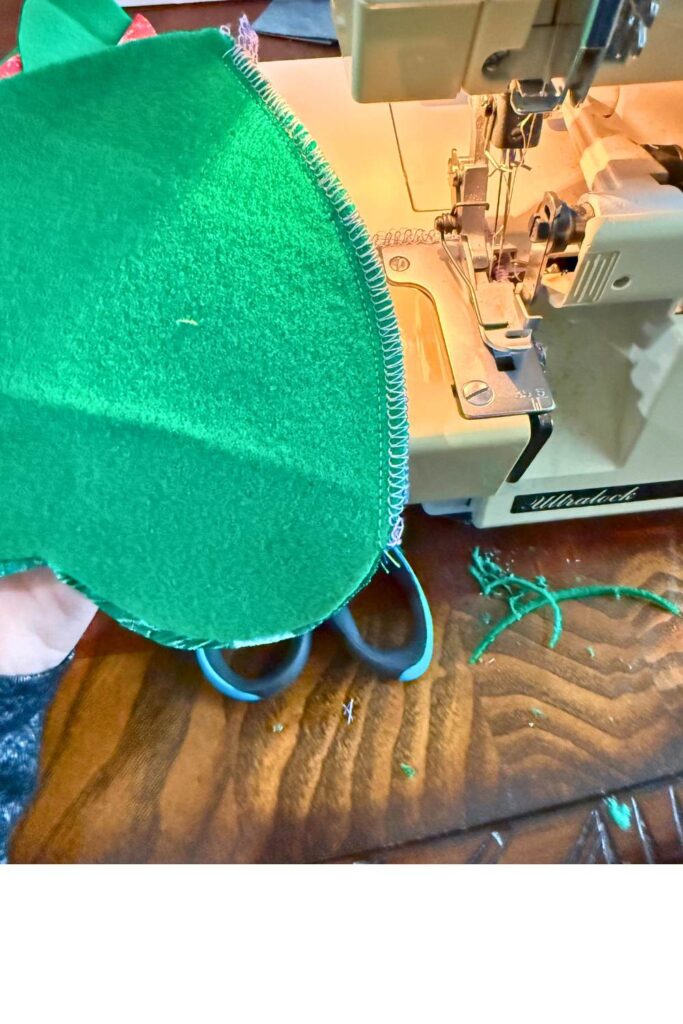
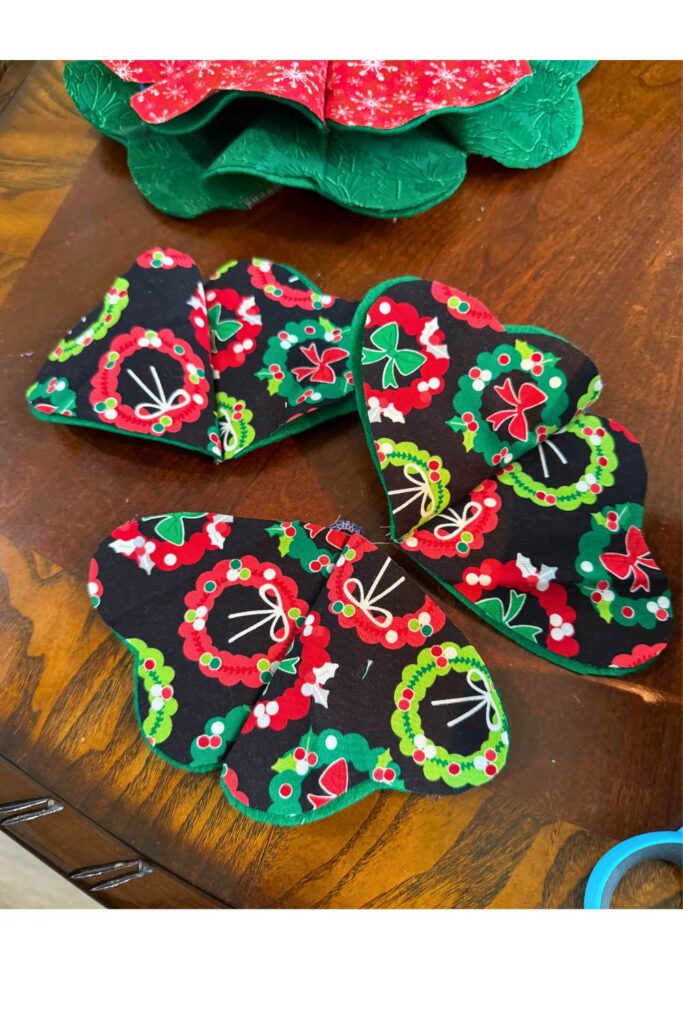
After you cut out your template next you will use a sewing machine or hand sew each shape together. Be sure to put right sides together so your seam will be underneath and not shown when the project is complete and assembled.
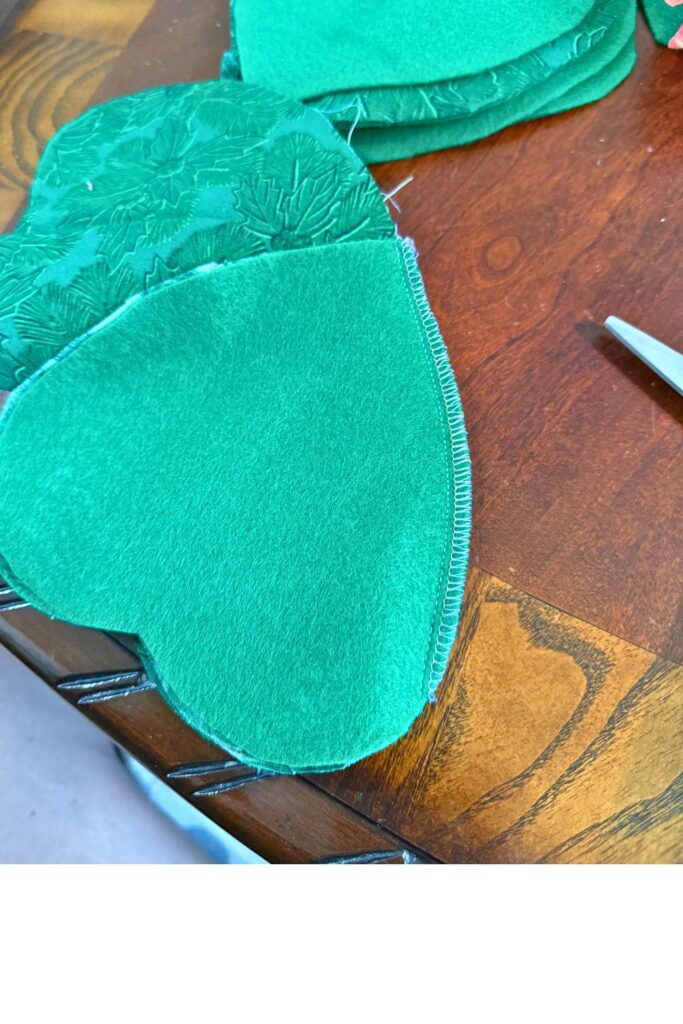
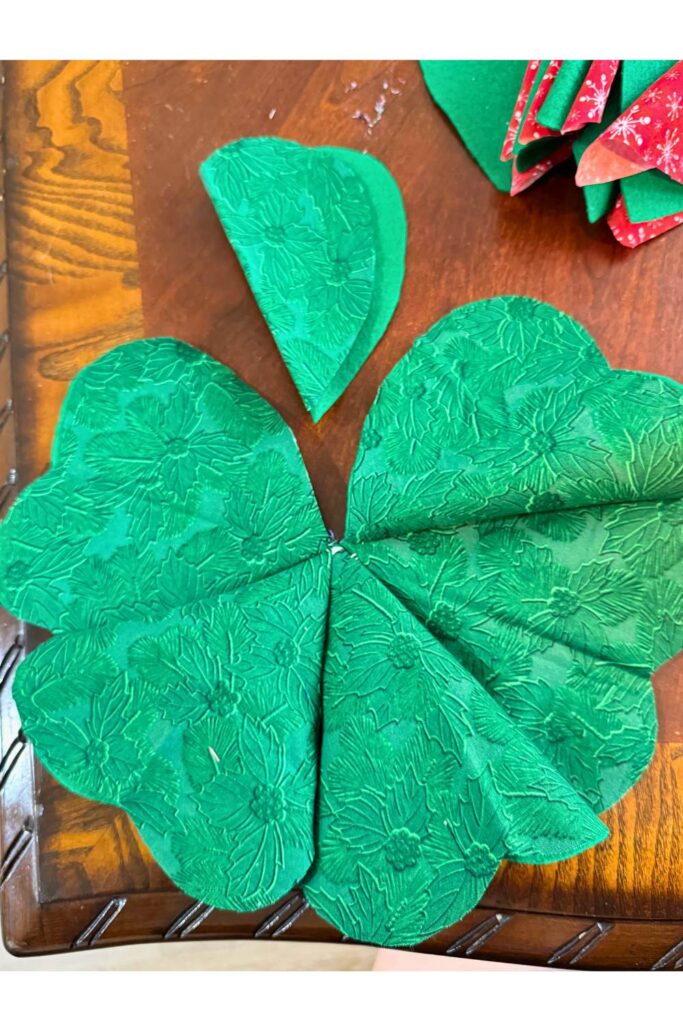
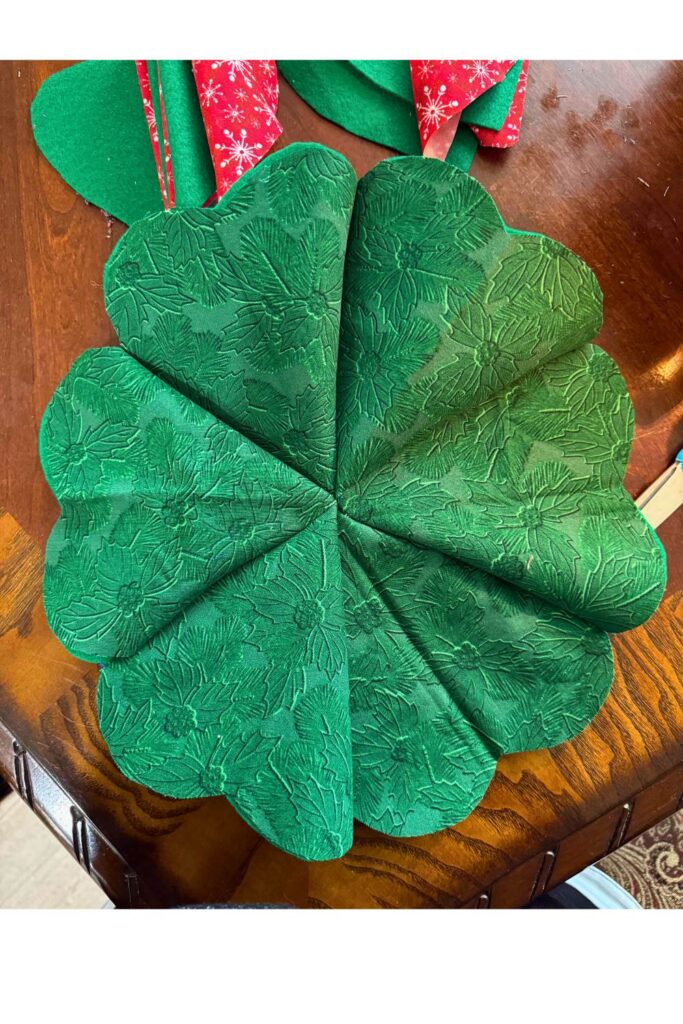
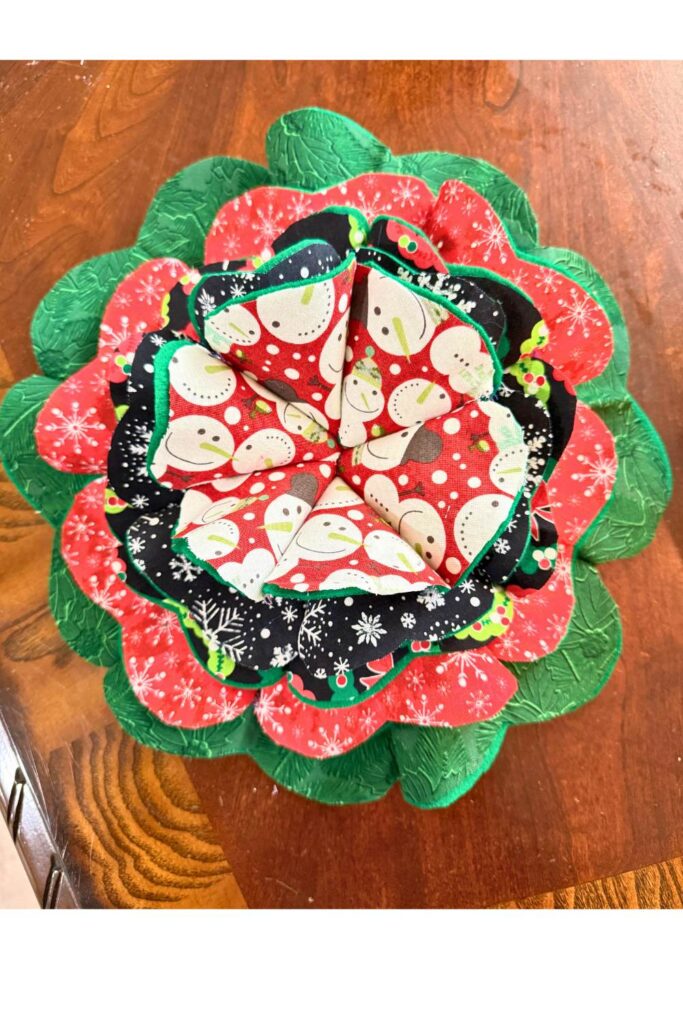
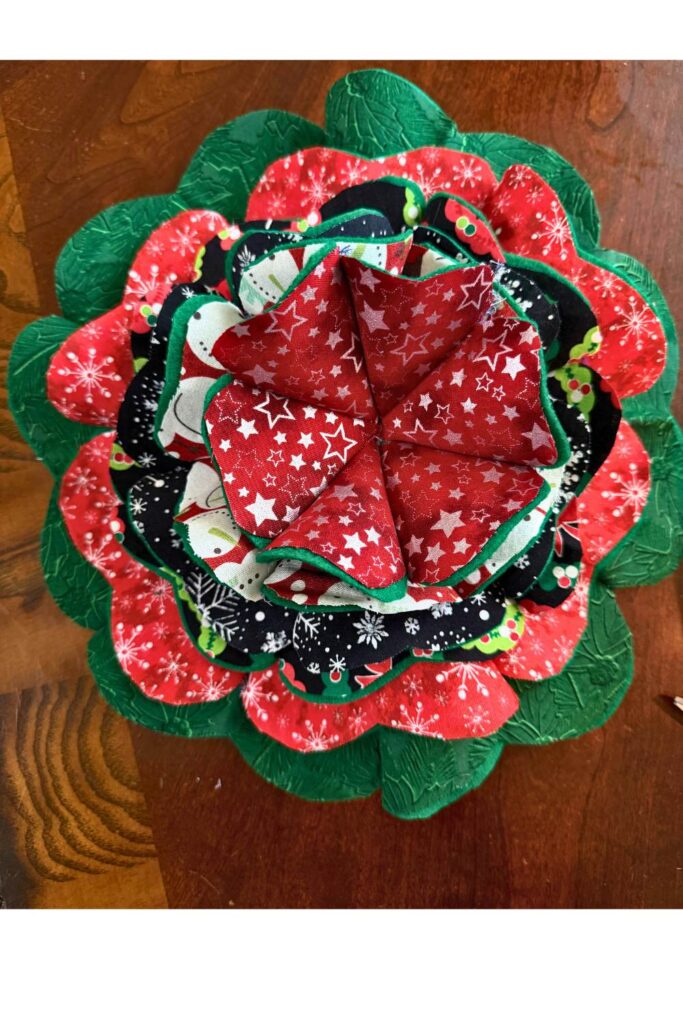
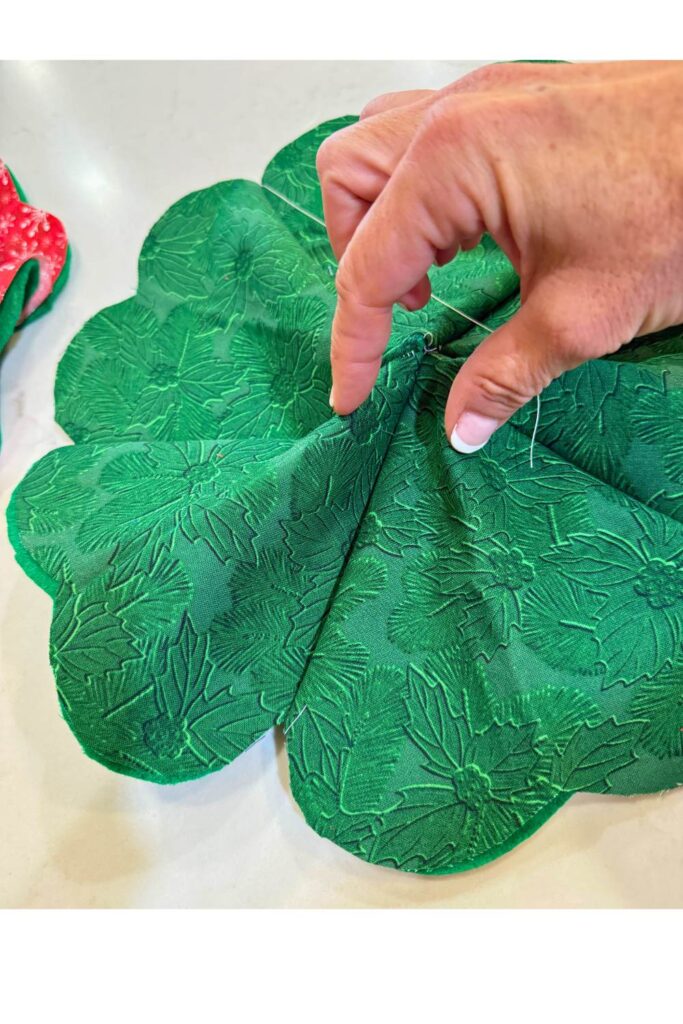
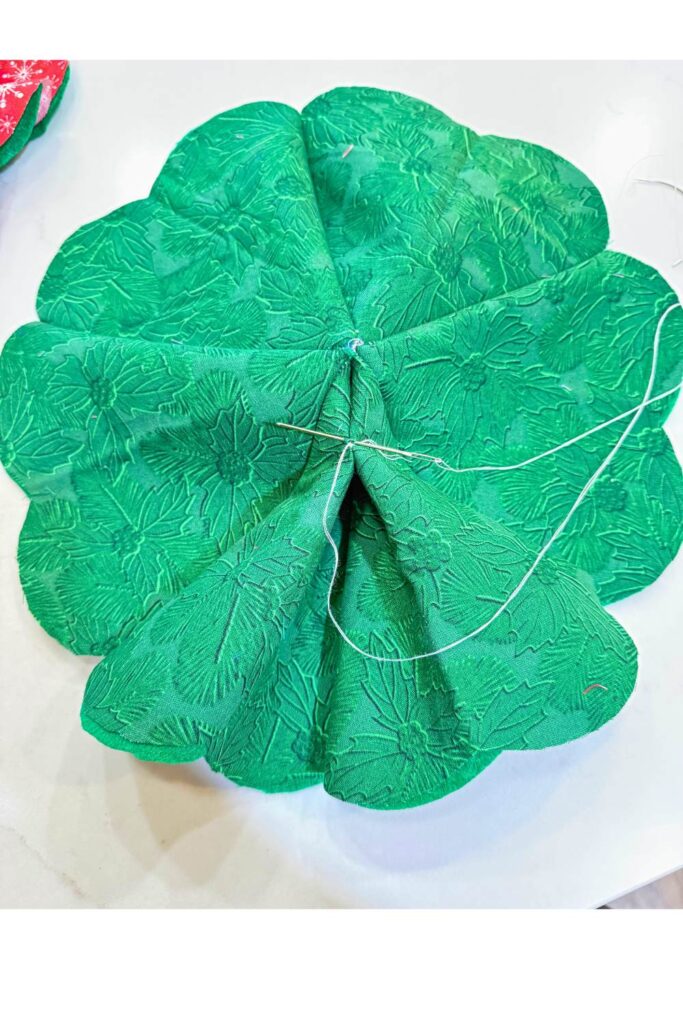
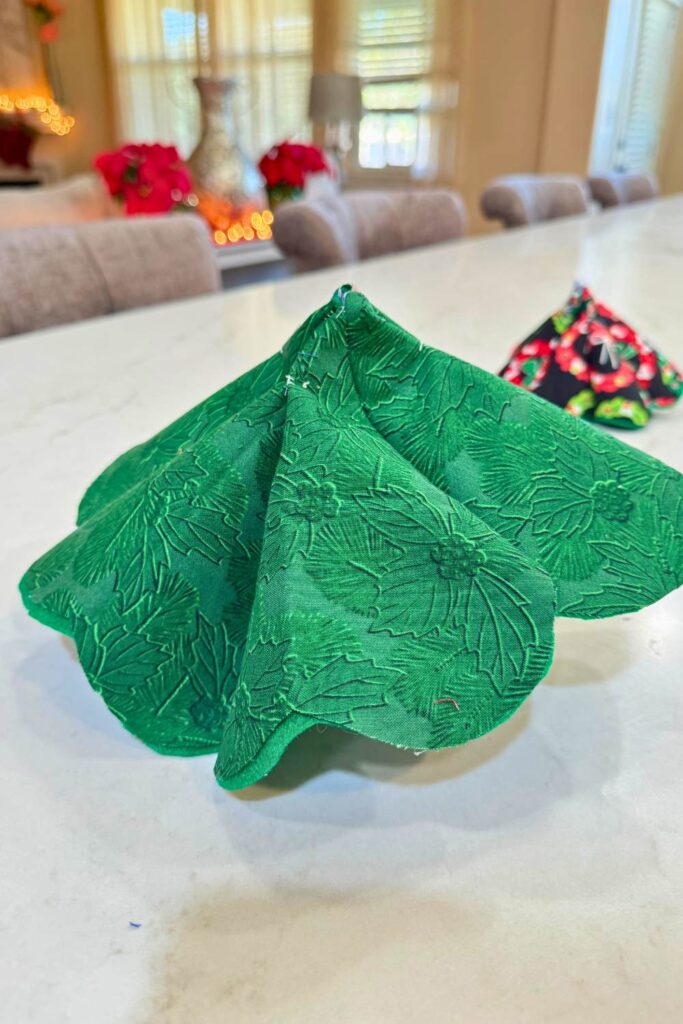
When sewing each heart shape together you will sew a straight line from the tip (bottom of the heart shape) only up until the heart starts to curve and that’s where you will end your stitch. Doing this will allow the ruffles to form on your tree at the end. Sew all the same size shapes together until it makes a circle. Because of the shapes mine had a small hole at the center of each circle. This can be helpful if you decide to attach the tree to a small wooden dowel. You don’t have to though because with the stabilizer on the material these shapes will stack together nicely without support.
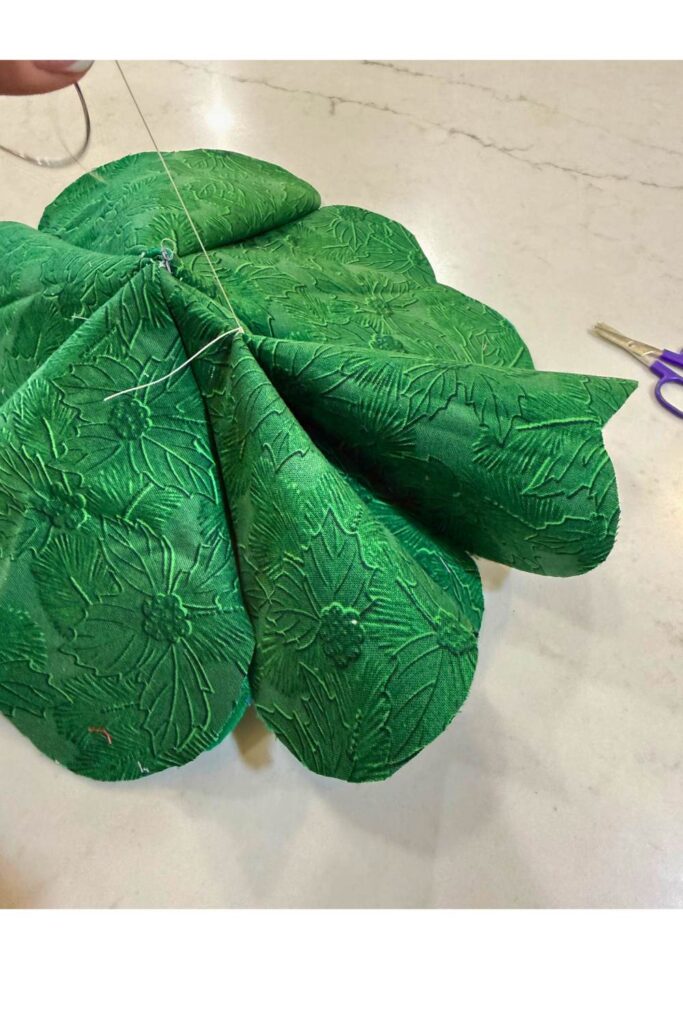
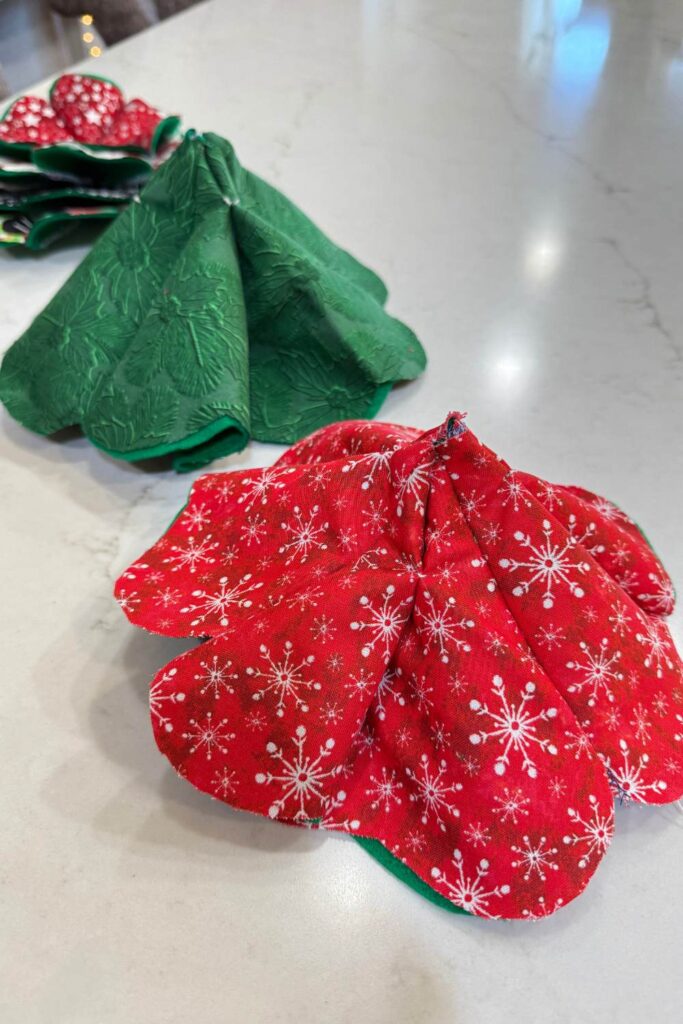
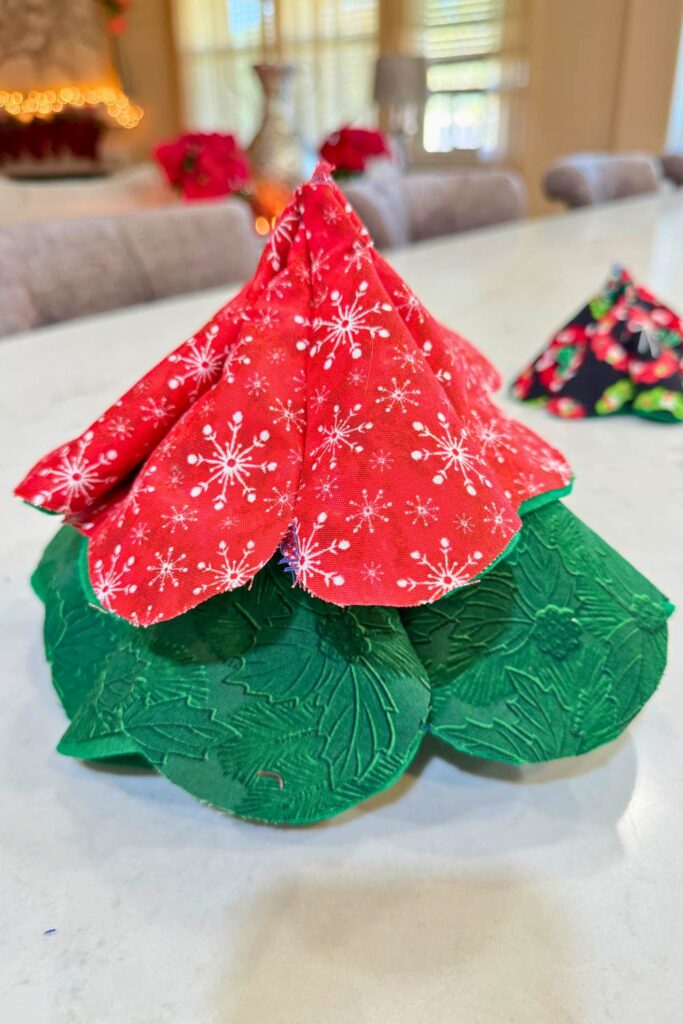
After you sew all the shapes of the same size together for each layer of the Christmas tree you will lay them out and notice they aren’t 3d yet but rather they lay kind of flat. The last thing you will need to do is hand stitch three small notches in each tree so they stand up. You will do this by grabbing the imaginary center line of one heart shape and the imaginary line of the second neighboring heart shape and sewing one knot close to the center top of the shape to make the tree stand. Then you will move to the next neighboring two heart shapes and repeat those same actions to knot the next two hearts together. You will end up with three different sets of two hearts knotted together. This is what forces the tree branch levels to stand up in a 3d effect.
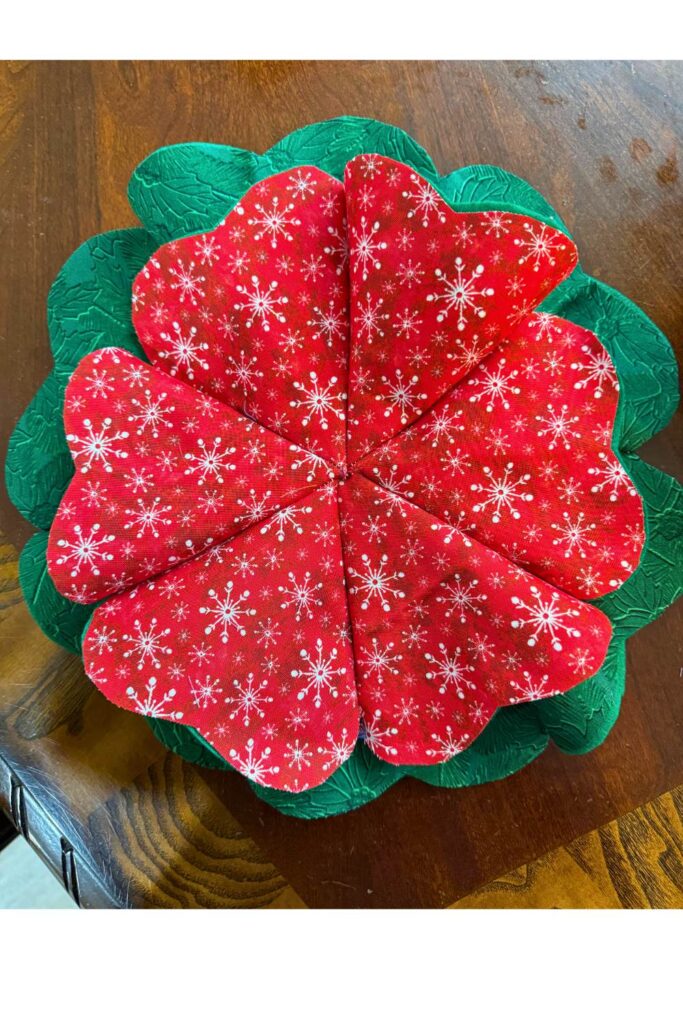
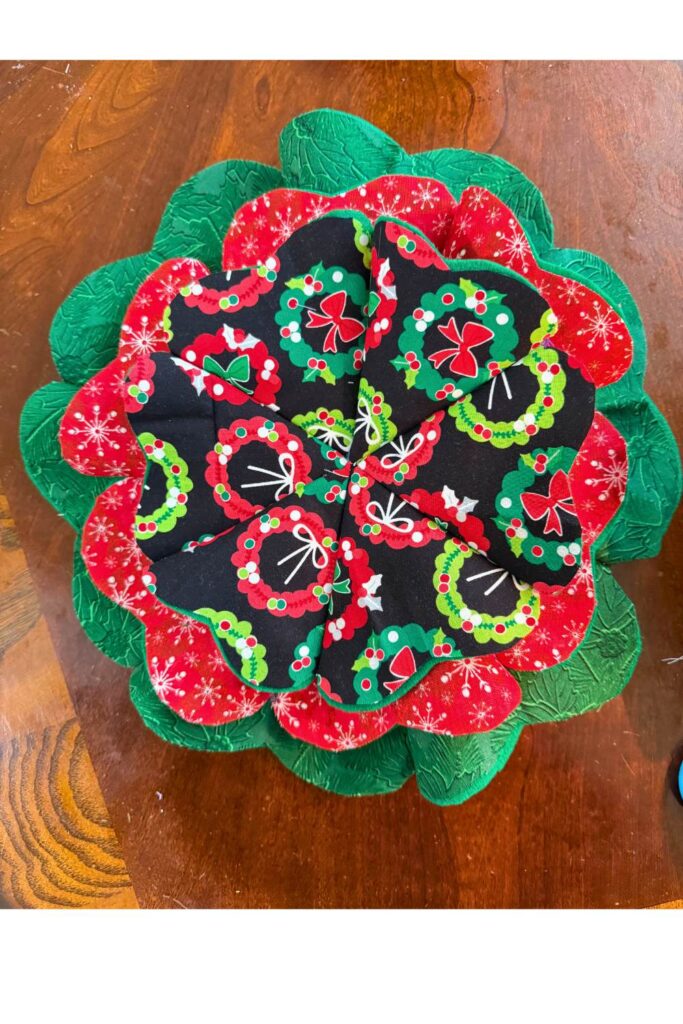
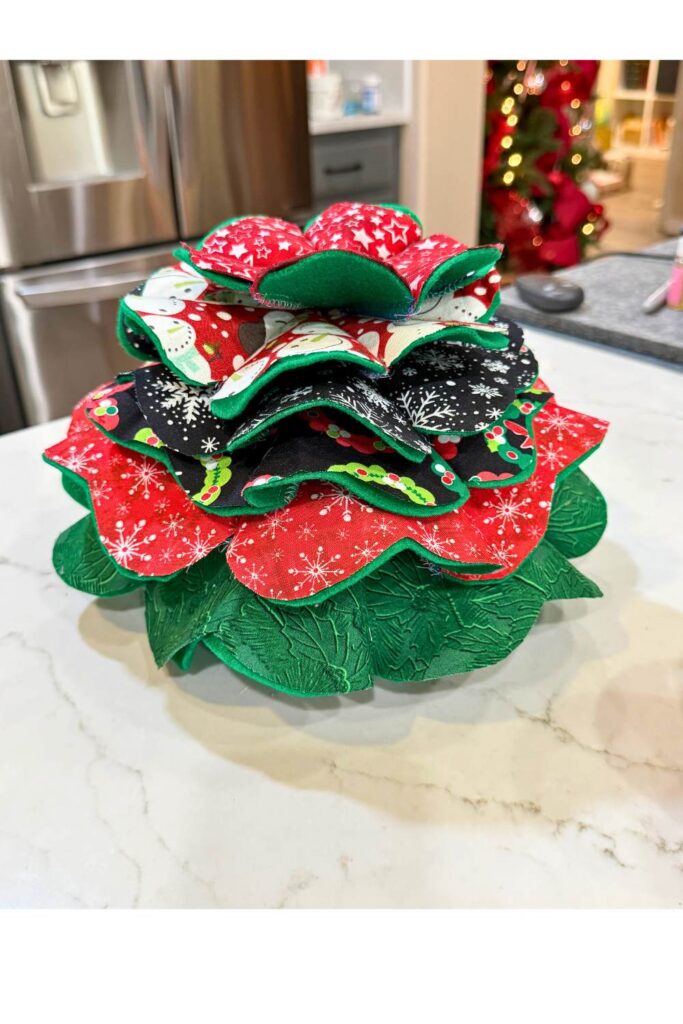
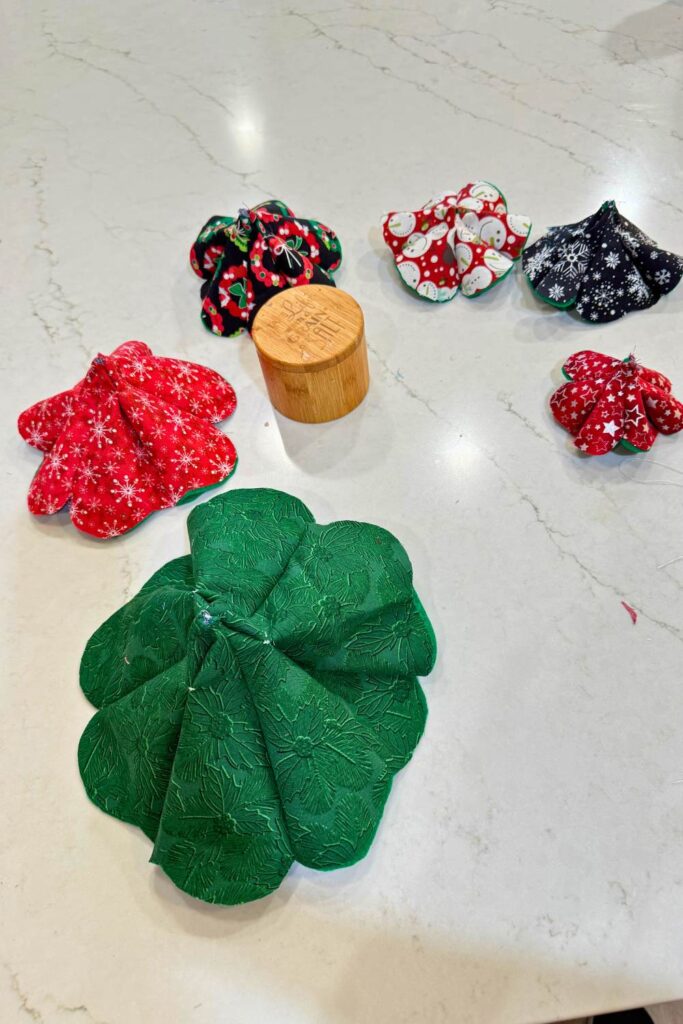
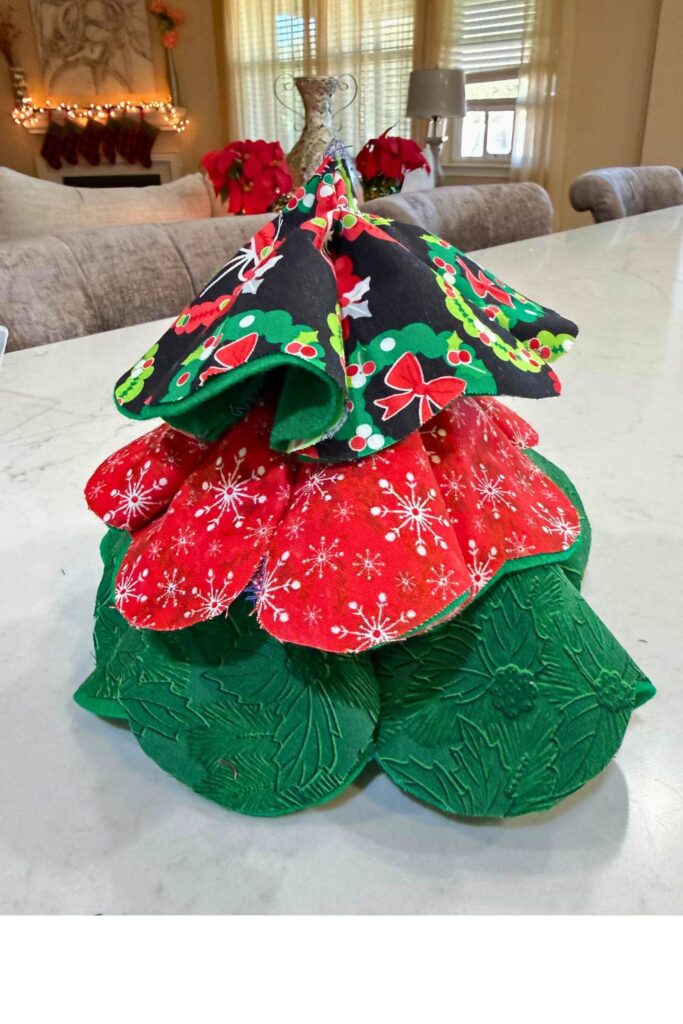
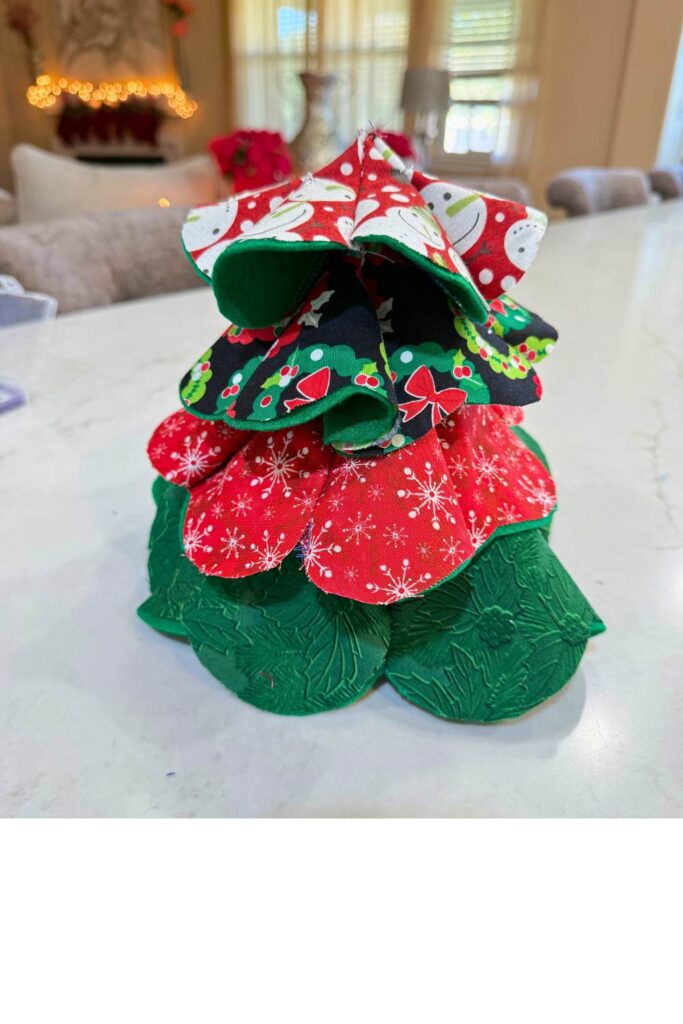
Once complete you can just stack each level together as I have done. I find it to be a bit more stable if you stack it on something that resembles a small can of soup as the base. I have a small wooden salt container that I stacked mine on to make it look like a tree trunk.
After the Christmas season is over this project will easily unstack and lay flat for easy storage for the next season too!
If you are more of a visual learner like I am, I have included photos of every step of this process here:


This was a fun and easy project and perfect for the holiday season. I hope you enjoy this project as much as I did!