
Hydro Dipping With Spray Paint
Hydro Dipping With Spray Paint
Our family loves to have fun and get crafty with just about anything. It’s often we head to the craft store to stock up on tons of art supplies.
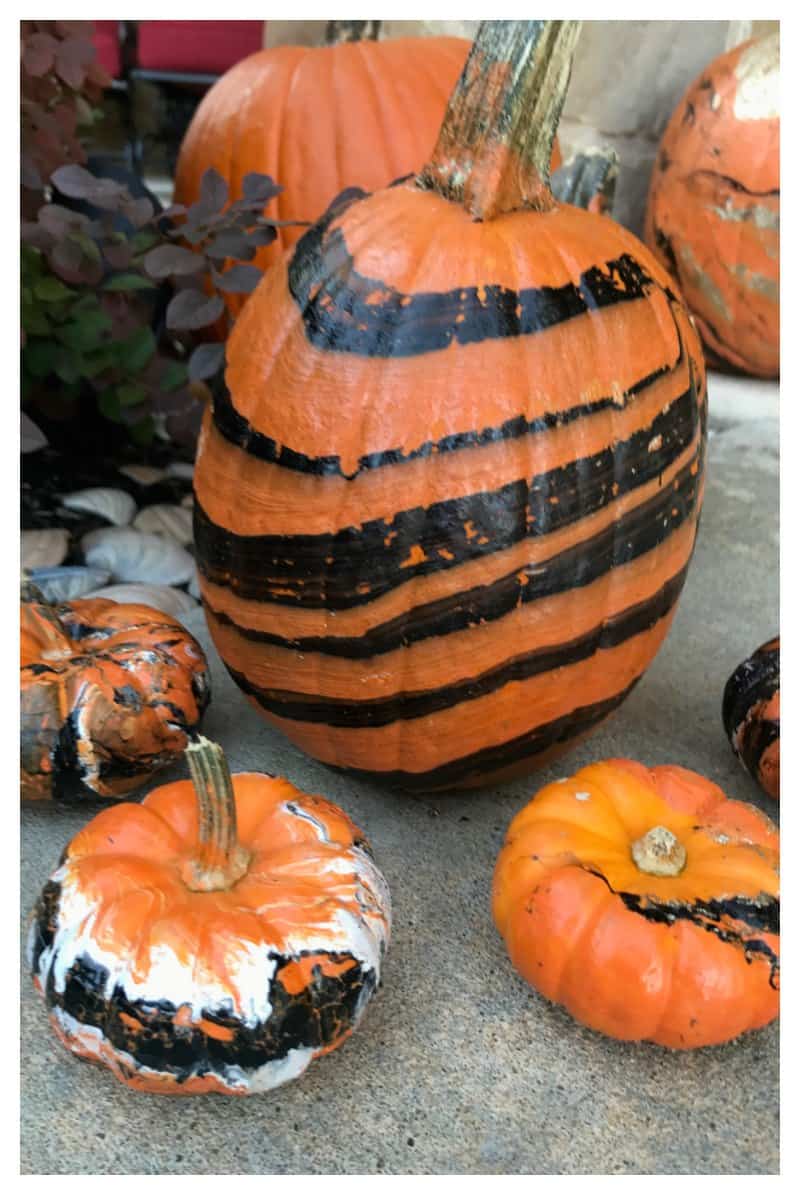
This week we decided to get a bit crafty with our Halloween pumpkins. We’ve been wanting to try a Hydro Dipping technique but we didn’t have anything we wanted to paint, until now. We don’t plan on eating the pumpkins, so applying spray paint to them was not an issue. We have plans to carve them a little closer to Halloween.
Here’s how this fun Hydro Dipping with spray paint technique went for us.
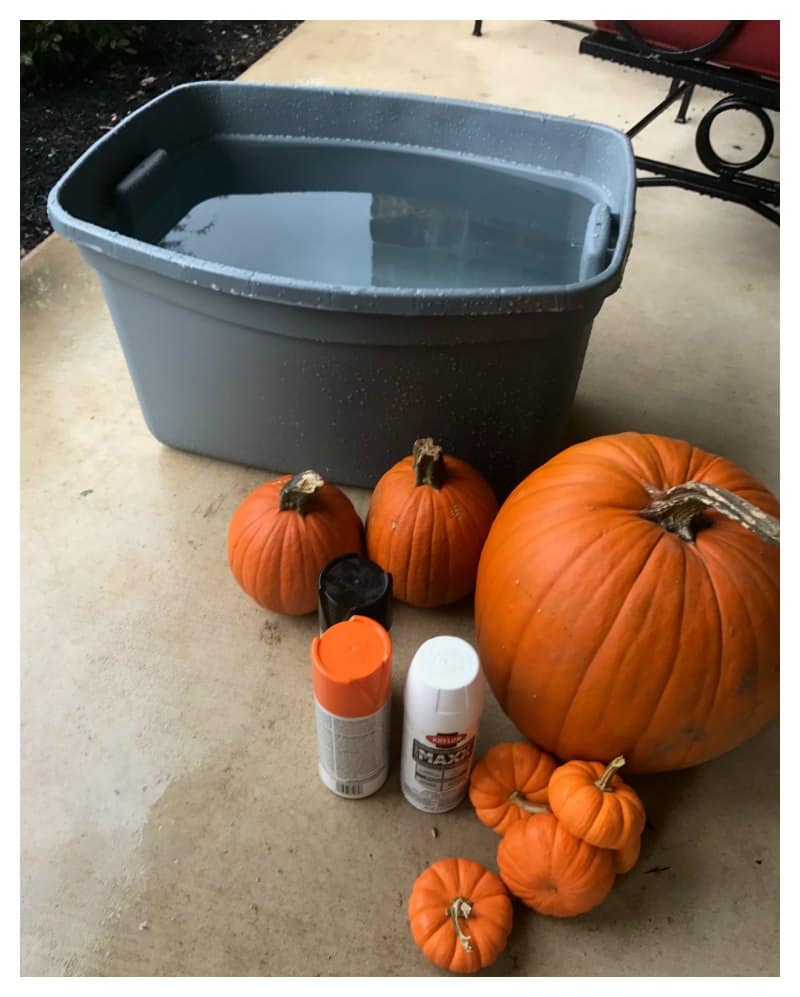
Hydro Dipping With Spray Paint Supplies
Different colors spray paint (contrasting colors are fun)
Large Tub or large bucket
Stick to make a design in the paint
Pumpkin (or another object you want to dip)
Instructions for Hydro Dipping With Spray Paint
- Fill your bucket or tub full of water. The size of the bucket or tub will be determined by the object size.
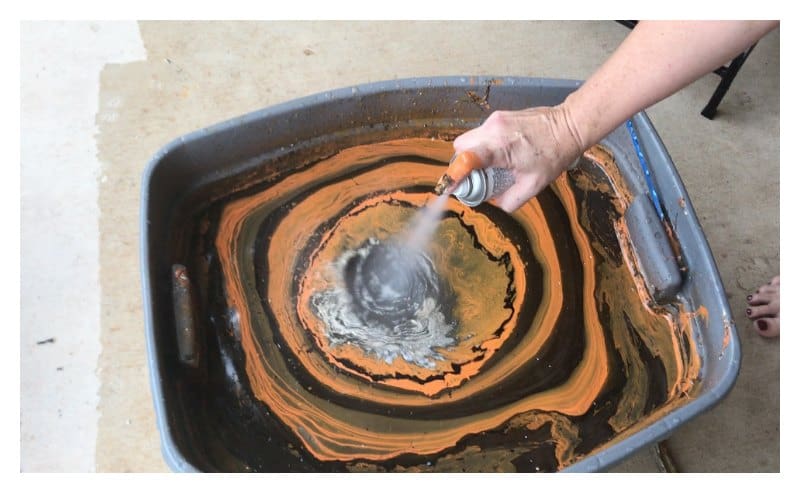
- Spray different colors of paint directly into the water. Make sure to do this in a ventilated area. We choose to do this outside. Each layer of paint will spread out in the water and tend to come back in the center spreading over the surface. You want to spray a pretty thick layer of paint. The thicker the paint the longer it takes to dry. This is helpful to know because if you spray a very thin layer of paint it will harden on the top of the water. Spray contrasting colors next to one another for best results.
- Use a stick to swirl the paint design just the way you want it before you dip your object. If your paint is too thin, it may not spread easily because it has already hardened. This is the reason to use a good amount of paint. You also want your project to be vibrant with enough color to show a design too.
- Dip your object into the paint design. Before you remove your object, be sure to use an object to remove the paint away from the water before you pull the design back up from the water. If you still have paint on top of the water, that design will stick to your object.
One thing to note, if you make a mistake and don’t like your design, you can always re-dip your project.
I did see a difference in paint too. The metallic and glitter colors spread quickly in the water. They are the most vibrant in my designs and I tend to use them more often now that I’ve done this technique a few times. You can use the cheap paint but I can tell it doesn’t go as far as the good stuff like Krylon paint colors. The spray button on the Krylon can be much more comfortable and easy to use. I had a really hard time holding down the cheap paint can button. My husband had to help me. Oh, and wear gloves before you start. I totally messed up my nails after doing this project. I nice pair of plastic gloves are a must to save you the heartache.
I love how our pumpkins came out. You can bet we were looking all around the house for more projects we can paint with this technique. It was so much fun!
Pin it on Pinterest for later:


Thank you I’ve been trying to figure this out for a long time I’ve always wanted to hydro dip shoes (which looks really cool on leather shoes) your really good at explaining.