Picture Frame Crafts
Picture Frame Crafts
I am happy to report that the kids area I have been working on is finally complete. The last project I had to do are these really cute Picture Frame Crafts. I have been wanting to try and make a chalk board and dry erase boards from old picture frames for some time now. They turned out really cute, are a HUGE hit with my kids and didn’t cost much to do.
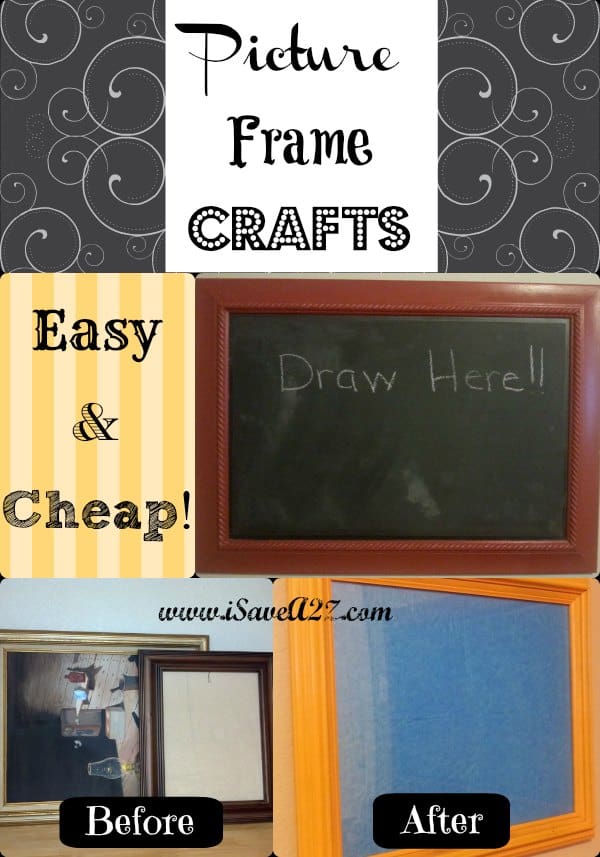
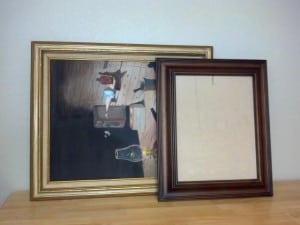
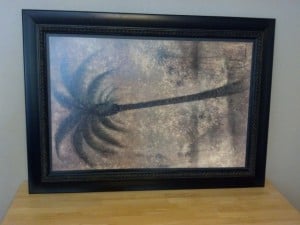
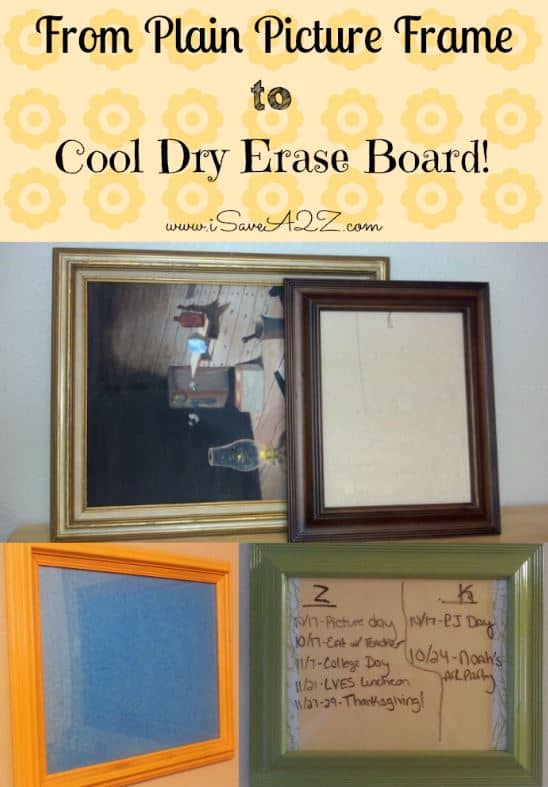
One of the frames was FREE because it was left over from the garage sale and they were just going to trash it. The other two I also got a great deal on. This home had a 3-day estate sale, this was the last day and everything was 50% off. The smaller frame only cost me $2! The large one, which was going to be my chalk board, was $10. This large picture still had the price tag on the back and it was $70 at a local home decor store! Considering that the picture originally cost a pretty penny and that it is 31×43, I thought it was a steal! Another cool thing about this large picture I found, was that the picture was actually plastic. There was no glass on top, just the plastic printed picture. Here are the frames I started with:
The Chalk Board
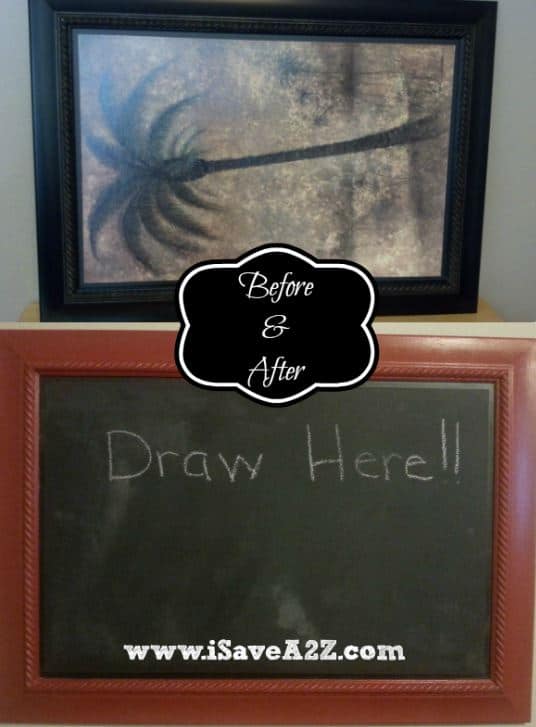
I started by painting the beautiful frame. It was black with a gorgeous rope design all around the edges, which I love, but the chalk board was also going to be black so I needed some color! I taped off the actual picture and used a brush to paint the frame a dark red. I ended up doing about 3 coats to get it good and covered. Once that was completely dry, I taped off the frame and started rolling my chalk board paint right on the plastic picture. I did two coats of this to get it nice and even. So this is what I ended up with:
Now on to the Dry Erase Boards
You know I couldn’t just have the plain wood or that very outdated gold picture frame. So again, I started by painting the frames. They each got a few light coats of spray paint, one in a bright yellow and one in an avocado green color that I’m obsessed with. While that was drying, I took the cardboard backing of the pictures and began to cover them. This will go under the glass and you can use anything you like. I do suggest getting a solid color or very low key pattern because patterns can make your writing hard to read. That’s a tip from my mistake 🙂 The smaller board was going in my kitchen, and I used craft paper for the backing. On the larger one, for my kids, I ended up using tissue paper! It was all wrinkled and crumpled into a ball, but it gave it a cool effect. Once the frames were dry, I simply put the picture back together. Voila!! Two beautiful and very useful dry erase boards.
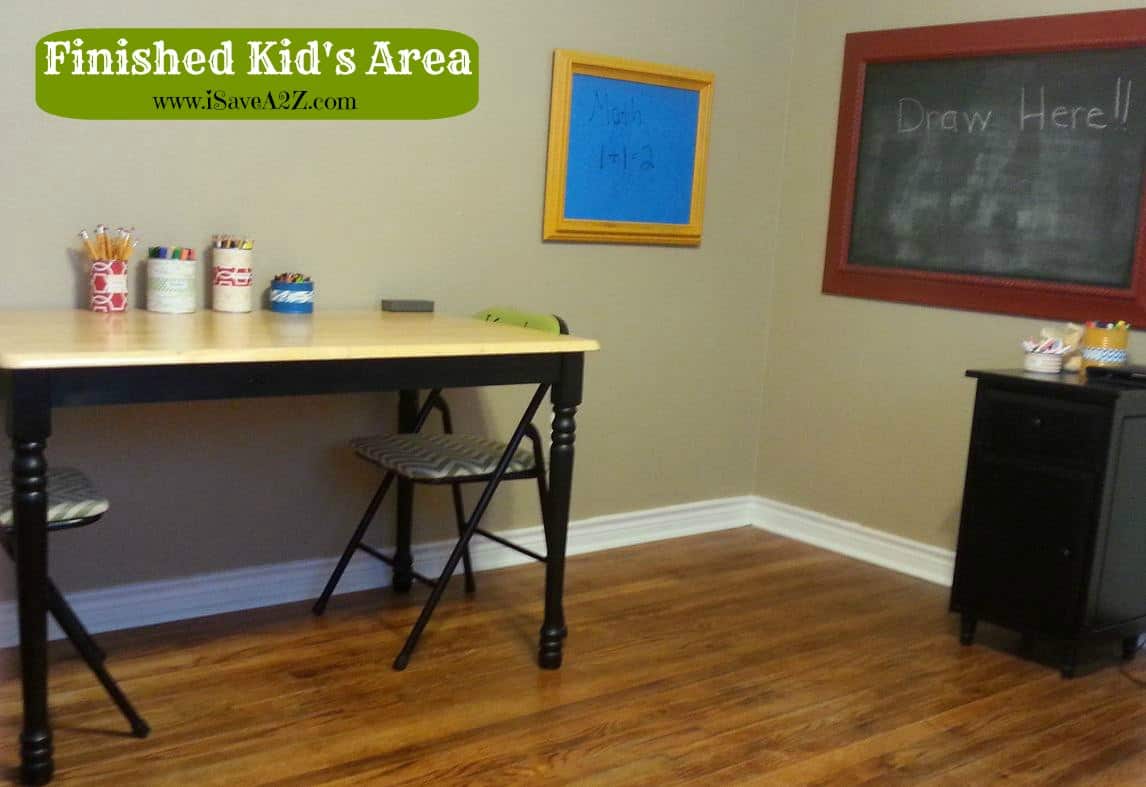
As you can see, the one in my kitchen helps me remember all the school activities my kids have coming up. Both of my little ones started playing with the chalk board and dry erase board before we even got them hung up…SCORE!
They have also become a learning tool. My daughter practices writing her name and my son tries out math problems. So here is our finished kid’s area! It includes our Tin Can Crafts and our DIY: Drab To Fab Folding Chairs that we did.
American Girl Crafts Color In Frames Party Activity Kit![]()
Also check out some of our other crafts! Such as our: