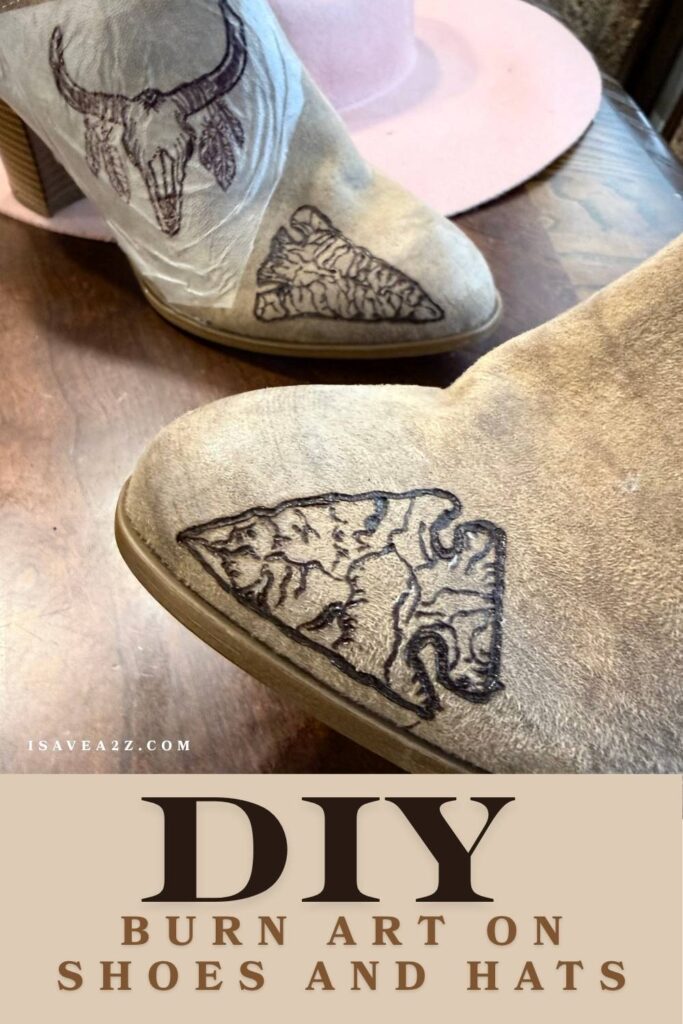
DIY Wood Burn Art on Shoes and Hats (Using a Wood Burning Tool!)
Ready to take your creativity up a notch? Learn how to use a simple wood burning tool to create one of a kind designs on shoes and hats! This beginner friendly burn art project is fun, inexpensive, and totally addictive once you see the results.
This is a fun project to attempt but I highly suggest trying it on scrap material or fabric you don’t care to waste if you make a mistake.
You must use real organic material such as suede or felt works best. No synthetic material.
I used a cheap wood burning tool but if you find you plan to make a lot of art projects I would highly suggest getting one where you can adjust the temperature and have multiple tips.
I had to turn off my cheap tool to let it cool down a bit because I felt it got a bit too hot at times. The best temperature is 140 degrees.
How to Design a Burn Art Project:
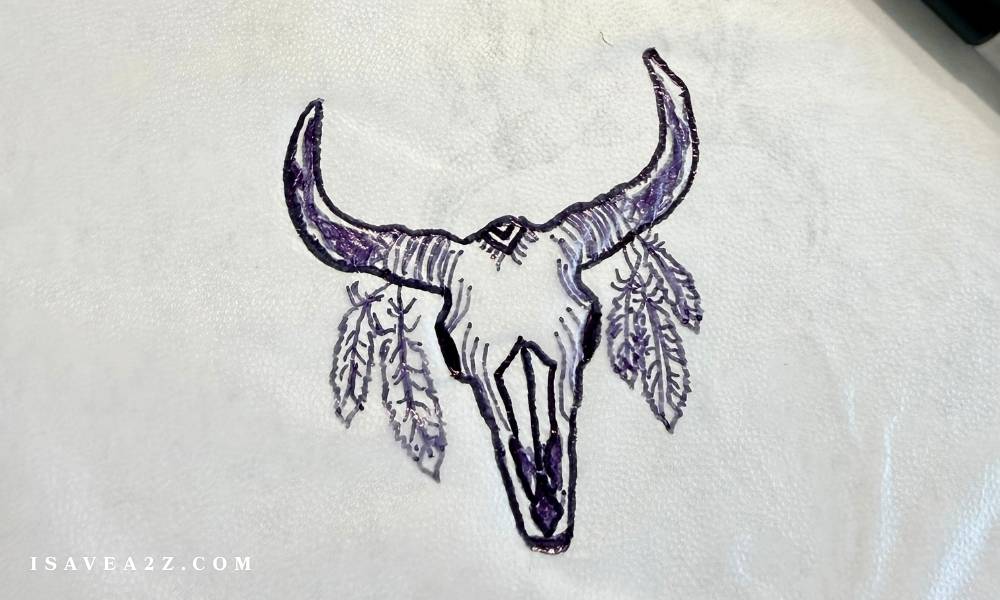
First, decide what design you want. You can either hand draw a design or use a design that you purchase from an artist on Etsy or CreativeFabrica. I have a subscription to Creative Fabrica so I use it often for stuff just like this.
You’ll want to start off with a simple design. I only used the pointed tip on my woodburning tool for all these designs.
Once you have chosen your design, you will need to prepare it for the surface of your garment.
How to transfer your design onto your project:
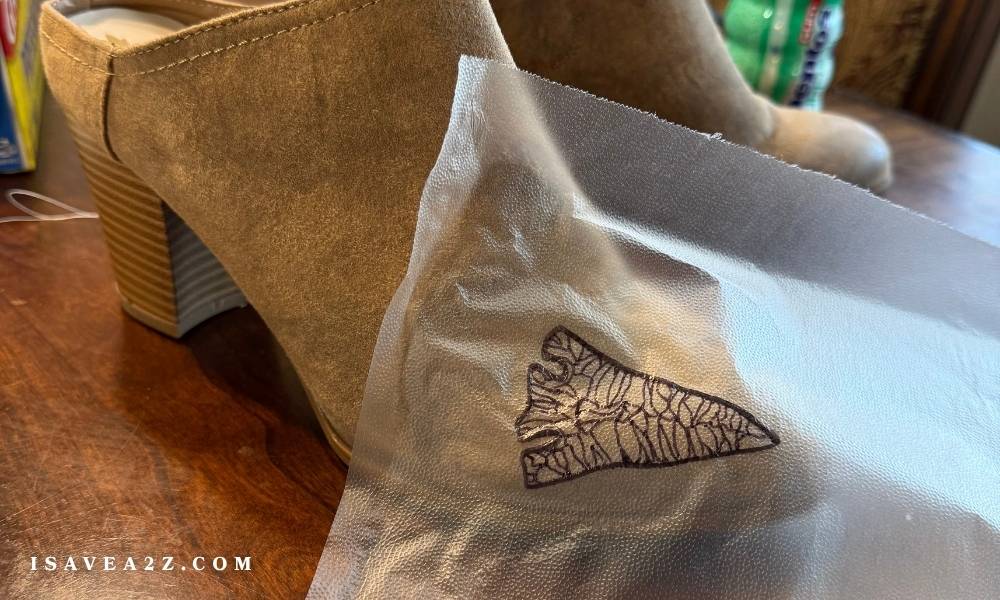
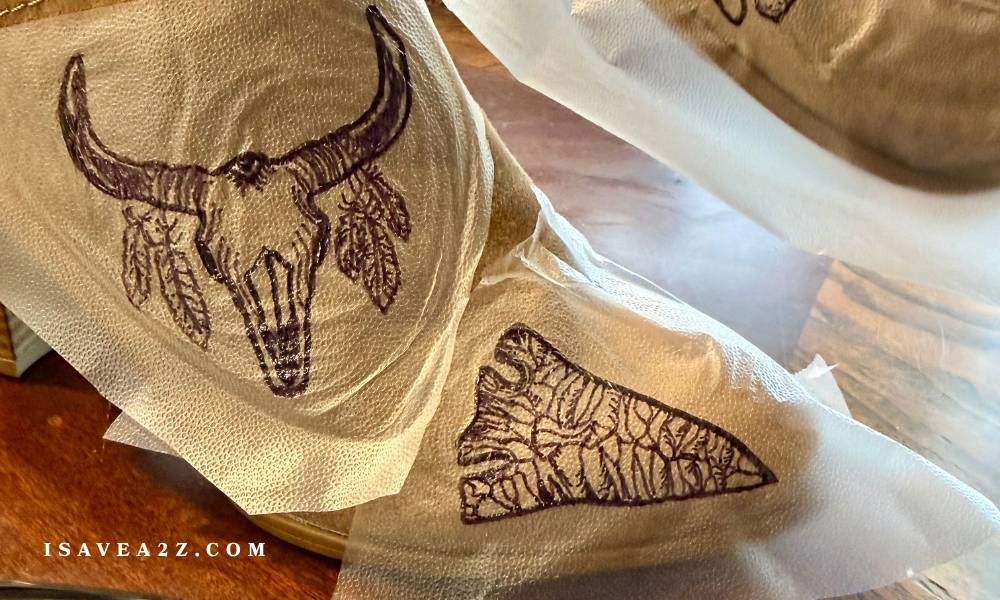
You will need to transfer your design onto your garment. In order to do this you will need to trace your design on some Press and Seal Glad plastic paper.
Be sure you use the Press and Seal because it’s a thin piece of plastic that actually has a slightly sticky backing that will hold onto paper while tracing but also let you pull it off of the paper and still apply it to your garment with no issues. And it sticks perfectly!
Use a sharpie permanent marker to trace your design. Print or draw your design on paper and lay a sheet of Press and Seal Glad Wrap over your design. Use a thin and regular Sharpie marker. The thin marker will be for small areas and the regular marker will be used for the outline or more defined areas of your design.
Next, you will burn your design onto your project!
How to Burn your design onto your project:
Peal the Press and Seal from your artwork and press it onto your project. I pressed it onto my shoes. Feel free to peel it off and repress it if the placement isn’t to your desired liking.
This is the beauty of this type of plastic wrap. You can peel it off and repress it as many times as needed and it will still work as intended. It also presses over the curves of your project nicely to continue the placement of your design.
Once it’s placed just where you want it, you will need to burn the artwork. You will do this by plugging in your wood burning tool and allowing it to heat up. Once it’s heated you can do a little test run on an inside seam that isn’t visible anywhere on the outside of the project.
I did a little test on the inside of the shoe. I added my initials to show I did the artwork.
You will want to start tracing over your design that is drawn on plastic to burn your artwork into the project. It will melt the plastic and that’s ok. You will peel away any plastic wrap still let on your project once you are done.
You will want to do a medium pressure and a continued glide of the wood burning tool to keep a steady line that is the same size. If you stop and you are still using pressure on the project, you will find the tip of the wood burning tool will do deeper on your project and it will create a thicker line.
Use light pressure for a fine line and medium pressure for a thicker line.
Once I’m done tracing my project with the hot wood burning tool, I go over it and outline it one more time to make the outside line thicker than the rest of the design. This allows it to stand out more and it finishes the design nicely too.
Lastly, you will use a tweezers or metal pick to remove the remnants of the plastic wrap left on your design.
Voila! You just completed your first wood burn art project!
Be sure to pin this for later!