
Blogger Help: Pinterest Tips for Business
Pinterest Tips for Business
First, I will start off by saying I am not a Pinterest Expert or at least I don’t consider myself to be one. However, I recently went to a blogging conference and quickly realized that I am already doing everything that was suggested to become successful with Pinterest! I’ve decided to document the tips and tricks that have been successful for me. I’ve had multiple pins go viral so I must be doing something right, right?
This post is written to help my blogger buddies be more successful too!
Great Photos
This is the most important rule! If you don’t have a great photo don’t even bother putting it on Pinterest! I don’t want to see the photo of your Chicken Alfredo Fettuccine if the photo has a green tint. (BTW: true story! I unfollow these people because I hate bad photos!)
If you don’t know how to take a great photo, then learn. Take a class. Ask a friend. Whatever works but it’s a must! You don’t need an expensive camera either. Most of (no, all of) my photos are taken with my iPhone.
There are different ways to get a great food or craft photo if you are not experienced. They best tip I can give you for photos is to take the photo outside. This way you don’t have to learn about lighting. Best time for me is about 9am. If you baked dinner and you need a photo save the plate for the next day and take it in the daylight. No one will ever know the food is not hot when you take the photo.
The next tip I just learned at my last conference was to take your food photos on small plates. This helps because the focus is more on the food and not the setting.
Be sure to add text to your photos. People LOVE text. I use PicMonkey.com
Don’t forget to watermark your photos.
Include multiple photos. You never really know which photo your readers will like best or pin more. I’m always surprised when I see what my readers pin versus what I thought was best.
I went to a conference recently and the Plate to Pixel book was highly recommended. (I am reading it now myself!)
Spend time to learn about Rich Pins
Rich pins is simply learning the html to label your content (this is the best way I know how to explain it). In Pinterest, it gives your pin a personalize look at feel. Your brand really stands out from the rest.

When you click on a pin with Rich Pins it gives the ingredients too (not the instructions which means the reader still has to click to your site to get that information):

Tip: I hate html and I hate having to memorize it. I created a recipe schema template that I can use and just change out the photo, name of the recipe, ingredients and instructions to help me through this learning process.
Here’s a screen shot of my template:

TIP: If you use a recipe template it probably already has rich pins built into the code.
Join Group Boards
This helps get your pins out to others who otherwise wouldn’t have had the chance to see your pins.
Schedule your Pins
I pin about 25 pins a day to different boards. I’ve heard of multiple other bloggers being suspended for pinning more than 25 pins per day so be careful! I personally use Ahalogy (free service) that allows you to schedule pins. I used to use Pingraphy (not a free service) but there is a free trial to see if you like it. It does allow different pins to different boards. You can schedule pins throughout the day too. LOVE THAT! I usually pin between 8-9am, 1-3pm and 8-10pm CST. It works for me.
There are two different methods for pinning.
Some say it’s best to have a board titled “Trending on **your website** or “What’s Hot on **your website** and to always pin to that board first so when it’s repinned it will reference your website name.
Others just pin directly to the boards that are relevant to the content. The content goes out directly to the people interested in following that board.
Note: I haven’t decided which is better yet. I see different aspects to each. If you pin it to your website board then you don’t want to pin it to a relevant board the same day because it can look spammy. If you decide to pin it to your website board and it gets repinned from there you have your website name exposed a bit more which is always a good thing.
Join Pinterest sharing groups on Facebook
I suggest these groups have people you know (your blogging friends) in them so you can trust the pins. The Pinterest groups are very valuable because your pins will be shared to as many people that sign up. You are promising to repin others pins also. It’s a great way to share your best work! This option is also a disadvantage in some way. I struggle with this because I am extremely picky on my photos and because I like a great photo and if it’s not good I don’t want to reshare but I have to because I committed already. So keep this in mind when joining these groups. Also, watch your daily pin amounts and try not to consistently go over the 25 per day. I would suggest these sharing groups to new pinners that have no audience.
Note: Don’t just pin your own content. Be sure to pin lots of relevant content. It will help grow your readers! This is very important!
Organize your boards
Always put your best work on top of your board. Always put the most relevant boards on top too. For example, if it’s February people aren’t interested in seeing your Christmas board first.
If you are in shared boards be sure to put those last. This is your business page and you want your best work featured first!
Here’s a screenshot of iSaveA2Z on Pinterest:
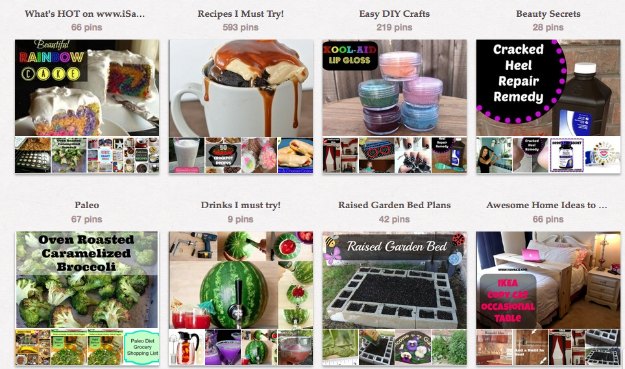
My recipes board is my most popular so I have that listed first. The second most popular board is the Easy DIY Crafts board so I have that next. You get the idea.
Important: Be sure to change out your photos every now and again. I try to do this at least once a month. If you have a very popular pin then I immediately change the board it was pinned to with that image.
Pin It Pro WordPress Plugin
Pin It Pro is money well spent in my opinion! The price is $49 for Business accounts. It adds a “pin it” button to any photo of your website to allow an easy pinning experience for your readers! It will even tally up the amount of times a pin has been repinned.
Here’s a screenshot of my No Bake Ice Cream Sandwich Cake Recipe post which received over 390 thousand pins!

There are so many ways to customize your plugin. Head over here to see more about it.
There are a few other plugins that help too. Check out the Pin Button Attraction plugin too. (This one also adds a “follow me” feature that pops up when you hover over an image.
Pinterest RSS Widget
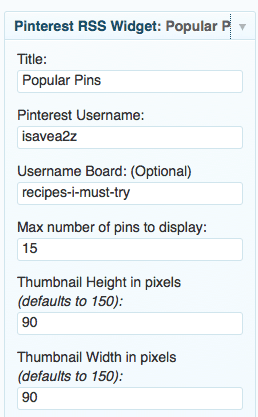
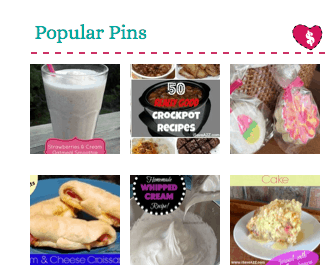
I also use the Pinterest RSS Widget to show my popular pins in the sidebar of my website! It’s super easy to set up. All you have to do is choose to show all of your pins or you can show only one board at a time. I have a widget set up on the sidebar of my blog page and I also have a widget set up towards the bottom of my home page. It’s customizable! You can choose the size of your images. You can also choose to add a title or not too! I love easy widgets!
Here’s a screenshot of what the widget looks like. In this photo I have my “recipes I must try” board featured.
Here’s what the live widget looks like with those settings:
Find out how many times your post was pinned:
There is a new pin count page that was just put up by the Pin It button pro people. Head over here and look for you pin counts! I just typed in the url to one of my posts and it gives you the repin count. Cool right?!!
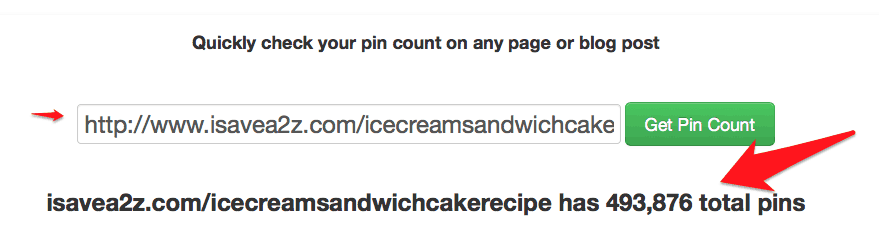
Note: Some websites don’t use the www and only use http. Make sure you are using the exact url or else it will return an error. I have also noticed it to be a bit clitchy with the “/” at the end also. If you get an error try removing that.
Find out how many times one pin was repinned:
Simple add the word repins on the end of the pin url to get a total count like this:
![]()
See what’s already being pinned from your website
Find out what is already working on your site by seeing what your readers are already pinning. You will need to access your Pinterest source page. Every website that is featured on Pinterest has it’s very own source page. These show first tier pins (meaning you won’t see repins).
Use this link to access your source page: http://pinterest.com/source/addyoururlhere/
Example of my source page: http://pinterest.com/source/isavea2z.com/
Tip: Sign up for a free account at Tailwind to help track your pinterest analytics. It helps to know what your readers like so you can do more of them! UPDATE: Pinterest now has some amazing analytics if you are signed up as a business account. No need for another tool.
I certainly hope this post helps my blogging buddies! I love Pinterest!
If you have any tips or tricks to add to this post, please feel free to leave a comment! I’m always learning new ways! Oh and leave your Pinterest URL in the comments and I will follow you too!
-Jennifer

Thank you so much for putting this together Jennifer! I cannot wait to implement all these tips!!!
Thanks for the Tips! I have a question, are you using a plug in or manually changing your pins on your sidebar? I love where you have the most popular showing but I haven’t found an easy way to do that yet without significantly slowing down my site and adding lots of images manually.
Hey Heather! I just updated the post. I use the Pinterest RSS Widget. It automatically posts the latest pins from the board I choose to display. I haven’t seen any drastic slowing of my site either. You can have this widget post one board or all of your boards. I prefer to only have one board that only has pins from my website. If you choose all boards it will post your shared boards too. Hope that helps!
Awesome! Thanks so much Jennifer, I will check it out and give it a try.
You’re welcome!