DIY Custom Doormat: Easy Personalized Welcome Mat Tutorial
Learn how to make a DIY custom doormat that’s perfect for your front porch. This easy personalized welcome mat tutorial is beginner-friendly and budget-friendly.
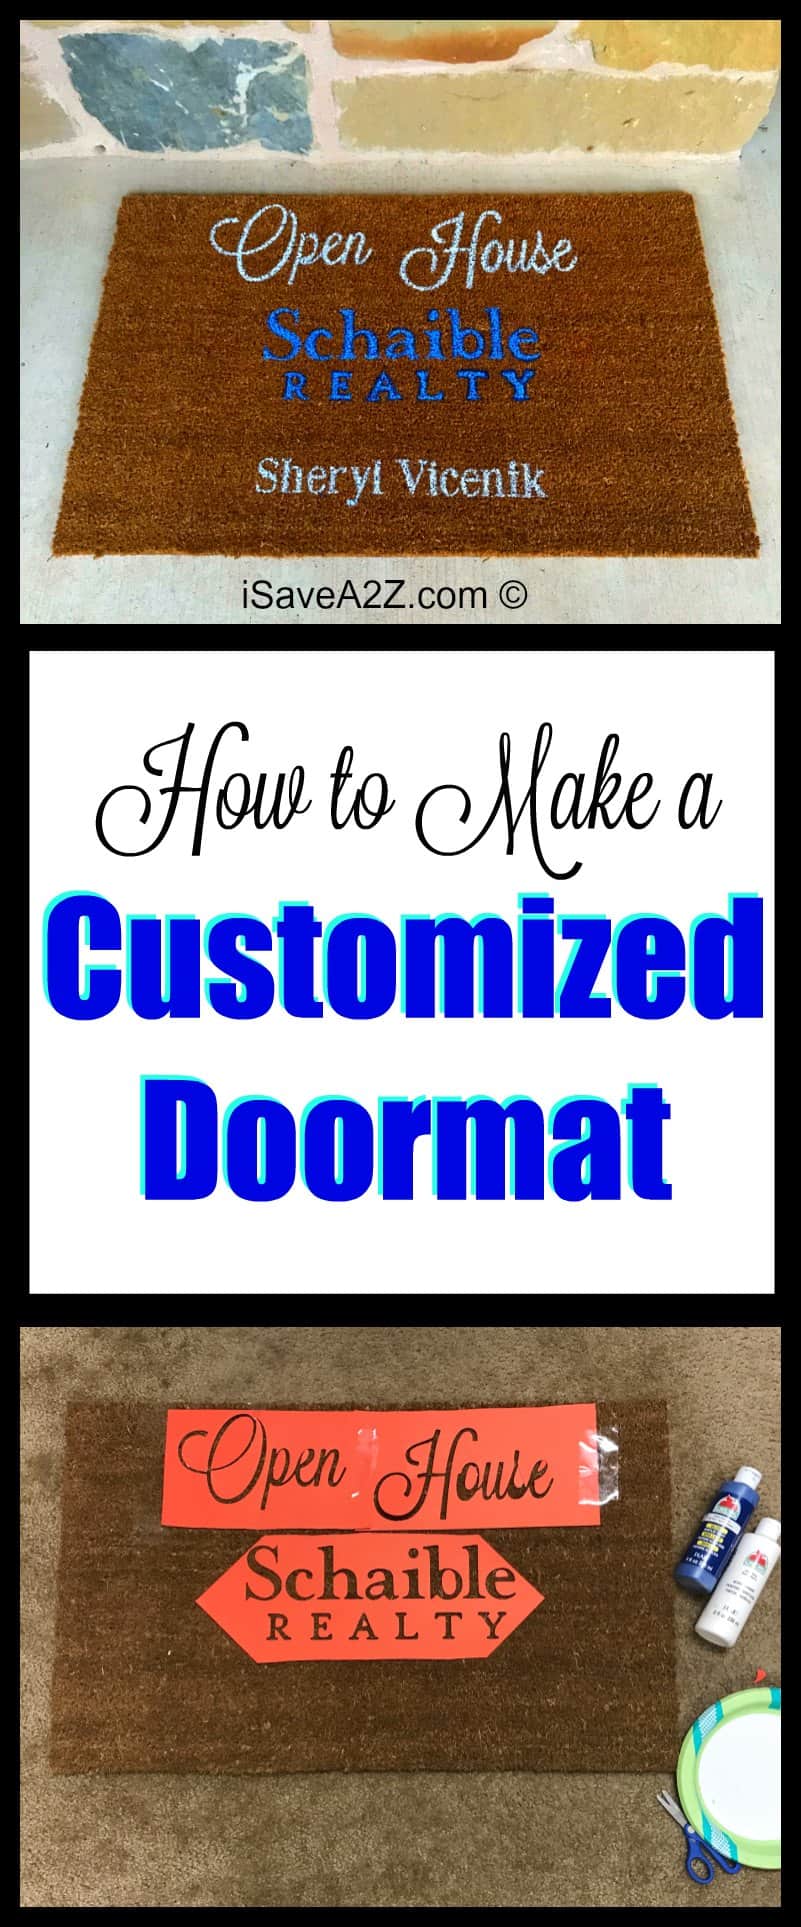
I just have to show you how I got a bit creative in my craft room today! I figured out how to make a customized doormat with some stencils and paint!
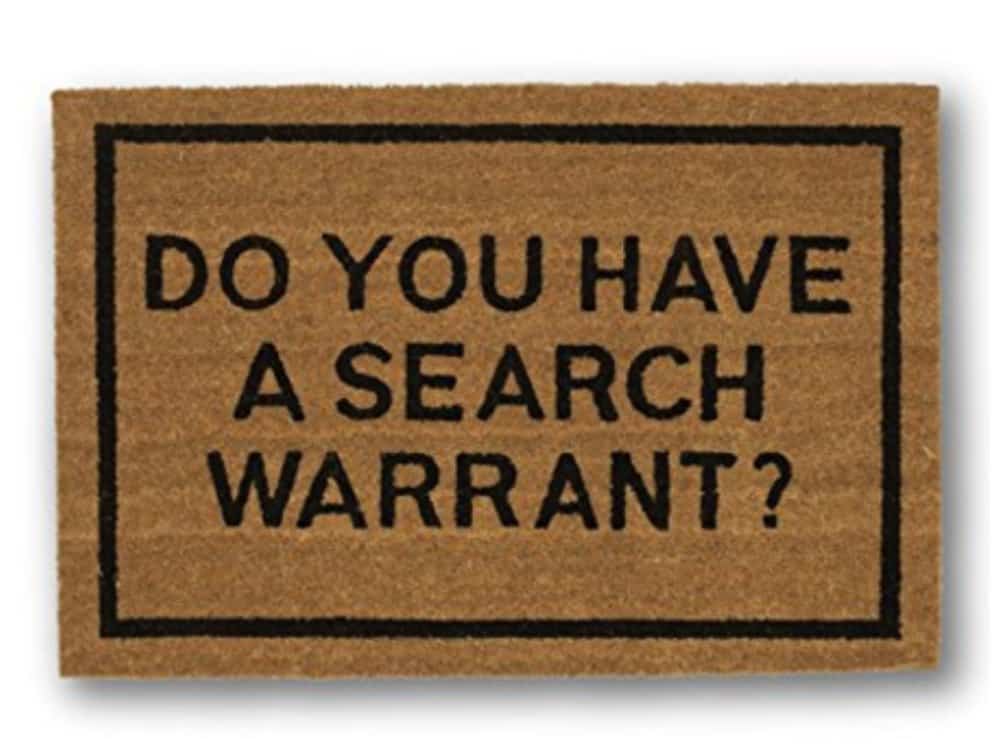
The inspiration came from this idea I found on Amazon. It’s a “do you have a search warrant” doormat! It’s hilarious! I thought to myself… it really can’t be that hard to make.
Items Needed to Make this Customized Doormat:
- Brown Coir Doormat
- Acrylic Paint
- Sponge Paint Brush
- Small Paint Brush Set
- Textured Cardstock to make the Stencils
- Silhouette Cameo Machine
- Tape
I was on the hunt for a plain brown doormat. You know how hard it is to find a doormat without a design on it?? It’s hard!!!
I ended up getting a plain brown doormat at Home Depot. They only had one left. I’m not sure if this is something they always carry or if this was the last one ever. The doormat I used is plain brown, size 18 x 30 and it’s called a Coir doormat. It’s exactly like this Coir Doormat found here on Amazon.
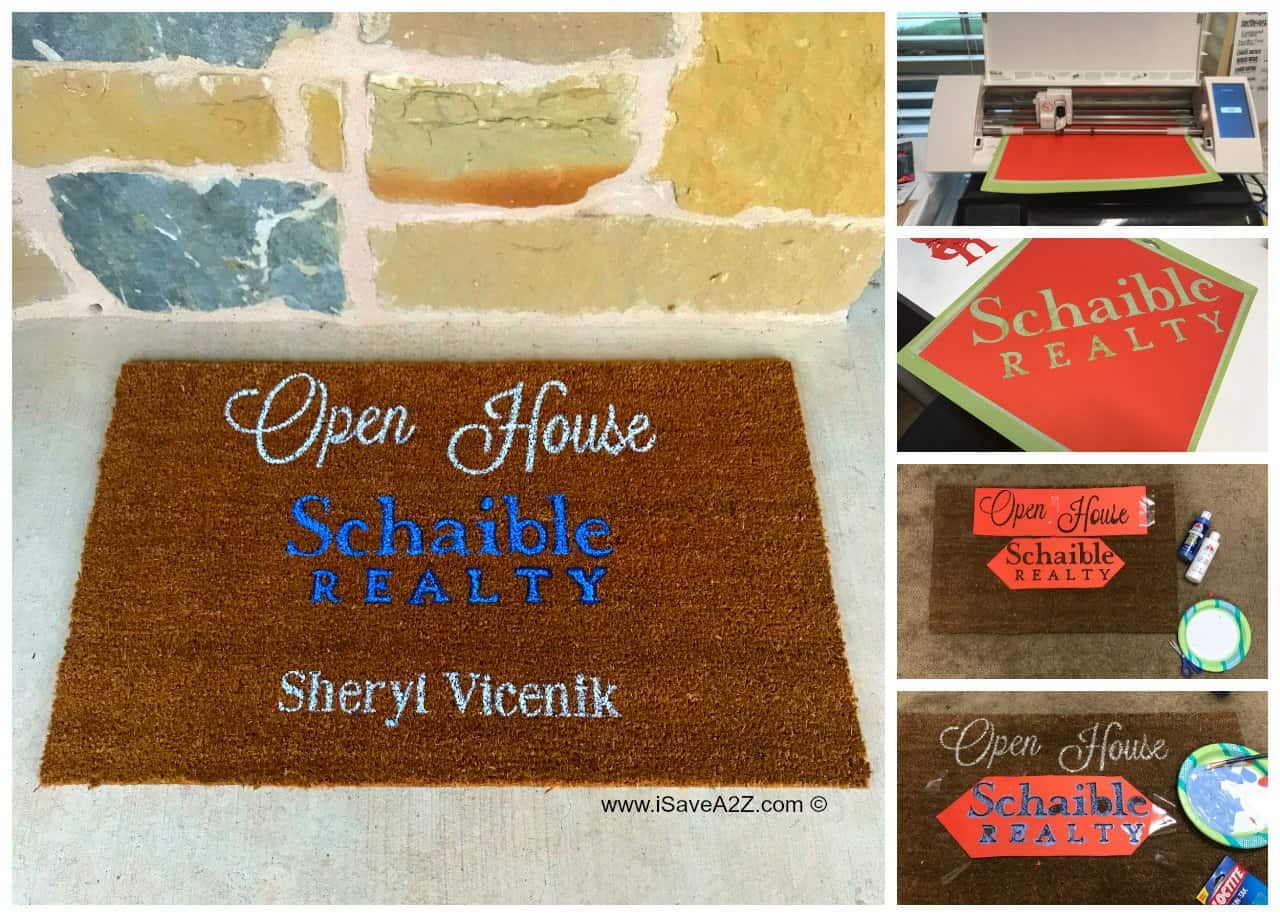
I had an idea to make a gift for a realtor friend of mine. She is constantly hosting open houses in her business and I just knew she would appreciate a customized doormat for her business!I busted out my trusty
I busted out my trusty Silhouette Cameo machine. I headed over to her company website to grab her logo.
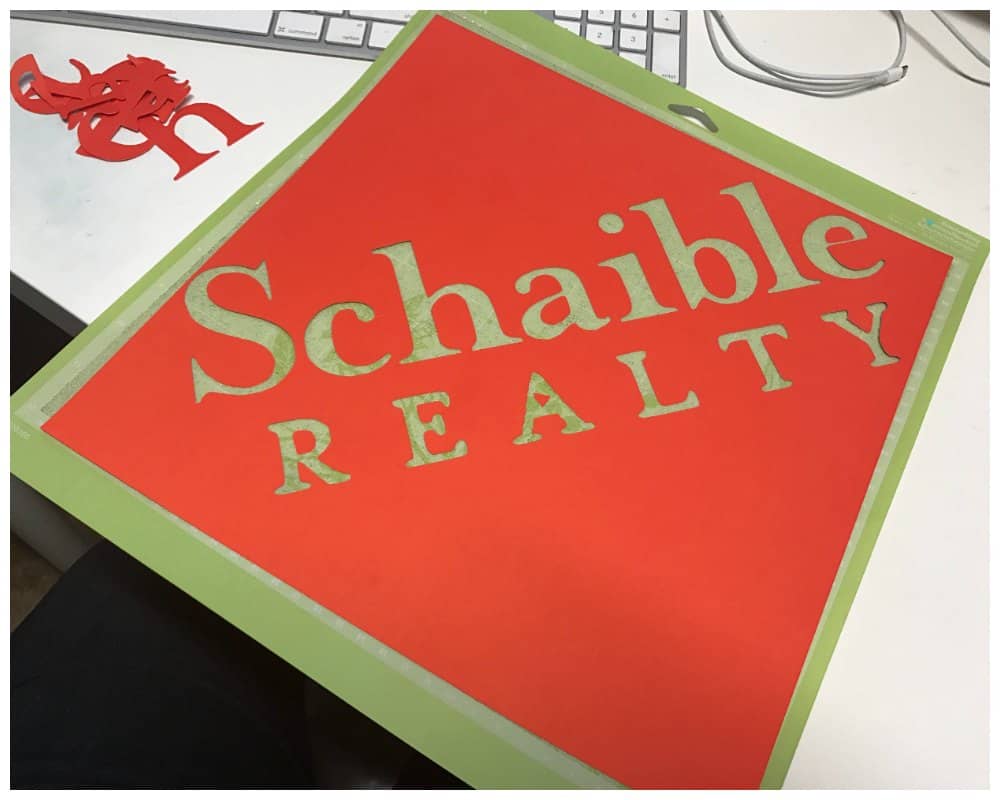
In the software that comes with the Silhouette machine, I was able to get a clean trace from the logo and create a stencil from it out of thick cardstock paper. I used the textured cardstock because of its thickness. I didn’t want to use a thin sheet of paper because I knew it wouldn’t hold up to the wet paint I planned on applying.
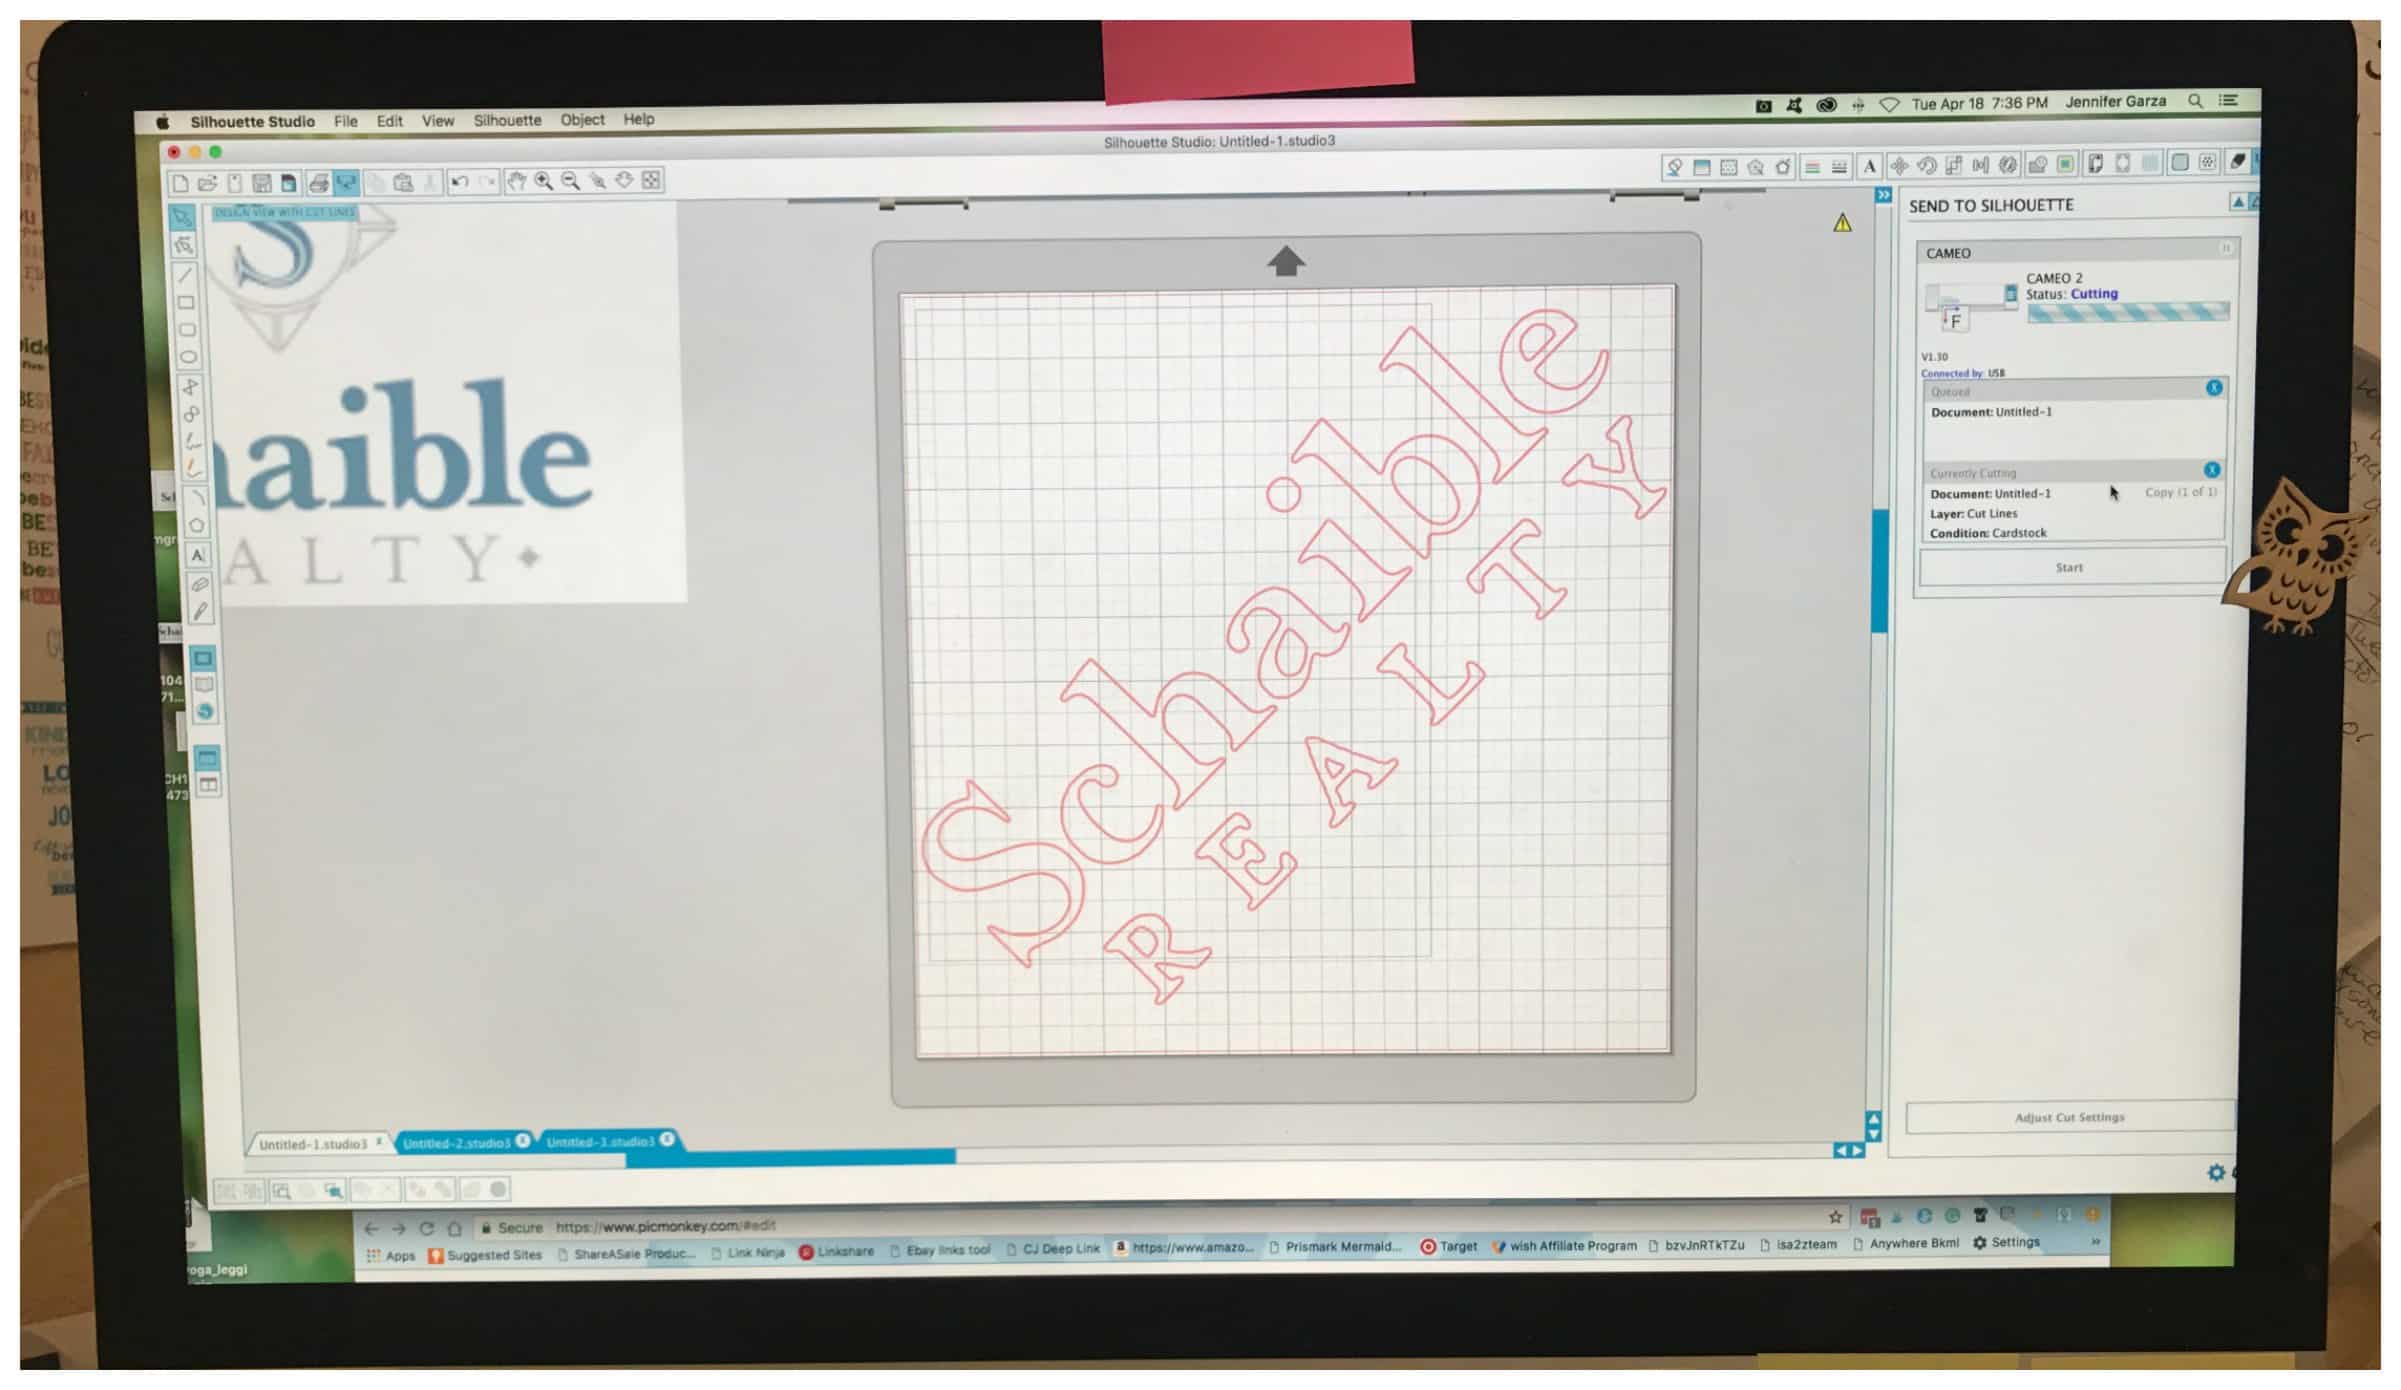
I created my stencil as big as I needed it to be displayed on my doormat. The mat on this workspace in the Silhouette Cameo is a 12×12 mat. I ended up turning the design sideways on the trace file to get it to the exact size I needed it to be. However, if I needed it to be bigger, I could have easily broke up the design and printed it on two sheets of paper and then taped them together after I printed them.
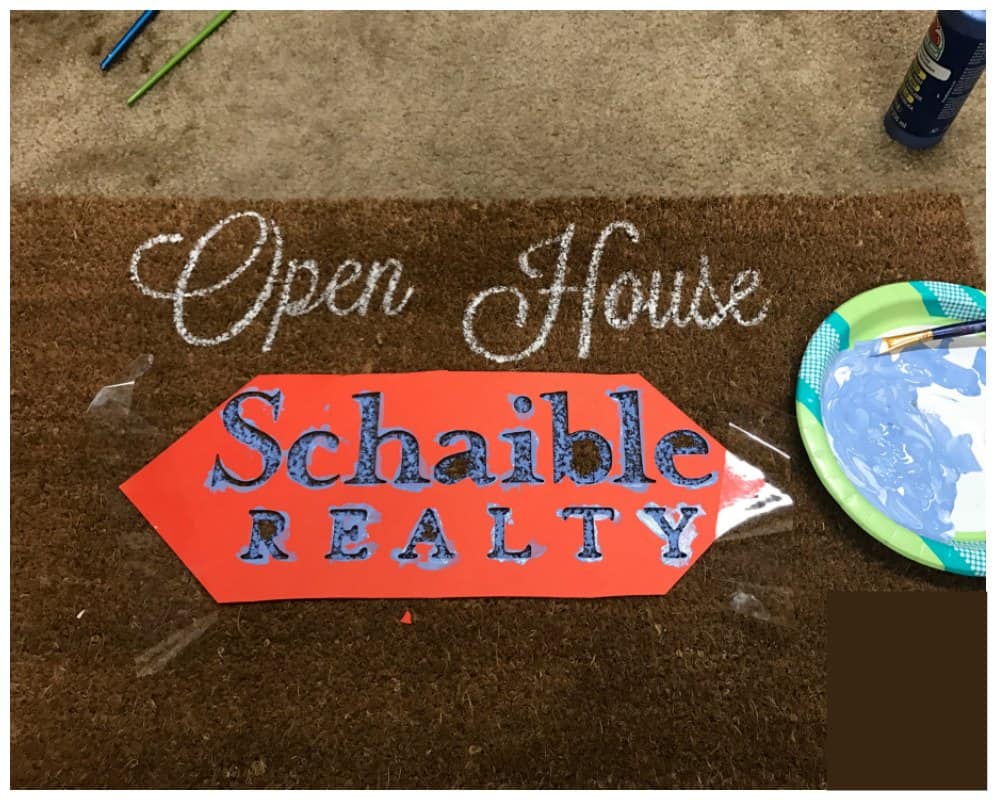
Let me give you a little tip about choosing the font. If you go with a curly font instead of a block type font seen in the above photo, it will be a bit harder to paint. I choose a curly type font on the “Open House” text on my mat and I needed a really small detail paint brush to paint all of those letters. It turned out amazing though!
I get my fonts from PicMonkey. I create all of my designs in PicMonkey and then trace the design in the Silhouette Studio software. I love PicMonkey. They have tons of fonts included in the membership but I can also import some of the fonts I’ve paid for that are located on my computer. It’s really user-friendly!
Next, I used a bit of tape to hold my stencil in place exactly where I wanted it to be. I used a paper plate to squirt some of the colors I planned on using on my design and started painting. I painted from the top of the mat down so that my arm would not rest on any of the already painted letters. I immediately removed the stencil as soon as I was done painting it to make sure I didn’t make a mistake.
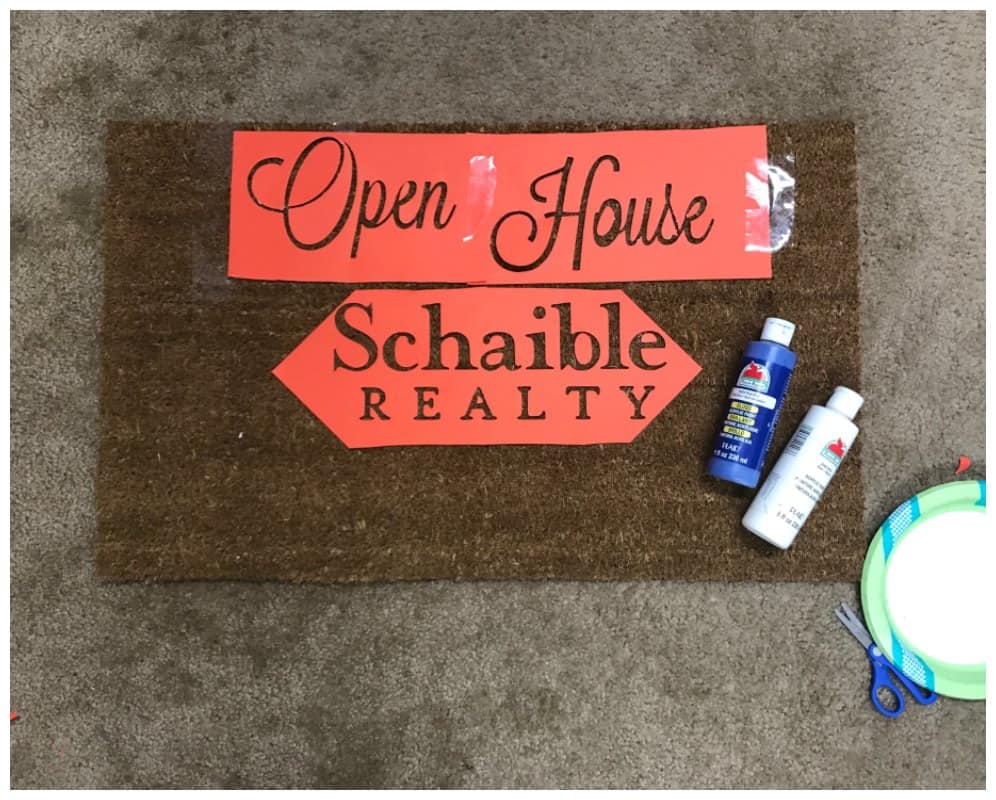
I only had some of the primary colors on hand so I decided to mix a bit of the blue and white together to match the logo a bit better. Not only that, I feel as though the lighter colors really show up better on that brown background too.
This is a photo I took outside as it lays on my porch! WOW! The colors really pop! It’s very noticeable and I am in love with it! This project turned out so well that I plan to make a few more! What a fun gift idea! Especially for those that just purchased a new home.

The paint doesn’t take long at all to dry. I left it overnight but I know it doesn’t take that long. And… this paint is super hard to get off. In fact, I doubt you will be able to correct a mistake if you make one. That’s good because you know the paint will last on the project outdoors but really bad if you make a mistake.
The other thing I should mention is the inside of the letters such as the e, b, a, o, and s. All of these letters had pieces in the middle that I was not able to tape down to hold in place.
I ended up holding the middle of the letter down with one finger and I painted along the inside of the stencil. If you have a really steady hand, you could attempt to paint around it without the stencil as long as you feel comfortable that you know how it should be painted.
I ended up giving this to my friend and her reaction to this personalized gift was priceless! It made my heart melt!
Here are a few doormat ideas to get inspiration from!
Be sure to pin this project on Pinterest for later!