
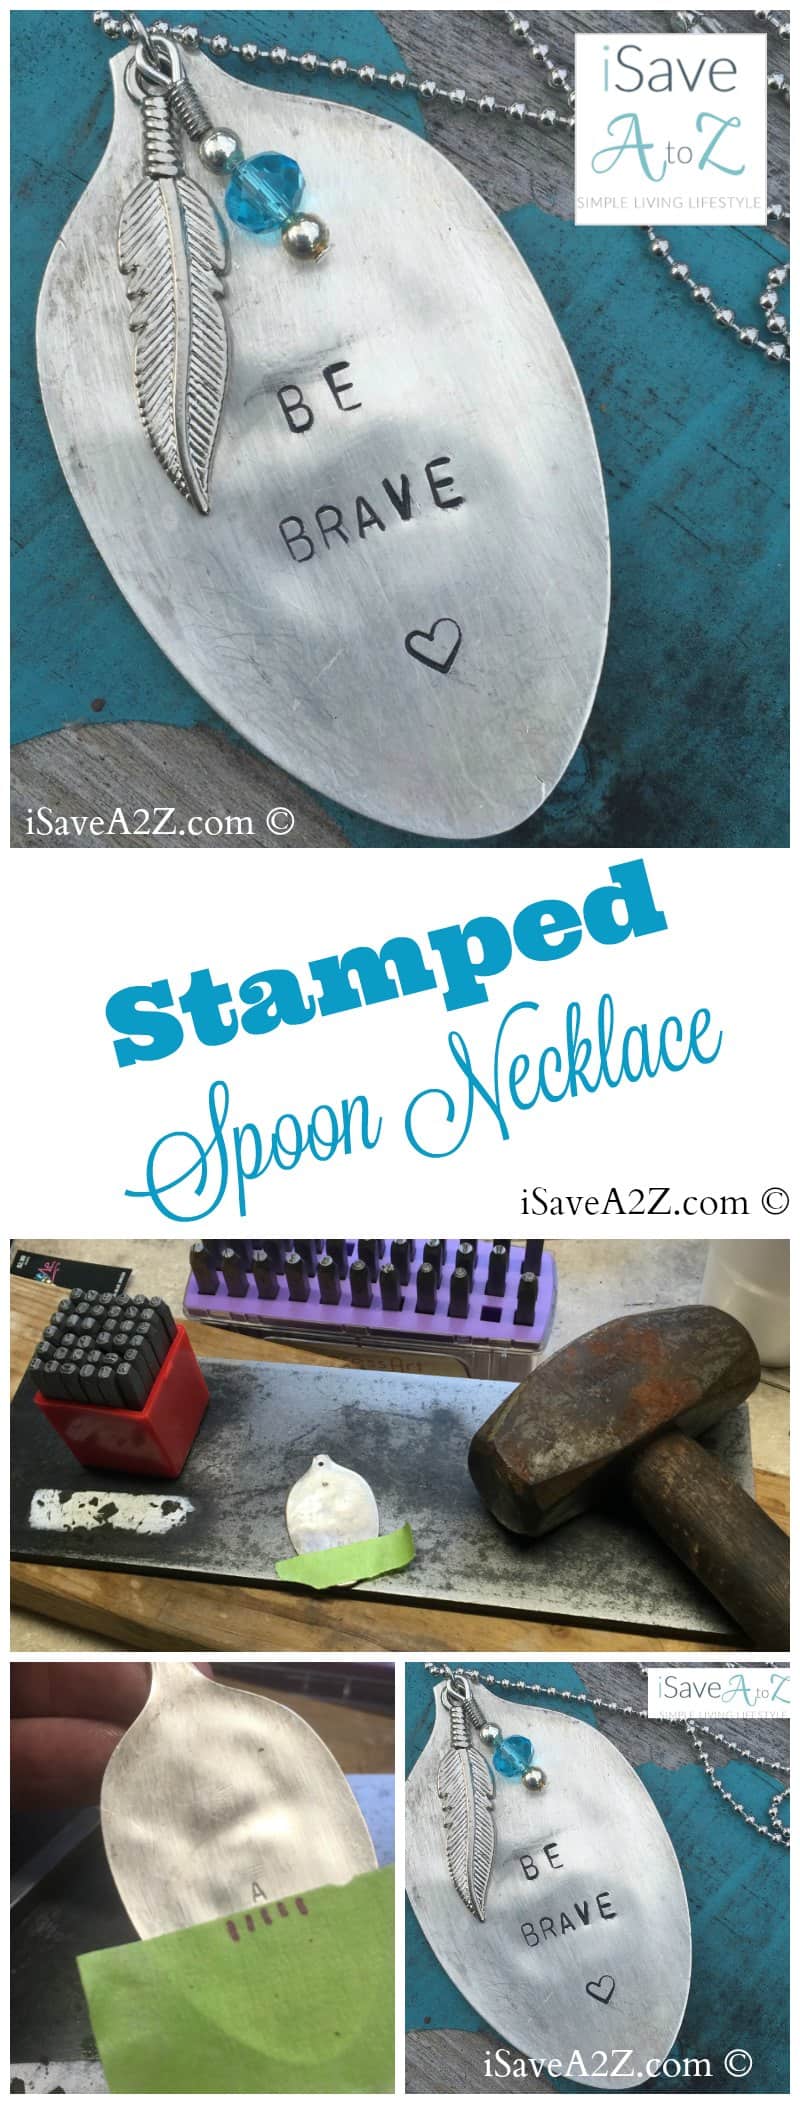
How To Make A Stamped Spoon Necklace
How To Make A Stamped Spoon Necklace
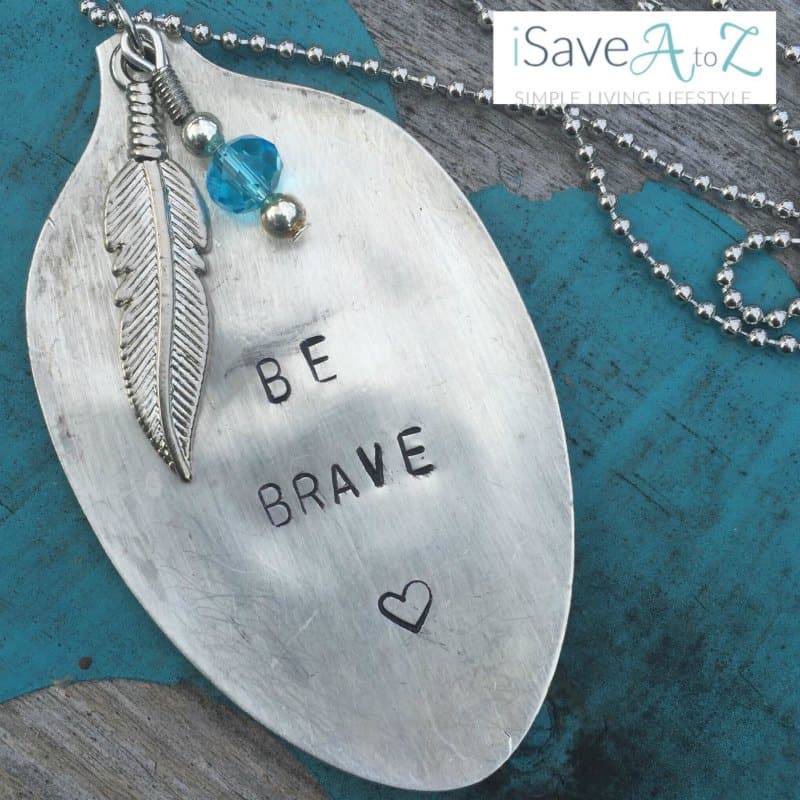
I just learned how to make a stamped spoon necklace! These are the cutest necklaces I’ve ever seen and they are adorable to wear! I put mine on a 36″ necklace chain and I get tons of compliments on it.
I’ve done a few stamping projects before but I still consider myself a beginner. I don’t have a ton of patience so don’t attempt really hard projects that take a ton of time. It’s just not for me. How to do this project is more of a visual so I created a YouTube video for you. It’s so much easier to see it being done that for me to fully explain every part.
I do want to talk about the tools and supplies I used though. I think it’s important to explain a few of these.
Stamped Spoon Necklace Supplies and Tools List:
- Solid Metal Bench Block
- Metal Stamping Hammer
- Drill
- Titanium Drill Bits
- Cloth
- Silver Plated Spoon
- Feather Charms
- Jewelry Jump Rings (I used size 6mm)
- Necklace Chain of your choice
- Needle Nose Pliers
- Grinder
- Dremel and a Metal Cutting Wheel attachement
- Safety Googles
- Sharpie marker
- ImpressArt Stamp Enamel
Stamped Spoon Necklace Instructions:
I started out with a solid metal surface. You can buy a solid metal bench block or you can do what I did. My husband had an extra piece of scrap metal that he uses for the kickstand of his motorcycle on dirt or gravel roads and that’s what I borrowed from him. You need it to be a smooth metal surface. If your surface is not smooth it could show imperfections from flattening it on the spoon.
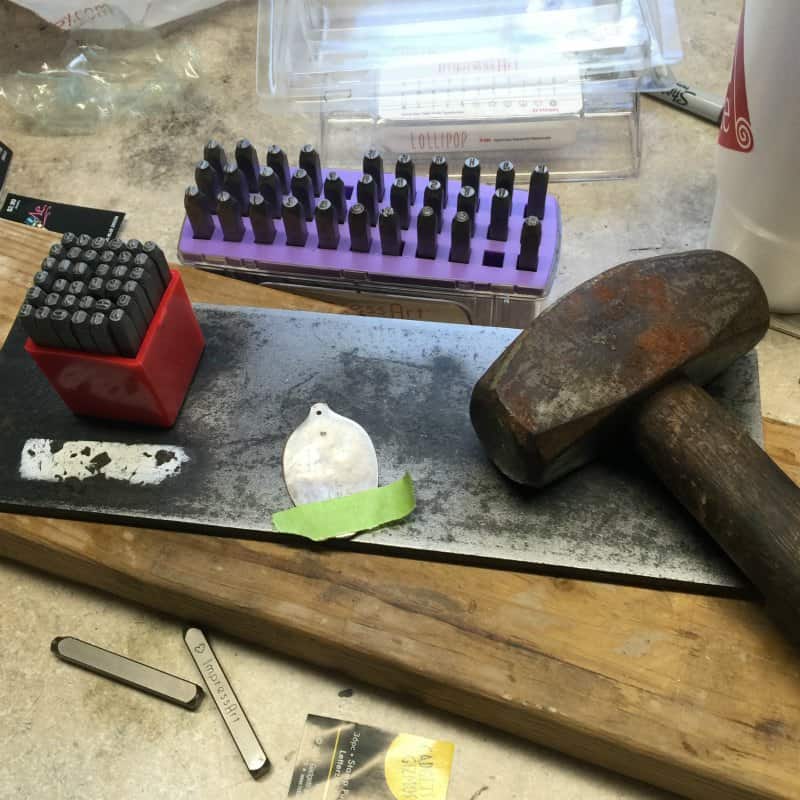
Next, you will need to use a solid heavy hammer to flatten this spoon. Again, I borrowed my husbands tools but they do have this handy metal stamping kit here on Amazon that has the metal hammer, bench block and stamps.
You will need a piece of cloth to cover the spoon. Make sure this is a cloth that you don’t care about. I put a few holes in mine when I was flattening my spoon. I placed the spoon faced down in between a piece of cloth and hammered it until it was completely flat.
I found a few silver plated spoons at a garage sale. I find that the silver plated spoons work very well. My friend told me that the cheaper the spoon the easier it is to stamp. She uses some of those dollar store spoons for her stamping projects. I might have to try that next time.
After I flattened the spoon I grabbed my safety googles and then used a Dremel with a Metal Cutting Wheel attachment to cut off the handle of the spoon before drilling a whole in it.
I used a drill with my Titanium drill bits to cut the hole in the top of the spoon to attach a necklace. These Titanium drill bits are really strong and can easily cut through metal. The size you will use will depend on the jewelry jump ring you use or the necklace size. I used size 6mm jump ring.
I also used a grinder to grind down the edges so they weren’t sharp. Be sure to wear your safety googles when using these tools with metal. You don’t want metal shavings to end up in your eyes.
You will need some cute stamping letters. These can range from $10 all the way up to about $60+ depending on the font you want. I have found some pretty good deals here on Amazon or you can pull up the 40% off weekly coupon on the Hobby Lobby app and get a set there! I ended up getting one set from Hobby Lobby with my coupon and the rest of my mini sets on Amazon. These sets come in uppercase letters and lowercase letters. It’s fun to have both and mix up the font styles.
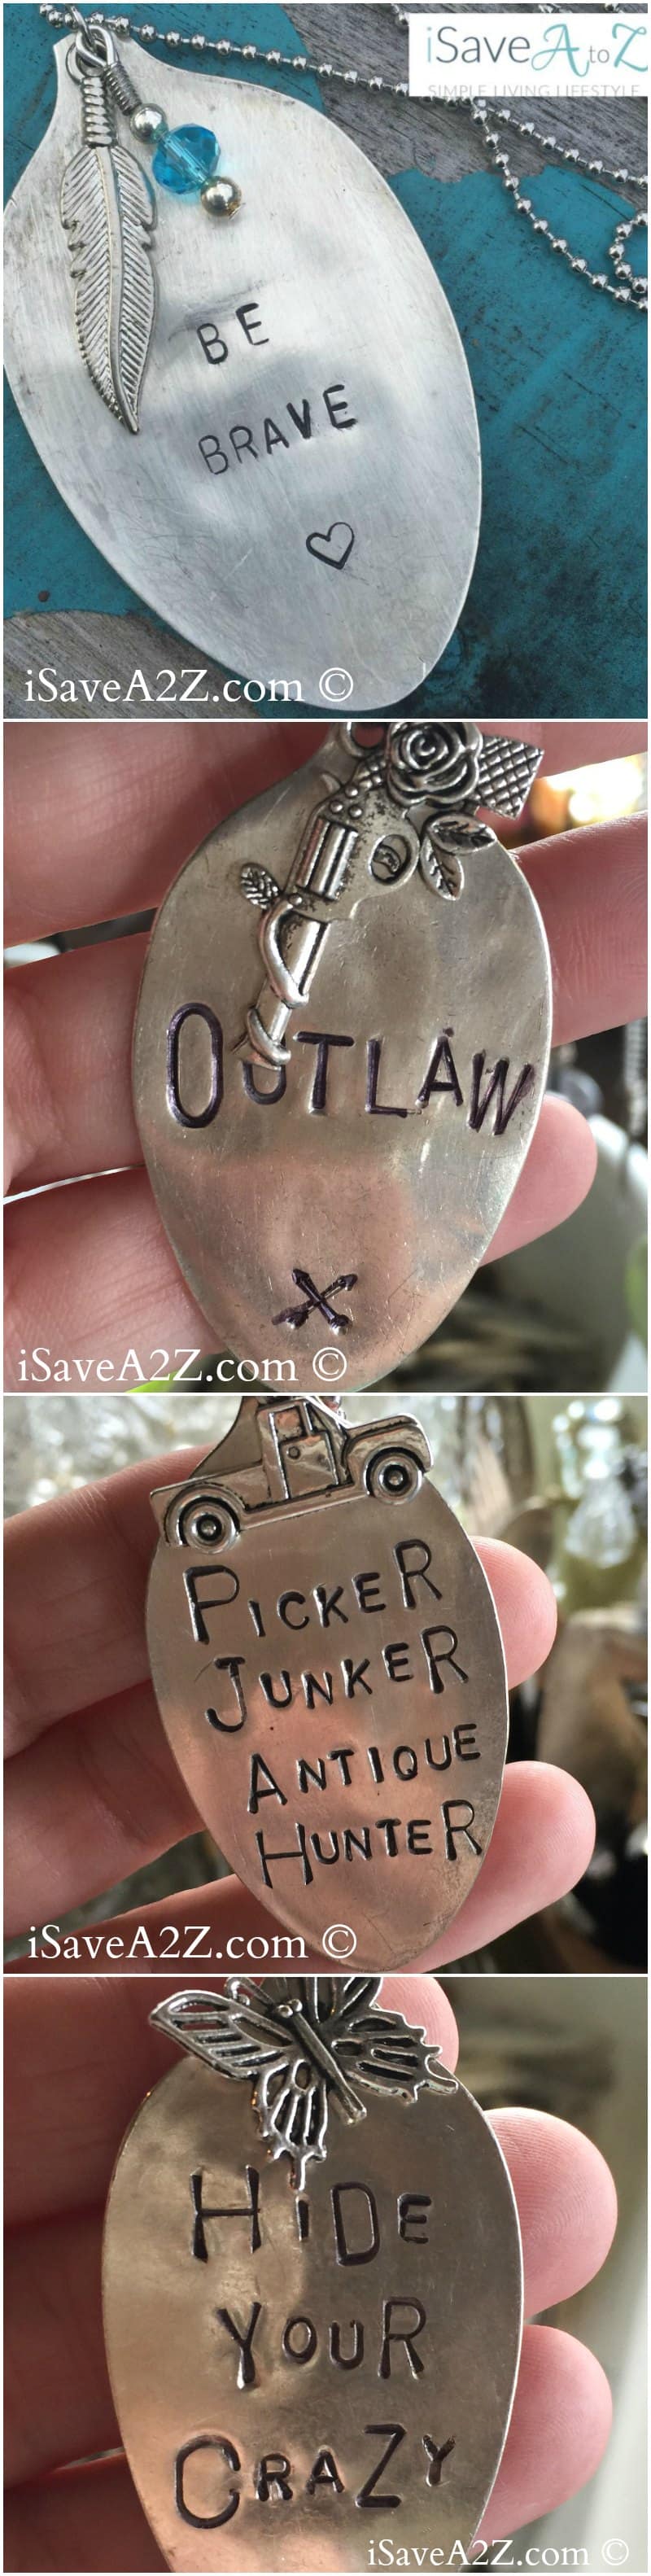
Here are a few examples of different fonts types, different font sizes and different charms:
If you are a beginner I highly suggest stamping some objects you don’t really care about. I can almost guarantee you that your first project won’t come out as expected. I speak from experience on this part. I started off stamped “Be The Change” saying on a few pennies so that I could really get used to the metal stamp sets and their spacing.
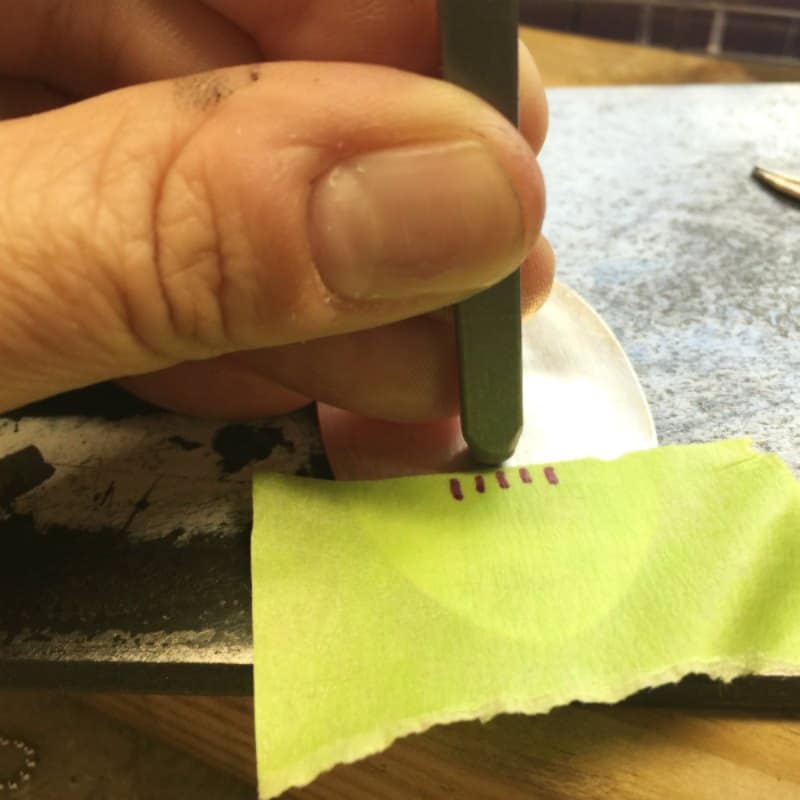
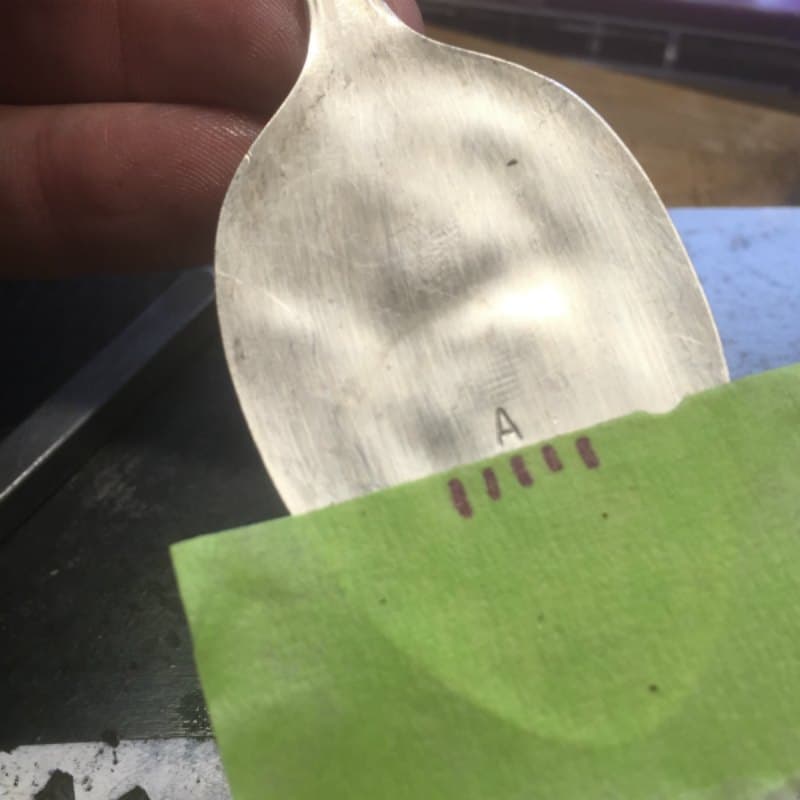
I also use painters tape to help guide my letters or numbers when I’m stamping. I usually start by stamping the center letter of a word first (as seen in the photos).
When I use the hammer and metal stamps, I hold it really tight in place so that the hammer doesn’t make it slip when I am pounding on it. I usually give it about 4 to 6 good pounds from the hammer to make sure the letter or number is indented on my metal.
It was at this point that I noticed my spoon was a bit dirty. There is a trick to cleaning silver plated spoons! I heated up about two cups of water in a microwave safe glass container. Then I grabbed a small piece of tin foil and crumbled it up in a ball. I placed the tin foil and baking soda in the hot water. I placed my spoons in the water for about a minute and they came out super clean! I’ve seen this trick done a few different ways. If you have a lot of silverware you may want to heat enough water to fill about halfway up a deep rectangle baking dish. Line it with tin foil. Then place your silverware on top of the tin foil. Pour the hot water over the silverware and then sprinkle a generous amount of baking soda over all the silverware. You will see it start to bubble and it will be completely clean in a minute or two! I’m not sure why the tin foil (Aluminium foil) and baking soda work, but I know it does!
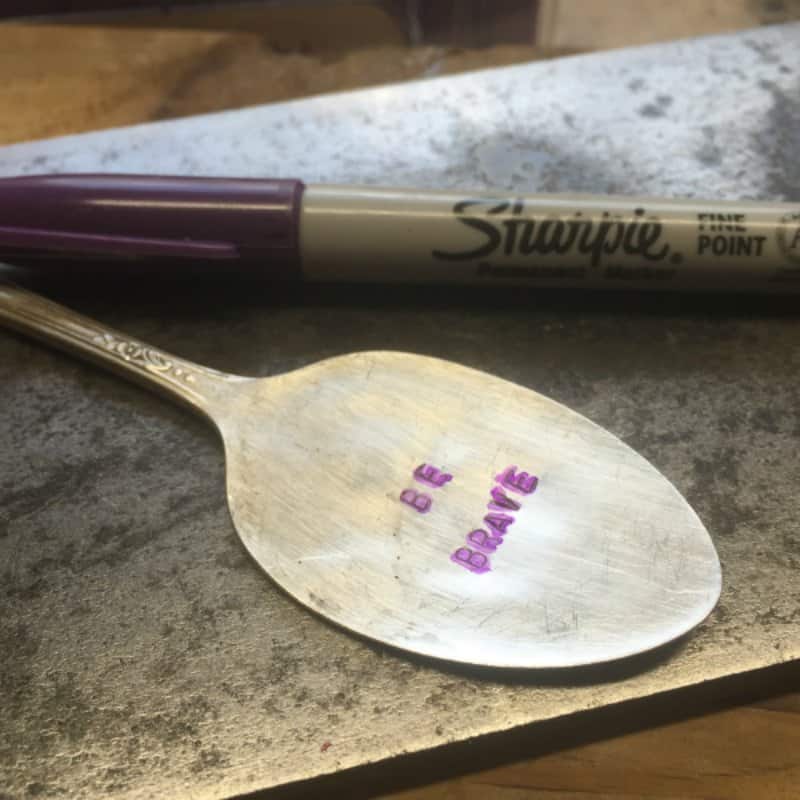
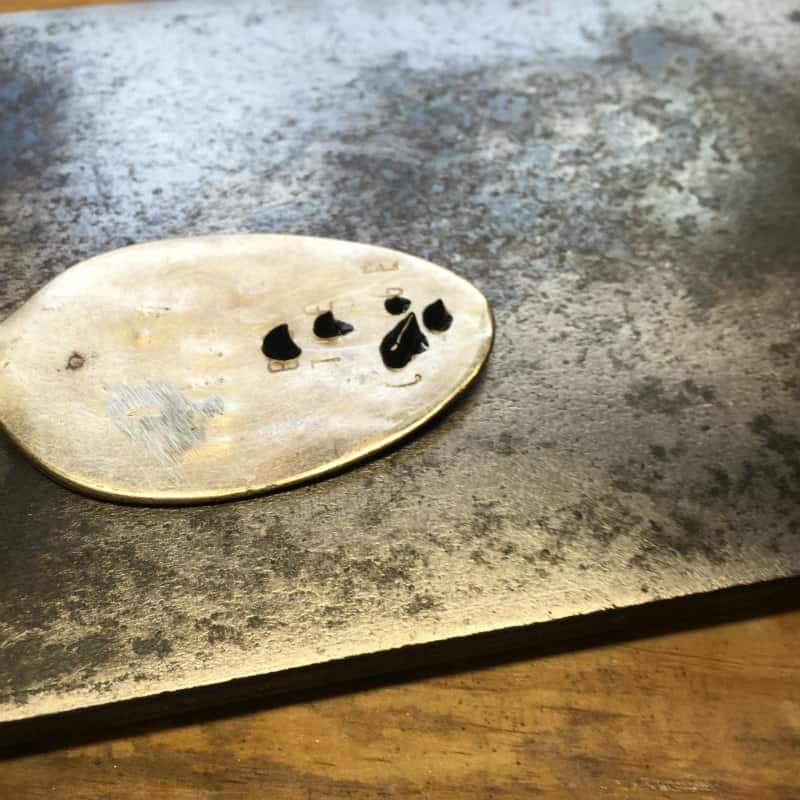
Once your piece is stamped you will want to darken the numbers and letters so you can see them better. There are two techniques you can do. You can use a simple permanent marker, like a Sharpie. Or you can use this ImpressArt Stamp Enamel. The enamel does come out a tad darker but honestly I don’t think you need to spend the extra money to get the look you want. I was able to use a sharpie and get a nice look too. I went over it a few times with the lighter colors and then after it dried I whipped off the excess with a cloth and alcohol. Works like a charm!

After it was stamped I grabbed a few charms and attached the necklace and charms using my needle nose pliers to attach the jumper ring to my spoon.
Voila! Your masterpiece is finished!
Feel free to pin it on Pinterest for later!
Two questions if I may: first is where do you find you’re charms for the spoons? And second, do you think the stamp enamel would work on things etched with a Silhouette or Cricut?
You can find the charms on Amazon or at your local craft store. I purchased these charms at Hobby Lobby. The vinyl cutting machines don’t etch the metal very deep. I’m sure it would work but I wonder how dark it would be since the cut isn’t very deep. I wonder if a fine tip sharpie wouldn’t work just as well for that scenario Casey. Let me know if you end up trying it. Now I’m curious.
I designed and stamped the bottom 3 spoons..you can buy them at Cherry Tree Creative in Taylor Tx.Ty are $11.00…Thanks
Nice to meet you Minerva!!!! I was at the antique show but when I asked who designed them they told me you were not there when I was there. I wanted to talk with you. I love your designs! Thanks for sharing where people can purchase them also!