
DIY Comic Book Shoes Tutorial
DIY Comic Book Shoes Tutorial
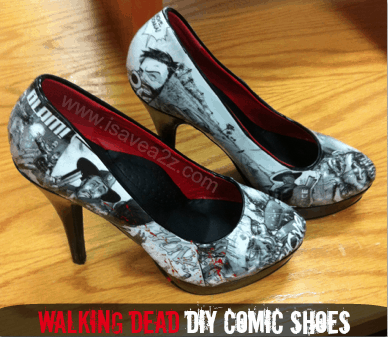
The latest Walking Dead Fan Craze has inspired these DIY Comic Book Shoes tutorial! I’ve always been a huge fan of Mog Podge so why not on shoes!
I just had to have a pair of Walking Deal Zombie heels of my own!
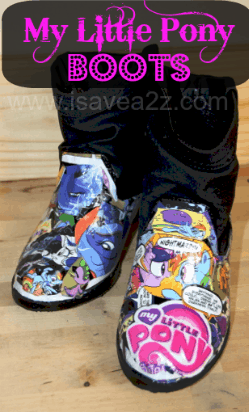
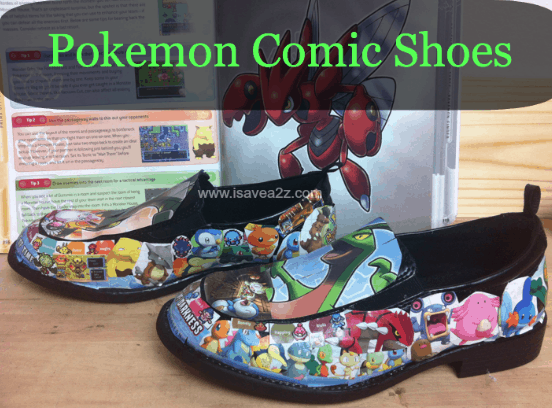
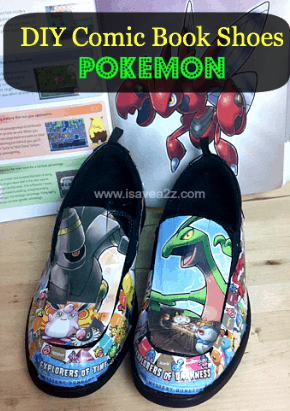
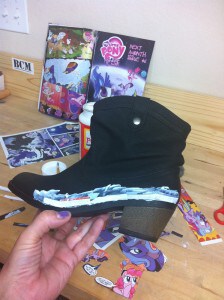
My kids had to have some cool comic designed shoes of their own. One child really likes Pokemon, while the other really likes My Little Pony. Three different shoe designs, no problem!
DIY Comic Book Shoes Tutorial directions:
First, you need to start off with a pair of shoes that have a leather or shiny material. I wouldn’t suggest using a cloth type shoe such as Tom’s Shoes. We found heels, boots and a regular pair of boys dress shoes.
Here are some other things you need:
A really cool comic or regular book of your choice
Mod Podge Lustre (Lustre gives it a glossy shine)
Scissors
Paint Brush (wide brush works best)
and a little bit of creativity
We started by cutting out our favorite patterns or characters from our comic book. (cutting up the comic was a bit difficult for sentimental reasons so be sure it’s a book that is NOT a collectible)
We started off by cutting strips of the book and outlining the bottom of the shoe with the strips like this:
Next we used the mod podge to paste our favorite characters on the shoe over lapping one another. If you don’t like the overlapping look then be sure to measure and cut exactly where you want your pictures to be placed.
Note: The My Little Pony Boots were done with the overlapping method while the other two shoes were done with a precise cutting technique. (my 8 year old did her My Little Pony shoes herself)
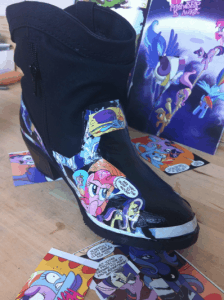
Tip: Be sure to keep your favorite pictures for last because those are the ones that will pop out the most.
Finally once you have placed all the clips you want you will wait for that layer to dry. Ours took about 2 hours. You want them to dry completely before starting another layer of mod podge.
Once dried, run your fingers over all the clippings to make sure they are all secure and in place. I did find some that popped out a bit. Add another layer of mod podge and repeat the drying time.
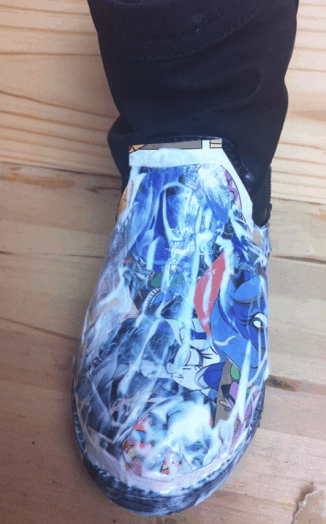
Mod podge works as the glue and the sealant for this project. You won’t need anything else. It’s also important that you put it on thick and as evenly as possible. It will look almost white and you won’t be able to see your images through the glue but it will dry clear. Just like this:
Repeat the mod podge with a third and final coat.
Once the final coat is completely dry you can use a piece of fine grade steel wool to smooth out the glue parts if you find it to be bumpy. If you put it on evenly you won’t need this step. You can use a nail buffer to make it shine more too but this is also optional.
Here’s another fun idea for shoes! DUCK TAPE SHOES! Duct tape would be so much easier and no drying time! lol… Now the duct tape companies just need to have the Walking Dead comic designs! I did find Avengers Duct Tape!

(photo credit: The Creative Lady)

Here’s a really good book for Duct Tape Projects! This one is one the Amazon’s Best Sellers list!

Enjoy!


Can I print out black and white pictures to glue on my shoes, or do they have to be “newspaper” type?
Yes you can. It may take more glue though because the paper is thicker but it can be done. I wouldn’t suggest a really thick magazine cover though.
Awesome stuff! I love the Walking Dead heals! Did you do the red lining on the heels or did you find them that way? If you did them yourself, would you mind sharing how?
Good eye J’Aime! I was going to write a whole other post on how to paint the soles of your heels. I used acrylic paints (2 coats). Paint one coat then let it dry completely. Paint another coat then let it dry completely again. Then cover it with the same Lustre Mod Podge (only one coat) as the final coat. I didn’t paint the part that comes in contact with the ground though.