
Luxury Vinyl Plank Flooring DIY Project Tutorial and Review
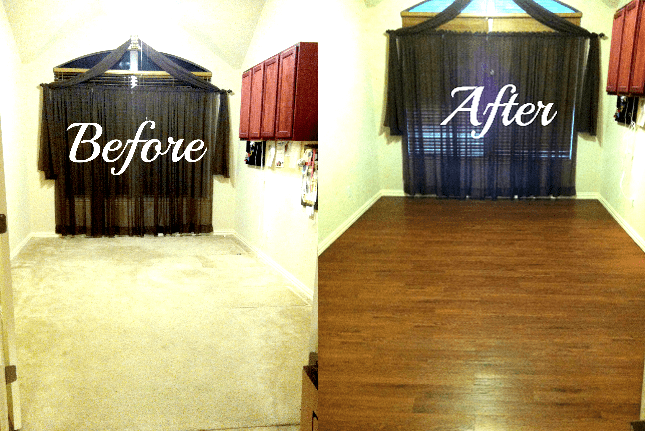
Luxury Vinyl Plank Flooring DIY Project
I’ve always wondered how Vinyl plank flooring holds up to everyday life. I’ve done a ton of research and decided to give this project a go!
I started this project in a spare bedroom just to test it. I wasn’t confident enough to put it in my office until I tested it out on a bedroom that was less used. When I think of vinyl flooring I automatically think of those ugly square tiles we used to see in the 70’s and 80’s! Eeewww!
I shopped around at a couple different local hardware stores for my project. My budget is tight because I have two rooms to complete and I also wanted to install a shower door on our spare bathroom tub.
I’ve done a few flooring projects before. One of my favorite projects was the Pergo or Laminate flooring in my last house. The Laminate flooring I installed still looked brand new after 8 years of use! I’m not big on carpet. Our family has lots of allergies and carpet has always been a problem for us. The laminate flooring is a bit more pricey than I wanted to do but I still kept it as an option.
I looked at ceramic tile but the price was out of the question. Not to mention I didn’t want to do the manual labor that goes with that project. Not for a spare bedroom anyway.
I didn’t even want to look at the vinyl flooring options because I had that image in my head of the ugly old vinyl squares that I couldn’t get rid of. I sales rep pulled me in that direction and I was impressed at how far vinyl flooring has come. They have vinyl flooring that looks like wood! Whoa! How cool is that?! The price was only going to be about $250 for everything I needed for our spare bedroom that measured 12 x 10! Wow! What a bargain too.
My vinyl plank flooring project has begun! The prep work for the flooring is the hardest part and the most time consuming. Laying the actual flooring is easy to say the least.
How to install Vinyl Plank Flooring
Remove the current flooring. Mine was carpet. I used a utility knife to cut the carpet down the middle of the room, roll it up and dispose of it (same for the pad underneath).
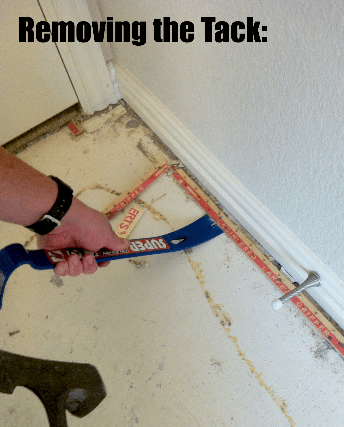
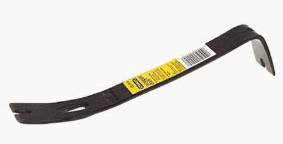
Then I used a very small Stanley Pry Bar and hammer to help me remove the tack. Tack is a small piece of wood strip that has nails on both ends to grab the carpet and hold it in place.
Once you remove the tack it will leave small holes in the concrete that need to be leveled and filled. I used some ready mix concrete patch to help fill and level those holes.
I absolutely could not have done this project without my Dewalt Knee pads. These babies saved my knees. They are not cheap but worth every penny and can be found at your local hardware store.
Tip: If you have high allergies you may want to wear a medical mask to help filter out the dusk that you will come in contact with.
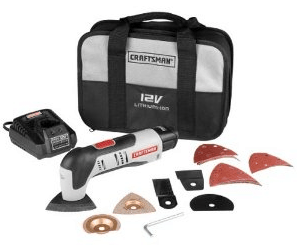
Once the tack is up and the holes are filled I used my Craftsman 12 volt Lithium-Ion multi-tool to trim the door jams and trim under the baseboards for excess concrete bumps.
Here’s a quick video on some vinyl plank flooring installation tips:
Next you will need to scrap all of the glue residue on the concrete off. I used a concrete scraper tool (seen here on Amazon) that I already had on hand. (Retails for about $25)
Next I grabbed my small Shop Vac and cleaned up all the carpet pad, glue, and dust residue on the floor.
Before you do the next step you need to make sure the patches you did for the concrete holes and completely dried. Once it’s dry you can apply the self stick Tile Primer. This prepares the surface for the best possible stick when laying your vinyl plank flooring.
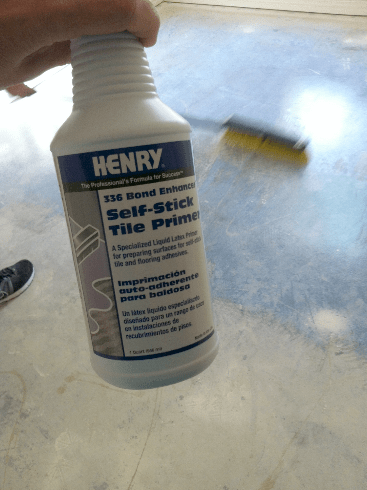
Notice in the photo above half the floor looks shiny. We are applying the primer. It goes on wet and takes about 5 hours to dry completely. Do not start laying your flooring until this has completely dried. Once it’s dried you will hardly feel anything on the floor. For some reason I thought it would be really sticky but it’s not.
Let that dry and take a long break!
Now it’s time to lay your vinyl plank flooring! This is the fun part and pretty easy too!
I ended up purchasing the 4-in W x 36-in L Oak Luxury Vinyl Plank from my local Lowes. This is the exact product you see in the photo above.

There are arrows on the back of the plank strips and you want to always have them going in the same direction to follow the pattern. Always purchase about 10% more than what you need to leave room for errors because you can always return what you don’t use. My local Lowes let me return whole boxes or even single planks I didn’t use.
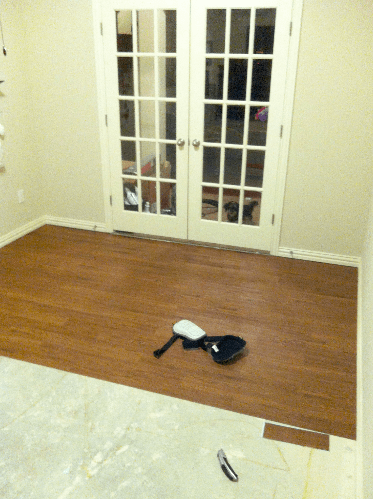
Laying this vinyl plank flooring is as easy as peel the wrapper and stick it to your prepped floor! Start at one end of the room and move continually in the same direction.
Tip: You want to offset your planks at the end of each row. For example, if you have a complete plank that you didn’t have to cut at the end of the row you will not want to place another plank right after that on the next row. You want a staggered pattern look so these planks should never match up. In the photo above you can see I cut a piece of the plank to start my next row.
When you cut your plank I suggest using a utility knife with a fresh blade (not a dull blade) and score where you want it to be cut. Once the plank has been scored, simply bend the plank until it breaks in the scored position.
Tip: Always place the cut end under the baseboard.

Once you have finished laying all the vinyl plank flooring tiles you will want to finish off the room by adding a transition moulding floor strip to the opening of the door and closet. I really like how easy the 4 in 1 floor moulding transition strips are to install. Take a plank and match the color to your flooring. Trim the strip to the opening. Then drill in a metal bar to the concrete to hold this moulding in place. Once the bar is screwed in securely to the floor the moulding snaps in for a tight and secure fit. No glue needed.
I enjoyed this project so much that I used the same product and replaced the flooring in my office. My office space only cost about $200 since I had some of the tools and supplies left over from my first project.
I highly recommend the vinyl plank flooring. I used the Style Selections Luxury Vinyl Planks found at my local Lowes Hardware store. It’s durable, high quality, beautiful, easy to install and fits almost any flooring budget. I don’t have one thing bad to say about this product. The texture of the wood planks make them look like real wood, and it feels wonderful to walk on. We’ve splashed water on the flooring and the water simply beads up. Very easy to dust mop too. Last great advantage is that it has a lifetime warranty! I tested how easy it was to scratch, held up 100% better than the much more expensive click vinyl planks from big name companies that cost more than 3 times as much and have much shorter warranties.
If you are having trouble viewing the above Animoto video you can click here to see it directly.
Happy Home Improvements iSavers! I hope you’ve enjoyed my little project!
Also check out some of our other crafts! Such as our:


Great article. Thank you for sharing this informative and helpful post.
My husband and I have been looking at the Luxury vinyl flooring for our home as well. I actually saw it in the Family Handyman magazine a few months ago and they talked very highly of it as well.
Your post is so informative on installation! I’m going to keep this handy for future reference!
Thanks!
I was surprised at how easy it was to install too! I think my favorite part is how durable it is though. I have it in my office and my kids are constantly sliding the office chair all over that room and there’s not one mark on the flooring. In our piano room we have real wood flooring and there’s no way I would let them play that rough in that room!
great review…we have laminate flooring now and it hates water……swells up at the seam lines..i’m really interested in the vinyl planking…
thanks
I’ve had both but I am really impressed with the Vinyl. I’ve always thought of vinyl as floors I used to see in the late 70’s and such and I couldn’t believe how nice the new vinyls flooring styles are!
This is very informative blog post. A complete guide on vinyl plank flooring installation. This is blog is going directly to my bookmarks list. Well done Jennifer!!Thanks,Allen Parker
http://www.expressflooring.com/vinyl.php
Thanks Allen! It was easier than I thought!