Handmade Leather Cuff Tutorial (soft leather cuff)
Handmade Leather Cuff Tutorial
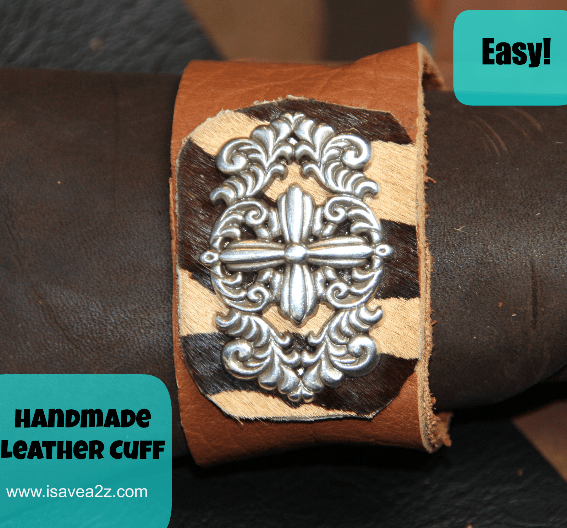
If you are looking for a fun and stylish craft, you’ve just got to try making a diy leather cuff! These handmade leather cuff bracelets are fun to give as gifts too!
I’ve picked out some really soft leather for my cuffs. You can make any width you want. I personally like the leather wide band cuff myself! But it also has to be a soft leather cuff too! Those really thick and hard pieces of leather irritate me but it’s all about preference.
The rivets can be fun too. You can see them used in the dragon leather cuff wristband in the above photo. Want a leather cuff strap watch?! Use rivets to attach that watch face. Womens leather cuff watches are very much in right now! Oh, how about the wide leather cuff watches! The possibilities are endless! Hopefully this tutorial will get your creative juices flowing!
Let’s begin!
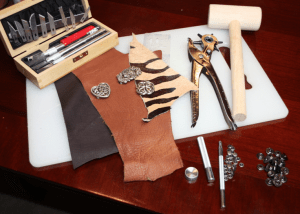
Items needed:
- Leather Remnants
- Leather Snaps Line 20
(Line 20 size is a decent in between size that is not too small and not too big for leather cuffs)
- snap tool (Here’s a Line 20 snap tool with snaps included)
- hammer or mallot
- leather hole punch tool
- Xacto knife or rotary cutter
- Cutting board or pound board
- tape measure
- rivet tool and rivets (optional)
- conchos for leather (optional) These are decorative pieces that have a screw backing. Here are some I found on Amazon
.
Instructions:
Get all your tools in order
Measure out the amount of leather you need. I measured my wrist at about a 7 inch. So I cut the leather at 8 1/2 inches to allow room for the snap.
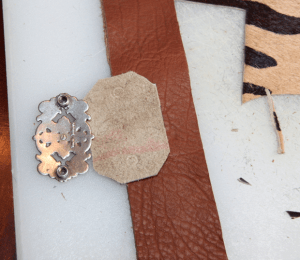
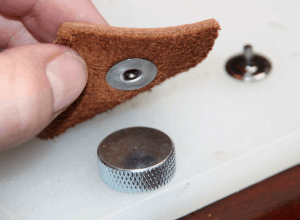
I used a leather concho with a screw backing. I pressed really hard to make marks in the leather so I would know where to punch my holes. If you look closely you can see the tiny rings on the backside of that leather piece.
Punch the holes in all the leather pieces.
Looking good!
Finished screwing the backing on the concho.
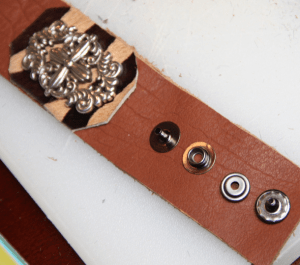
Figure out the snaps. I ended up putting them in order. The top two are for one side and the other two are for the other side.
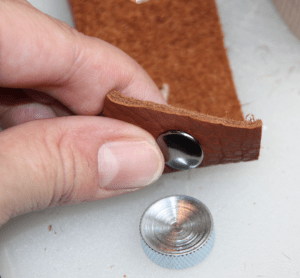
Notice the round tool piece. It’s flat on one side and curved on the other. Whenever you are about the hammer the flat piece, make sure it’s on the right side.
Here’s a photo showing the flat piece of the snap.
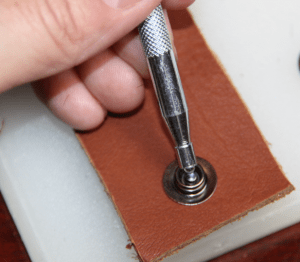
This part was a bit tricky. I am using a Line 20 snap tool with size line 20 snaps. You will notice a little ball at the top part of the tool. The snap will have a cylinder sticking up and you need to place the round part of the tool into that cylinder. You will use the hammer and bang on the snap hard. The tool will peel back the cylinder piece and fasten the snap when you have completed this task. If you don’t hit it hard enough, you won’t see that piece start to curve downwards. (Tip: It’s very important to make sure you are using the right size tool for your snaps. If you don’t, the snaps will not work)
Now for the other side of the leather cuff bracelet. Notice this time the round tool piece at the bottom is flipped over to work with the curved side. This will allow you to complete the process above but without damaging the curved part of the snap.
Voila! Almost done!
Last step, make sure the snaps actually work.
I had fun and created a few leather cuff wide and soft bracelets for me and my girls! It was so much fun!











I loved this tutorial. I am forever not being able to get the snaps correct, which size, which setter… kinda of thing. I appreciate you explaining, step by step, and of course your photos are really helpful. thank you so much. I appreciate you….Penny