
How to Make a Chopsticks Basket
How to Make a Chopsticks Basket
Here’s a great tutorial on how to make a chopsticks basket! I recently came across a Chopsticks Basket here on Amazon![]() and thought I could possibly make one of those. How hard could it be right? Well, let me tell you… It’s not hard at all.
and thought I could possibly make one of those. How hard could it be right? Well, let me tell you… It’s not hard at all.
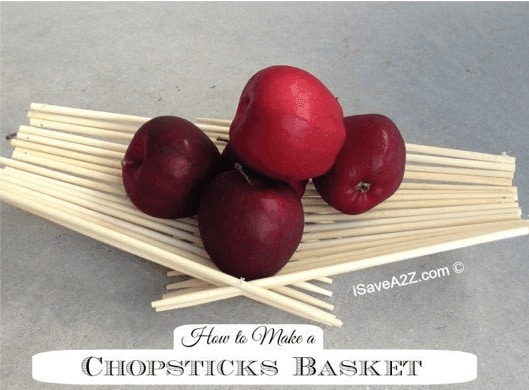
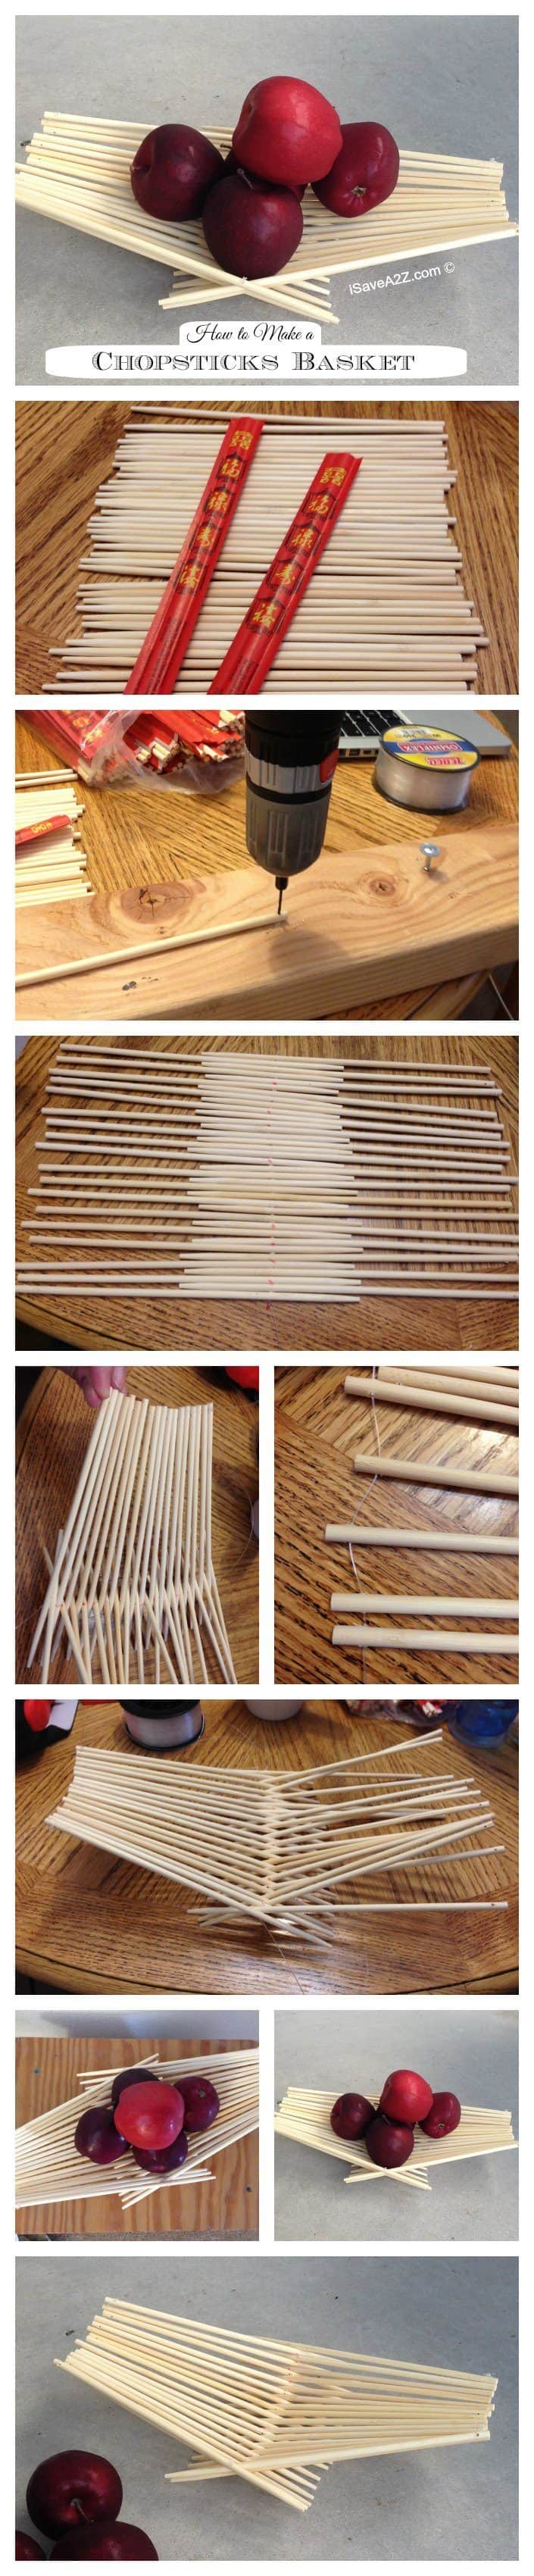
First, you have to find the chopsticks or you’ve got to really enjoy Chinese food to collect them. I happen to get a package of 100 at my local restaurant supply store but I’ve also seen huge packs of chopsticks here on Amazon too. I ended up using 18 chopsticks on each side of the basket for a total of 36 chopsticks. There are two chopsticks that come in each set. I used new chopsticks but if you are recycling some used ones, I would boil them to kill the bacteria first. Let them dry by laying them completely flat before you begin this project.
Here are the supplies you need for your Chopsticks Basket:
- Chopsticks (I used 36 but you can make it bigger or smaller)
- 1/16 inch drill bit
- Power drill
- Fishing Line (I used this type found here on Amazon – you can find this at your local Walmart too)
Instructions on How to Make a Chopsticks Basket:
- Start with clean chopsticks. I counted out 18 for each side but you can make this basket bigger if you wanted by adding more chopsticks.
- Drill a hole using a 1/16 drill bit about 1/2 inch from the end biggest of the chopstick.
- Next, lay all the chopsticks out side by side and use a pencil to mark each chopstick about 2 1/2 inches from the smaller part of each chopstick. I measured it and used a ruler and drew a line down the chopsticks to mark them all at once. The place you just marked will be for the second hole you need to make in each chopstick.
- After you have drilled two holes in each chopstick you will use fishing line to tie them together. I placed each chopstick side by side and began to thread these chopsticks together with the fishing line. You are threading the hole that is 2 1/2 inches from the end for this part. You will thread the holes closes to the end of the chopsticks last. Next, I tied off one end using about 3 knots so the knots would be bigger than the hole and stay in place. After I threaded all the chopsticks together, I flipped every other chopstick in the opposite direction as seen in the photo below.
- Once the chopsticks are laid out and the first hole is threaded you will thread the outside of the basket. This fishing line is straight enough where you won’t need a needle when you are threading it. Once you have threaded one end, be sure to tie the ends together so that all the chopsticks are very close together. Don’t leave any gaps between them. Tie a know at the end of each end so it will stay in place.
- Repeat step 5 for the opposite end of this basket.
- That’s it, you are done! This basket can even fold in half and store away if needed. It can hold 5 to 6 apples with no trouble at all.
TIP: If you want it to hold more weight I suggest weaving a string under the bowl in and out of the chopsticks that are making the basket stand up. If you do add a weave in between them, you can no longer collapse this basket but it will allow you the support to hold more weight.
Here are the process photos from start to finish for this project:
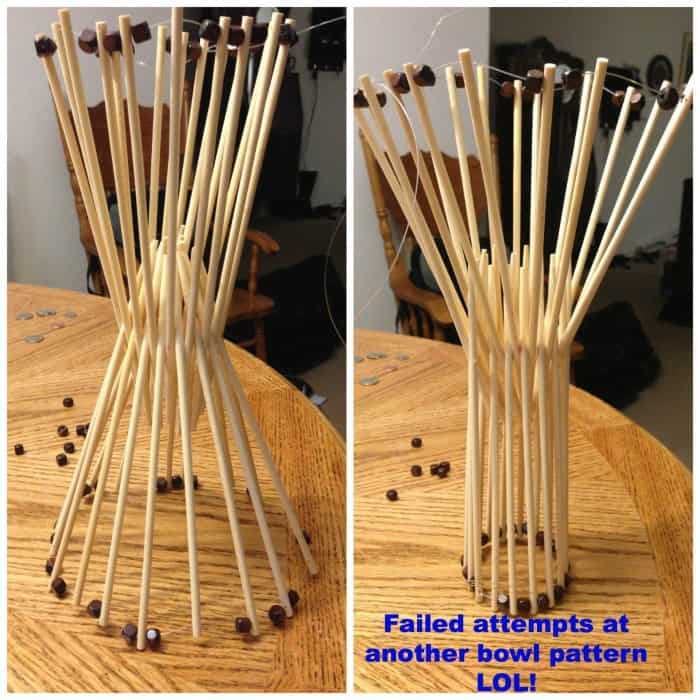
I thought I would give you a glimpse at some of my failed attempts at making another basket or bowl pattern. It’s didn’t happen. lol!
Now, I liked this chopsticks basket so much that I took it to another level by making another one with a decorative edge! This one was fun! I ended up buying some beads and creating a double loop before I threaded the ends of the basket. The beads do weight the edges down a bit so I weaved a piece of Paracard at the bottom of the basket to make it very sturdy. Worked perfectly! Take a look:
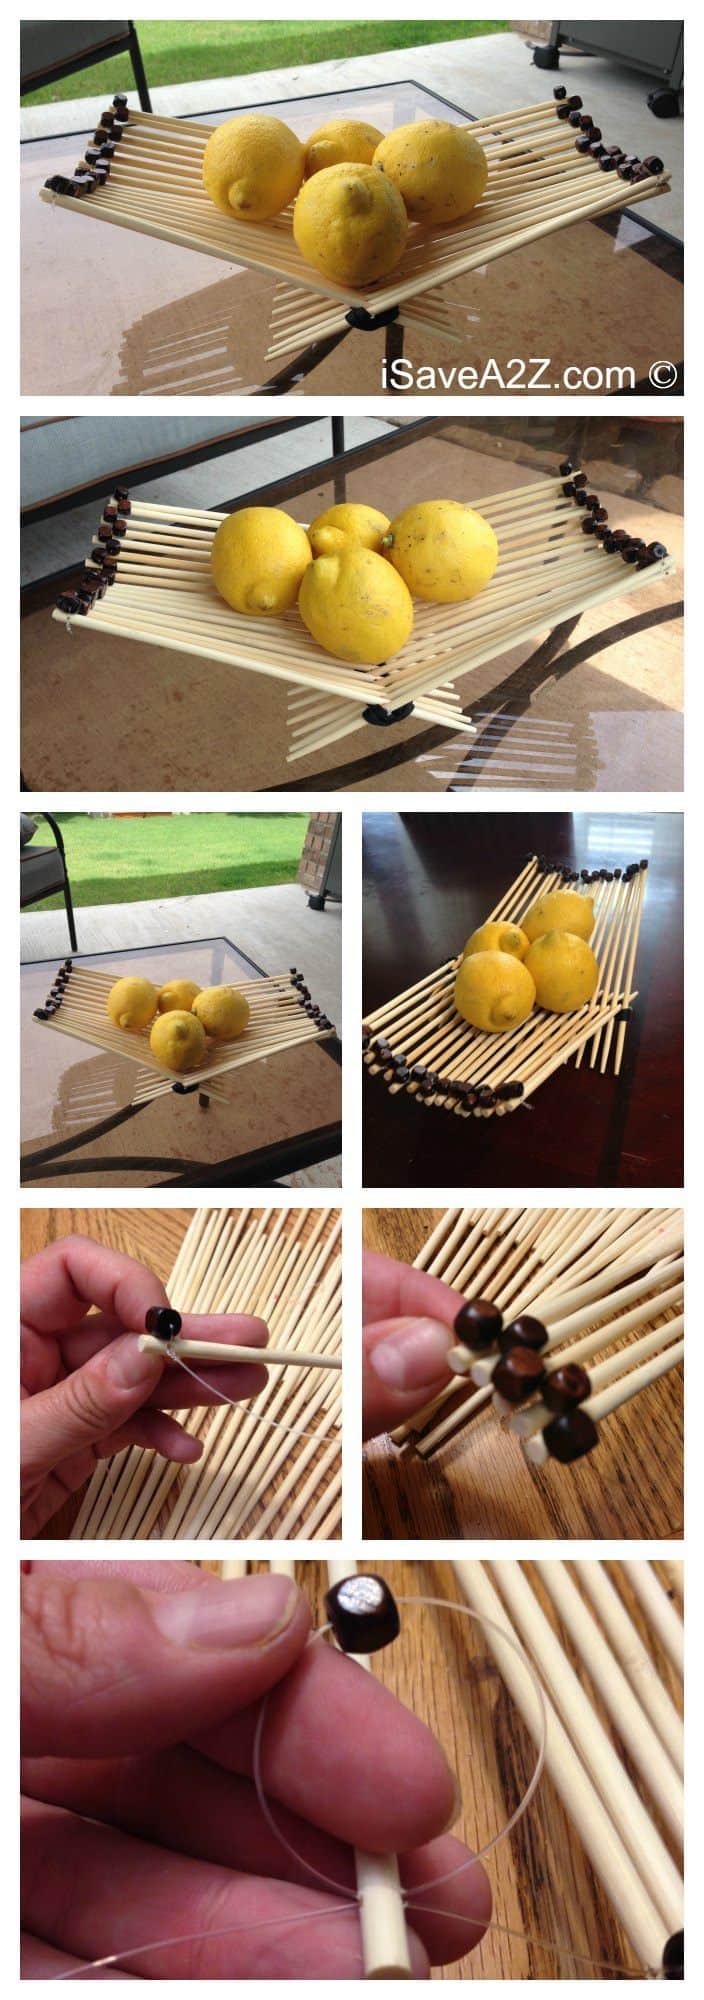
You can get very creative with this project by painting it your favorite color or adding your favorite beads to it. This type of paint seen here on Amazon is my favorite for projects like this because it’s lasts a long time and it dries really fast. Or you might even try this chalk paint recipe too. It’s perfect if you have left over paint you want to use. It sticks nicely to wood! You can find it fairly cheap at your local crafting store or even Walmart!
This project was fun and I plan to make more! What do you think? Would you try this project?
Enjoy

What a cute idea, love the bead edge. And I approve of a the use of power tools! How fun. This would make cute housewarming gift.
Housewarming gift… Great Idea!!! Thanks! I had fun making it. Love my power tools.