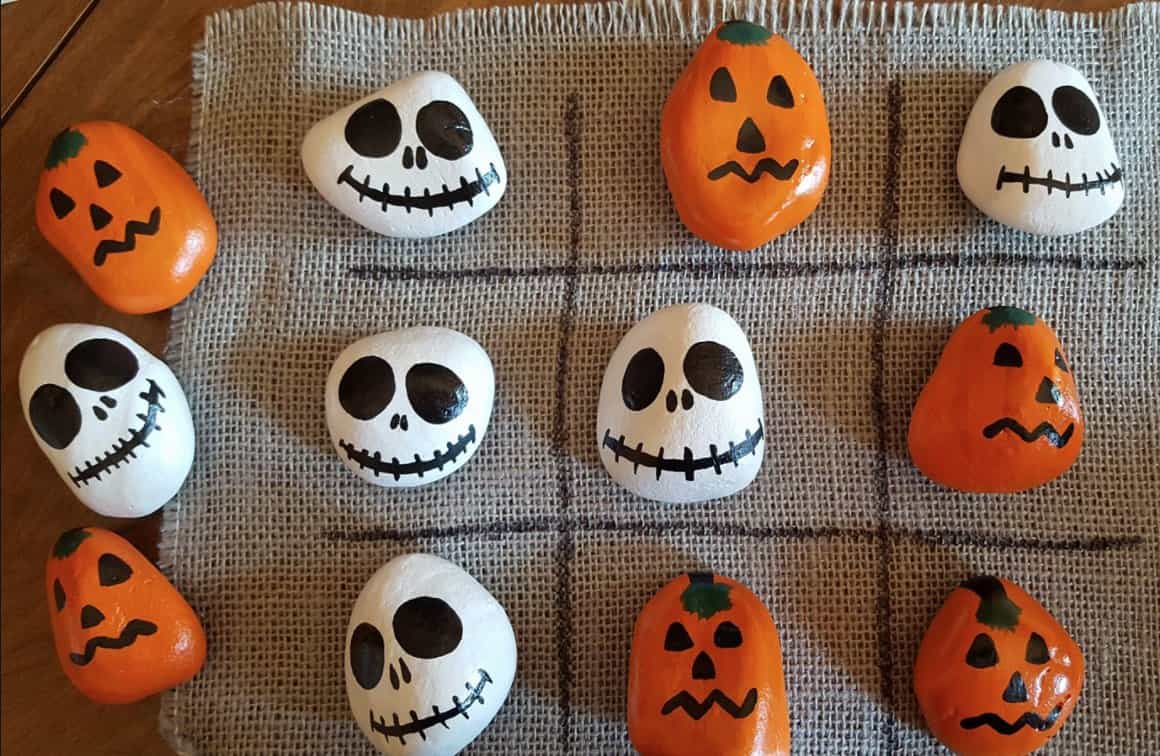
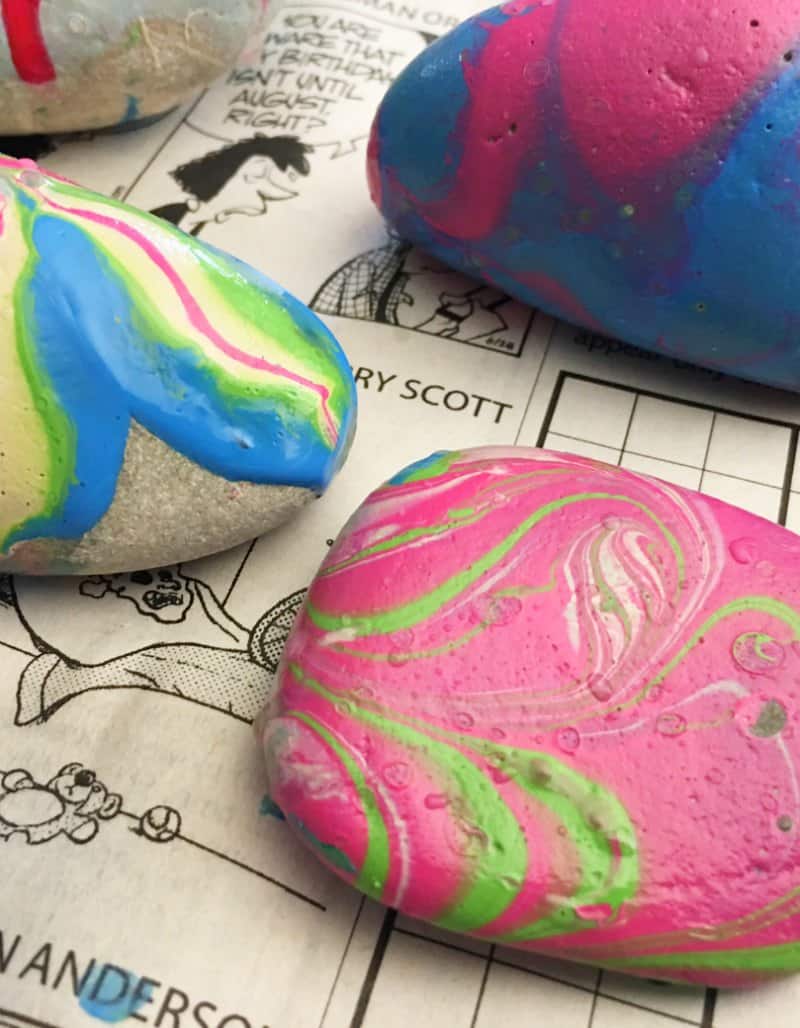
Cute Painted Rocks Idea
Cute Painted Rocks Idea

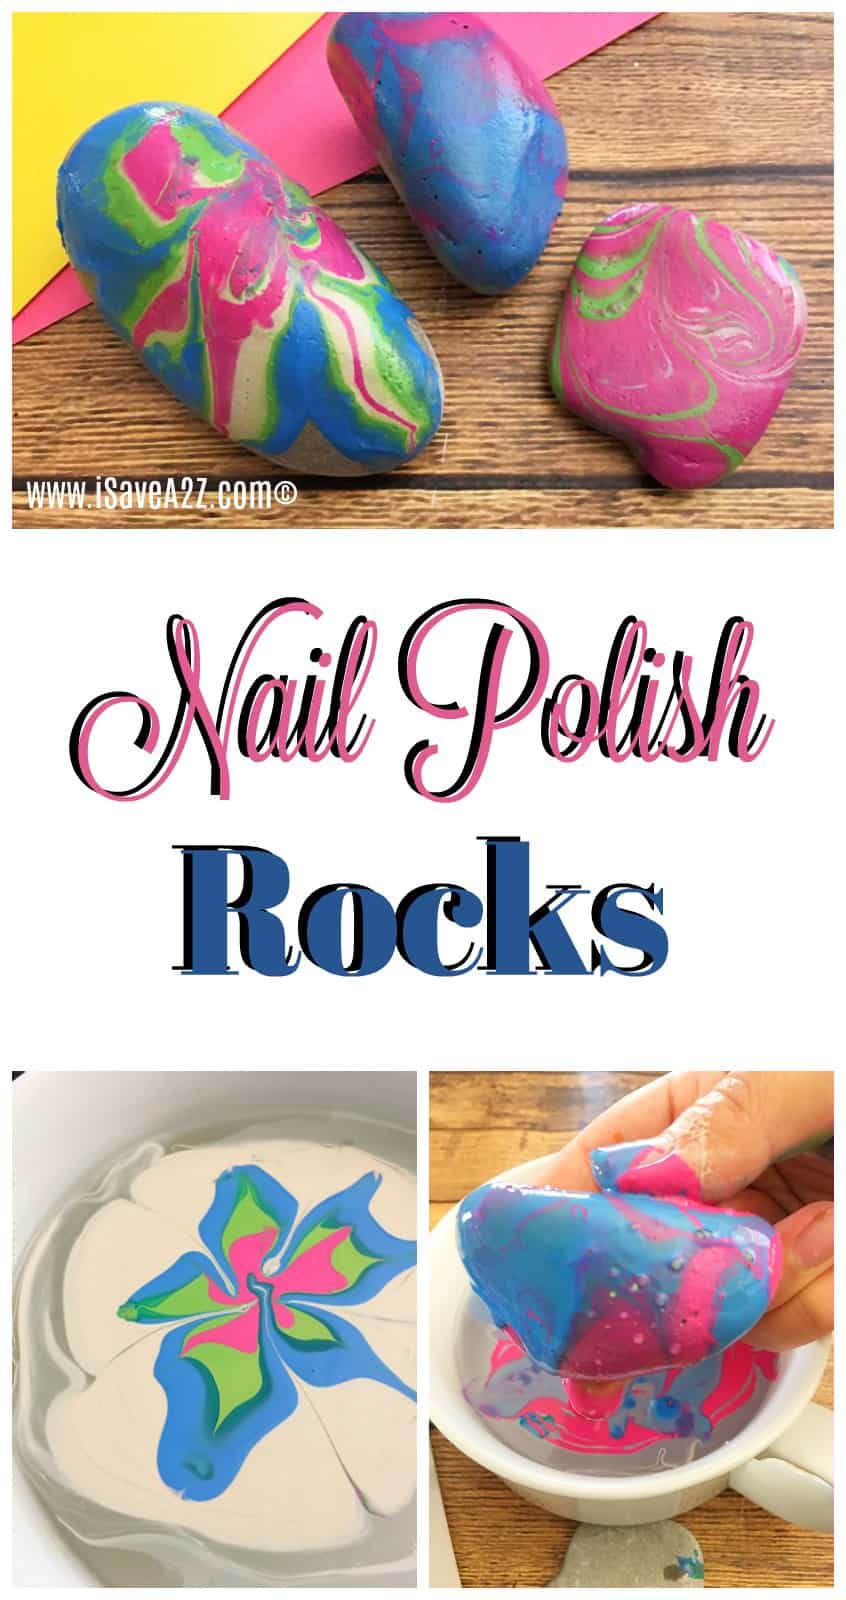
If you want to know How To Paint Rocks With Nail Polish, there are a few tricks you need to be aware of to make the designs pretty and make the colors vibrant for a very long time. This is a fun project to do with the kiddos. We almost always start off by talking a walk along a train in our neighborhood where there are plenty of rocks. They key is to start off with a smooth surface rock to paint. The shape doesn’t matter as much as the texture does when doing these types of designs.
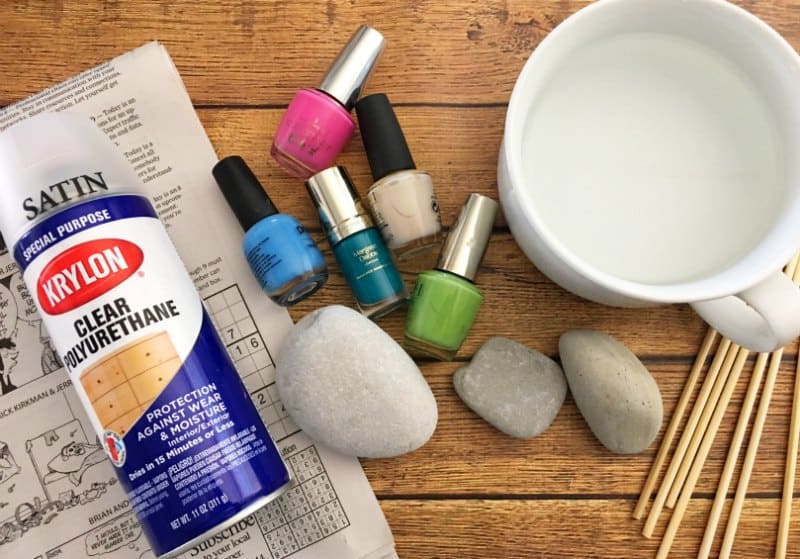
Paint Rocks With Nail Polish Supplies:
- Smooth rocks of any size
- Several bottles of nail polish
- Large bowl filled 3/4 with water
- Toothpicks or kabob skewers
Cute Painted Rocks Idea Instructions:
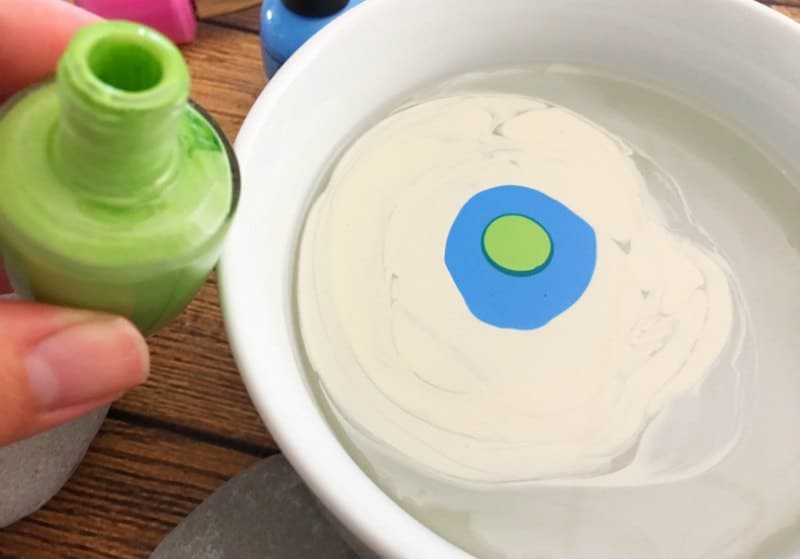
1. Lay out a couple pieces of scrap newspaper before you get started.
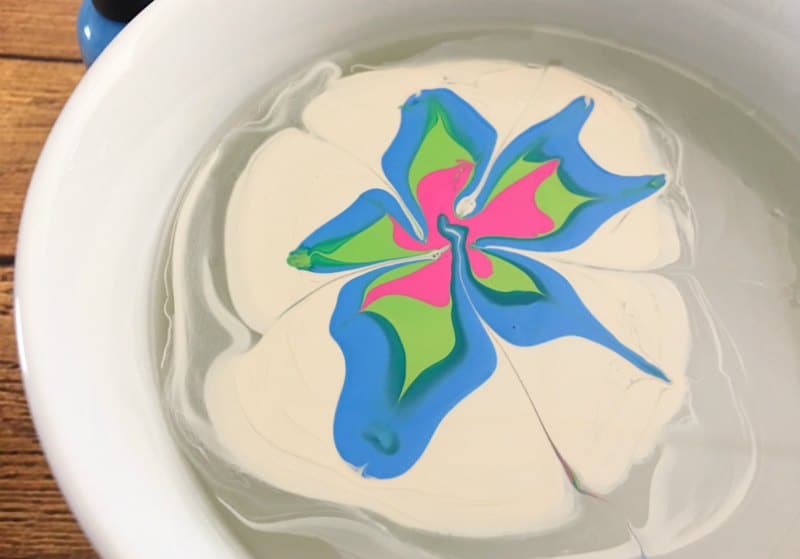
2. Fill a large bowl up 3/4 the way with water.
3. Slowly pour one color at a time in the center of your water filled bowl.
4. Then slowly pour another color into the center of the first.
5. Repeat step 4 with a third color.
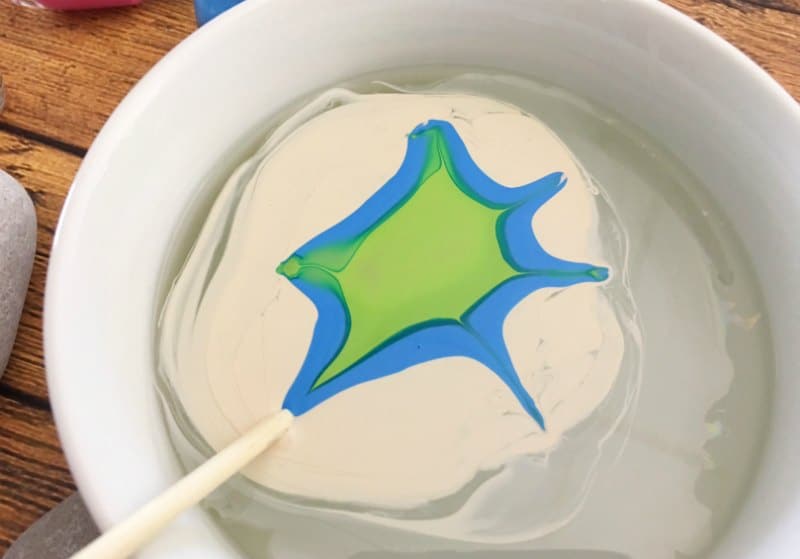
6. Use a toothpick or a a kabob skewer and stick in the top center of the polish and pull the center out towards the edges until you have a pattern yo like, you can also pull from the outside in.
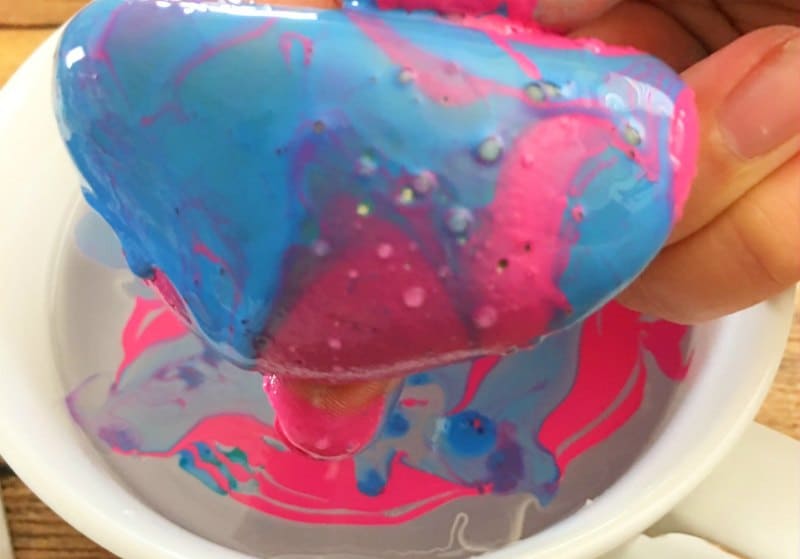
7. Hold the bottom or sides of your rock and quickly dip into the center of the polish and quickly pull out the rock.
8. Set on a piece of newspaper to dry fully.
Here are photos that show how to make Cute Painted Rocks:
Don’t forget to Pin it for Pinterest later!