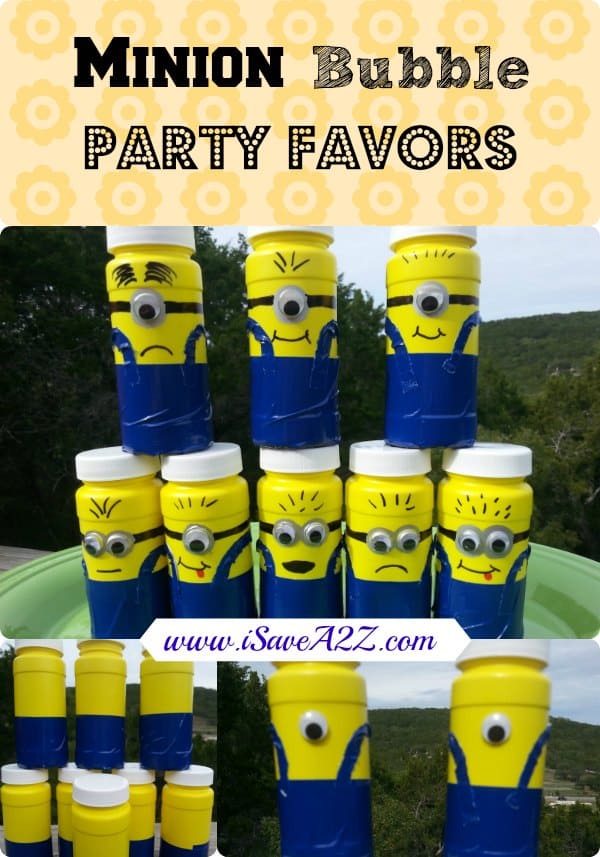
MEDUSA Halloween Costume DIY Tutorial
We just made a wonderful MEDUSA Halloween Costume and I’m gonna show you exactly how we did it!
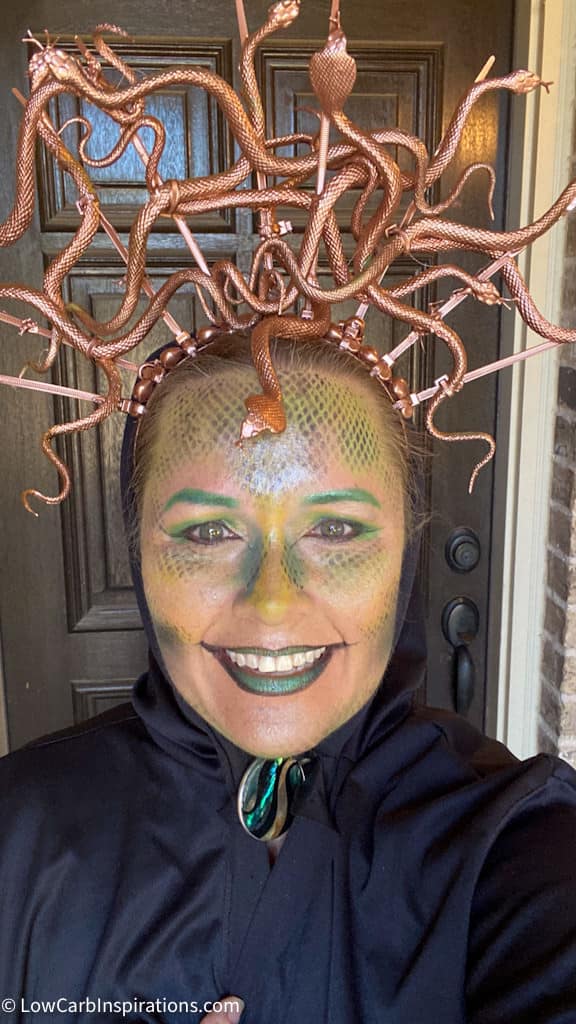
This costume mainly focuses on the snake makeup and the snake headband. These are the two main parts of the MEDUSA halloween costume.
The makeup will be one part and should be painted right before your event.
The headband needs to be made at least one day in advance so that the paint has enough time to dry before you have to use it.
So, there is a bit of preparation time needed but overall this project is pretty simple and totally worth making.
I received many complements from pre-teens and teenagers and that is probably the highest form of complement you can get because they have to be really impressed to give out complements at all! LOL!
Here are a few photos I took while making this Halloween costume. The instructions are just below all the DIY photos.
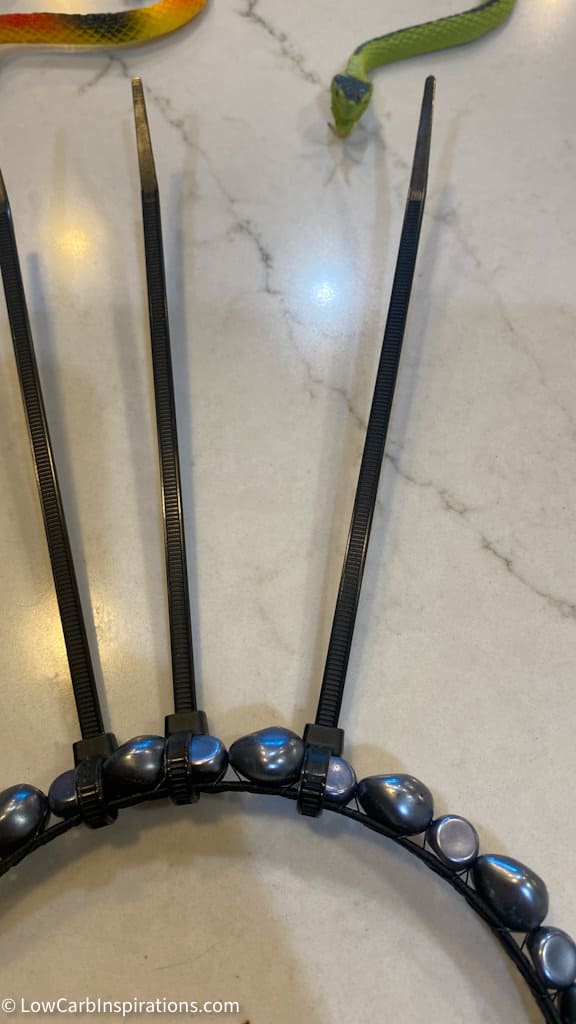
Be sure to tighten the zip ties as tight as they can to so that it stays in place and will hold the rubber snakes.
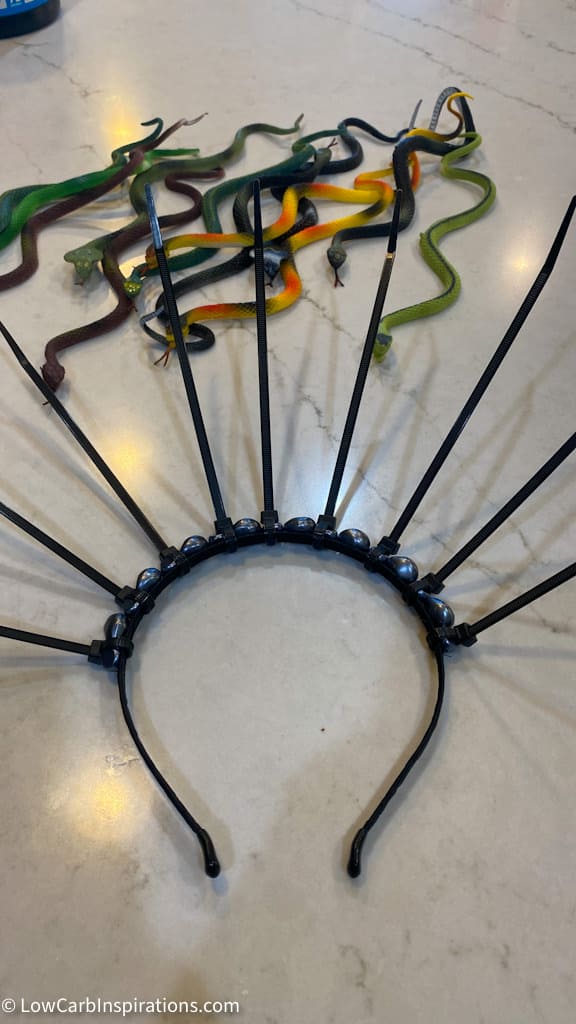
Now you will start to assemble the rubber or plastic snakes over the zip ties and glue them with a hot glue gun. Be sure to place something under the project to protect your surface.
Be sure to paint the headband outdoors or a well ventilated area. We did it on the porch under the shade and it dried really quick. It was done in less than 30 minutes!
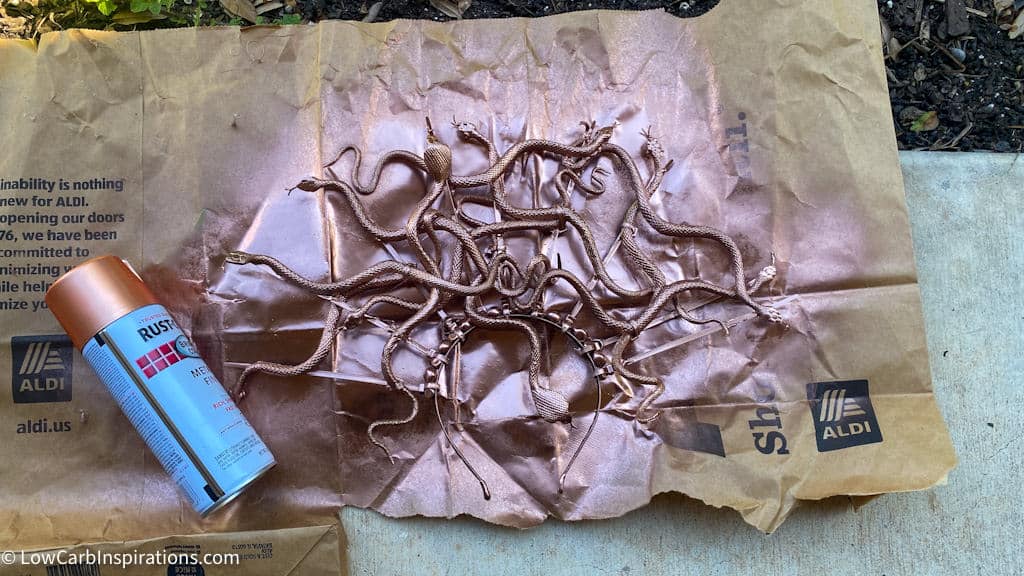
We looked all over for a gold color but ran out of time and opted to get the rose color. It turned out fabulous but I still would have preferred the gold color. You can use any color you want!
This is a professional face paint set I purchased many years ago. The only colors I’ve had to purchase more of was the black and white. Those colors we use the most often.
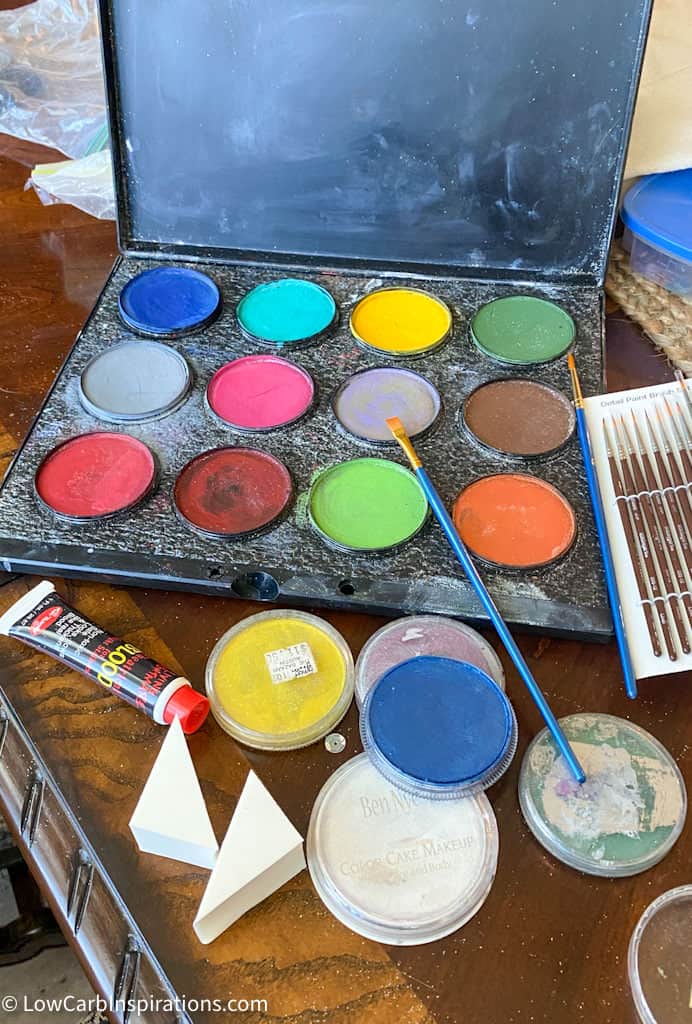
You can apply these face paints as dry or slightly dampened. If you do full on wet it will be a very deep color! Test a little bit on your hand before applying it to your face so you get the exact look you are going for. I used a very small amount of water. I even dabbed a bit off on a paper towel before adding the paint brush to the paint.
Just look at how bright the pigment color is when you use real good quality face painting supplies! You won’t get this type of deep color with the local store bought stuff.
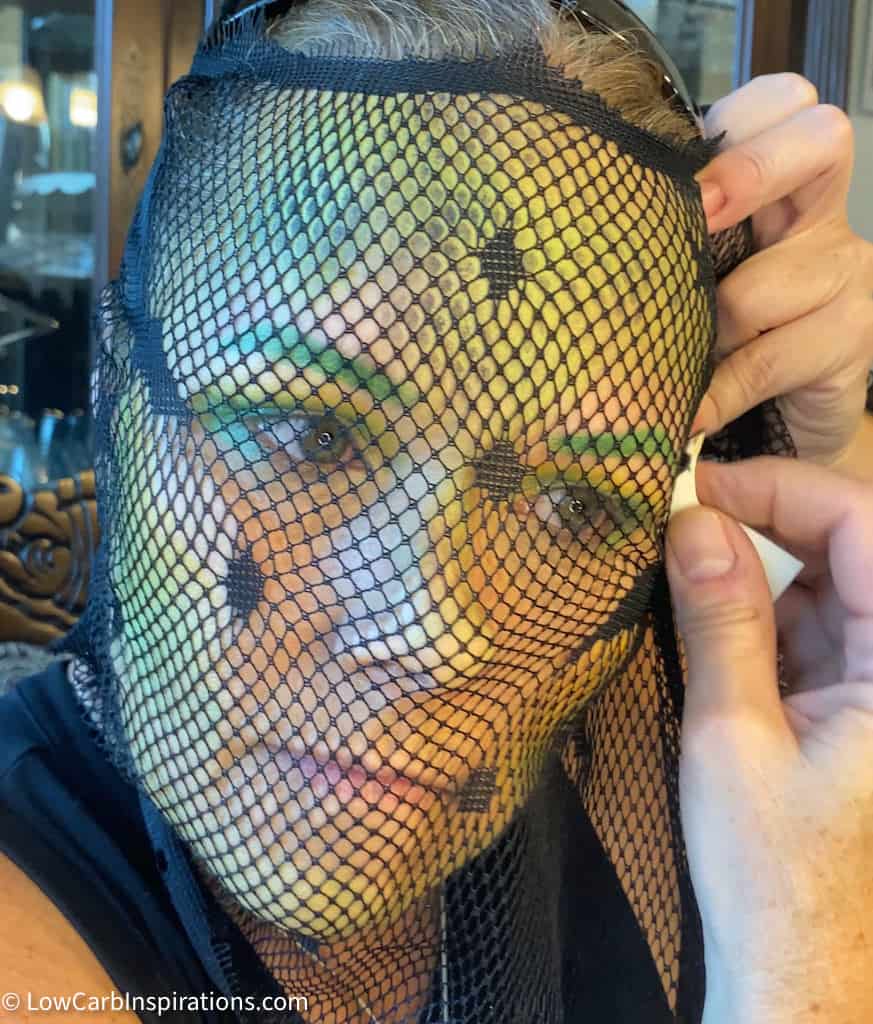
I ended up finding a fish net type table runner that worked perfectly to make the fish scales! You can also use a mesh wig cap or fishnet stockings too!
You will place the mesh over your face and press the wedge sponge that is loaded with black face paint over the pattern to create the snake scales. This works amazingly well!! The fabric doesn’t have to be a big piece either. You can use a small piece and do it in patches. I had to move this fabric around because of the design in the fabric. Also remember that it doesn’t have to be perfect either.
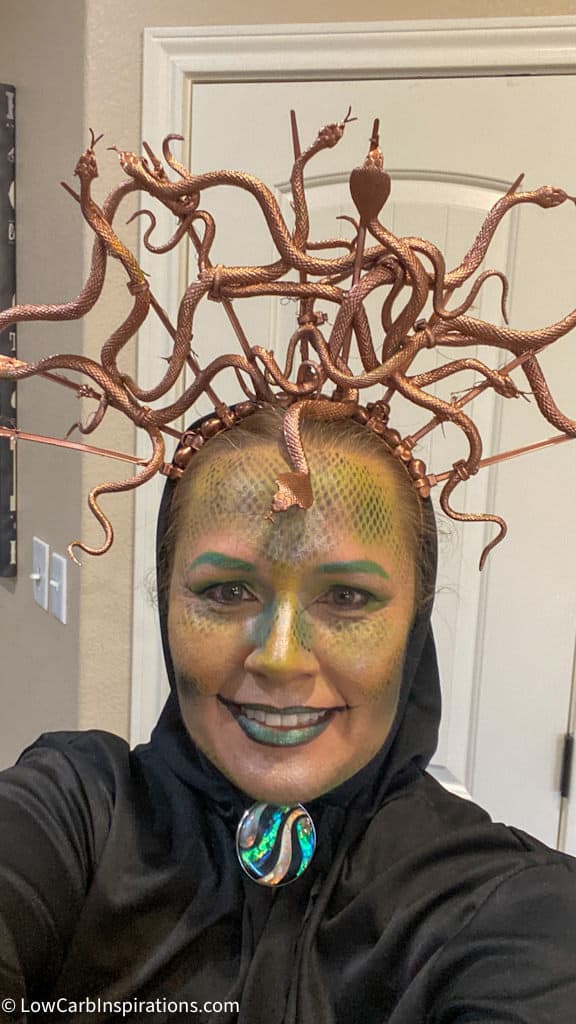
I glued the cobra snake coming further down to lay on my forehead. You can arrange these snakes any way you wish. If I were to do this project again I would probably add some more snakes that lay down the side of my head for a fuller look.
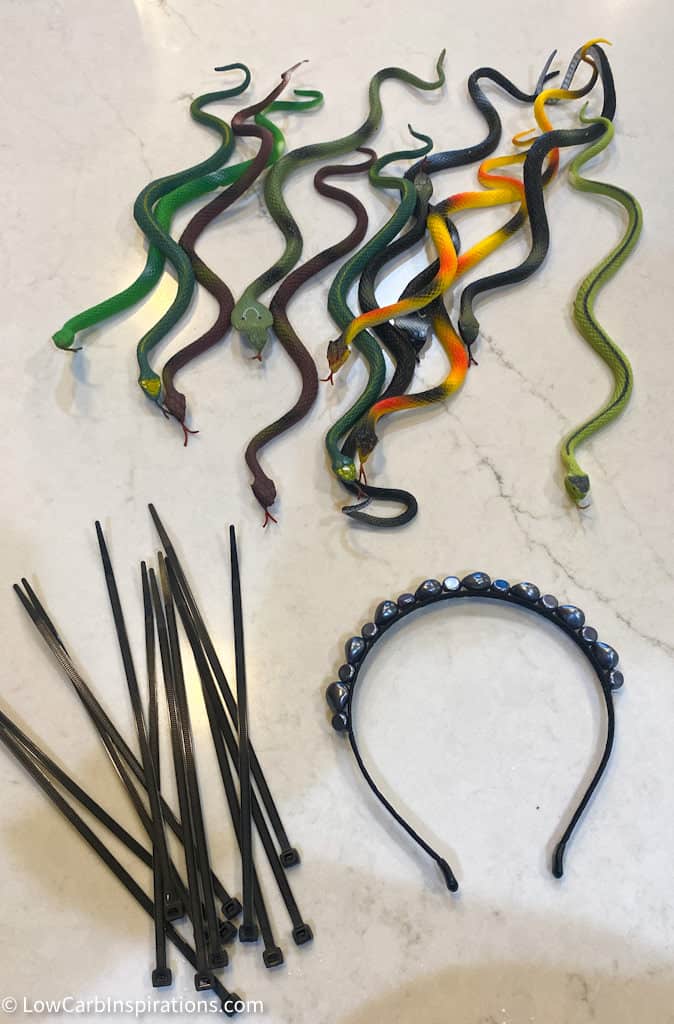
Believe it or not the hardest part was finding the rubber snakes to make the headband. For some reason, we were not able to find any local. We checked Walmart, Target, Dollar General, Dollar Tree, Hobby Lobby and Michaels craft store with no luck at all. Thank goodness for Amazon Prime and next day shipping. My advice would be to order your rubber snakes way ahead of time if you plan to make this MEDUSA Halloween costume.
MEDUSA Snake Headband Materials Needed:
- Headband
- Zip Ties
- Hot Glue gun and sticks
- Spray Paint
- Rubber Snakes
MEDUSE Snake Headband DIY Instructions:
Attach the Zip ties to the headband tightly. You will want to space them out about an inch apart depending on the size of your snakes. If you have really small snakes you may need to space them closer together.
Head the glue gun.
Place the headband with the zip ties on a mat to protect the surface from glue and paint.
Arrange the snakes onto the headband however you like. Glue each piece down as you go. Allow about a minute or two for the glue to completely hold the rubber snake.
If you arrange multiple snakes on top of each other it may be too heavy for the glue to hold. This is where I will use extra zip ties to hold them together. Be sure to secure the zip tie where the biggest part connecting it is snug securely in the back of the headband so no one sees it.
Once complete you will want to spray paint the headband a color of your choice. I was going to do gold but the stores were out of gold.
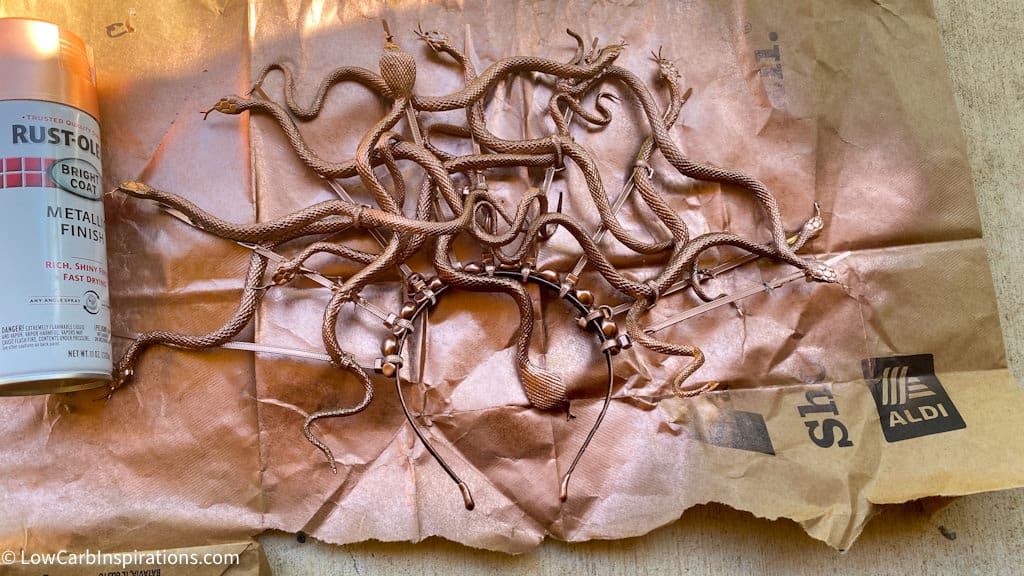
Spray the first side of the headband covering all the top parts and the side parts. Allow it to dry completely before picking it up and moving it.
After the top part has completely dried, flip it over and paint the back part.
Using the paint, it covers all the zip ties and no one will ever even know you used zip ties unless you tell them and they look really closely.
Set aside and paint your face right before you are ready to wear this costume.
Snake Face Painting Materials Needed:
- Face Primer
- Mehron Face Paint or Paradise Face Paints (dark green, light green, yellow, black, and glitter)
- Paint Brushes
- Water
- Blush Brushes
- Sponges
- Paper Towels
- Fishnet stockings or wig cap that has the pattern you need to make the snake scales
Snake Face Painting DIY Instructions:
Start by applying face primer. This will help your skin stay smooth and the pigment to stick for a long time.
Next you will start face painting. Mehron Face Paint or Paradise Face Paints have the best pigments and I highly recommend them. You will not have the same results with the local store bought face painting supplies you find at Walmart or Target. They are not even close. This part is very important.
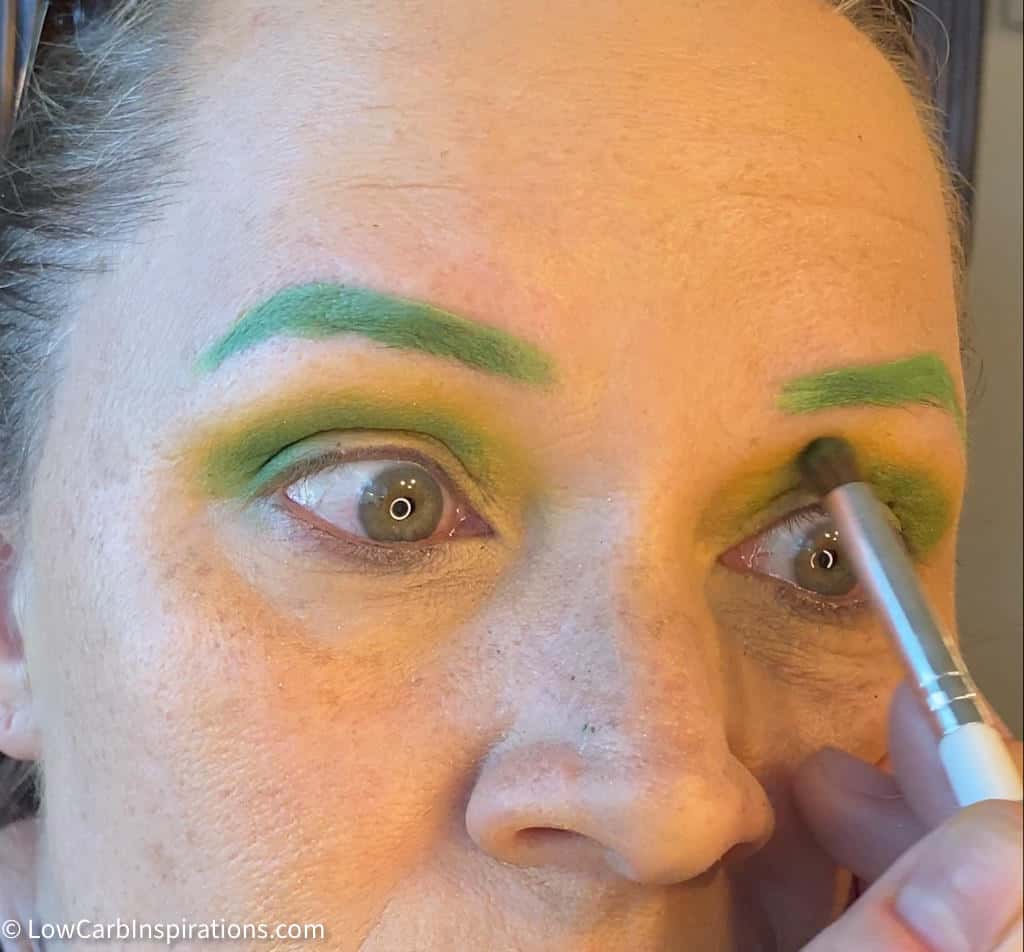
Start by applying the yellow to any part of the face you plan to paint. We painted the eyelids, the forehead and the cheeks.
Using a blush brush, apply the light color green over the yellow. You can apply this dry to give a light color or you can add a small amount of water to your brush to layer on the color deeper.
Finish by applying a dark color green over the areas you want to darken. We used the dark on the deepest crease of the eyelids and the lower part of the cheekbones.
Use the green color to color the eyebrows.
Don’t forget to color the lips with the same yellow and green colors.
After all the green and yellow are placed as the base you will want to use the sponge and create the snake scales.
Place the textured fabric over your face and dip the sponge into the black face paint.
Dab the sponge over the fabric to create the scales for the snake. The black part should go over any green and yellow color you painted earlier. It creates a layer that looks exactly like snake skin with dimensions!
Apply the face paint glitter to any part of the face you want to highlight. We applied the glitter to the eyelids, the top of the cheekbones, on top of the lips, and a small amount on the forehead.
Lastly, you will outline the eye lids and lips with the black face paint.
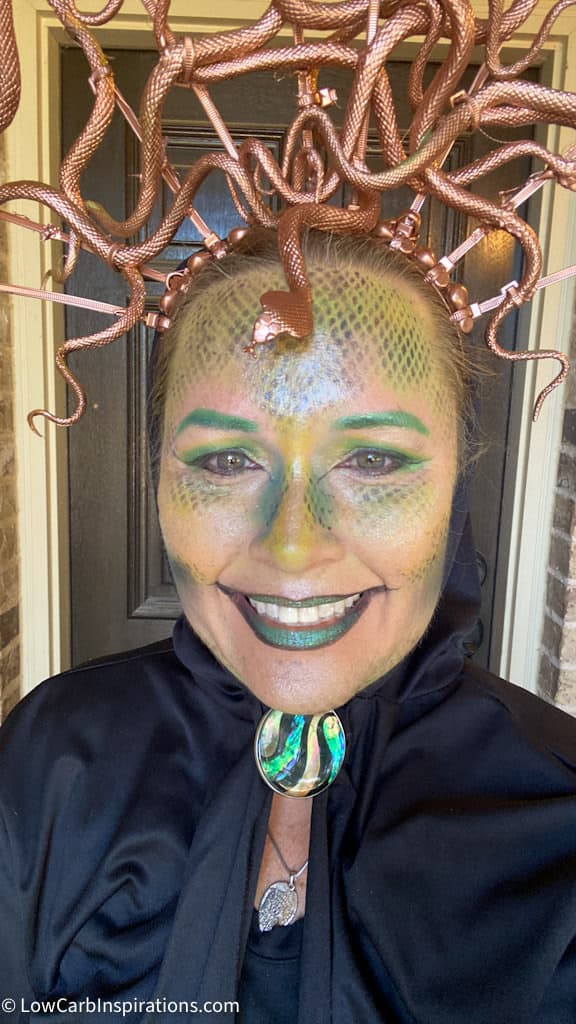
Now you will put the Halloween Costume together.
I wore a black cape with black shirt and black leggings with boots to complete this look.
Apply the headband. Depending on the weight, you might need to wear it before your heads to hold it straight up all night instead of how you wear a normal headband behind your ears. You can also use bobbie pins to hold it in place if needed. I didn’t have any trouble unless I had to bend over and my headband would slightly move if I didn’t wear it before my ears.
Have a Happy and Safe Halloween!
Here are a few other crafty articles you might enjoy:
How to Decoupage on Seashells Using Mod Podge and Tissue Paper
Halloween Pumpkins Made Out Of Oranges
DIY Minecraft Creeper Shirt Tutorial
Cool Art Project for Kids! (through the eyes of an 8 yr old)