RV Connection Tips & Tricks
RV Connection Tips & Tricks
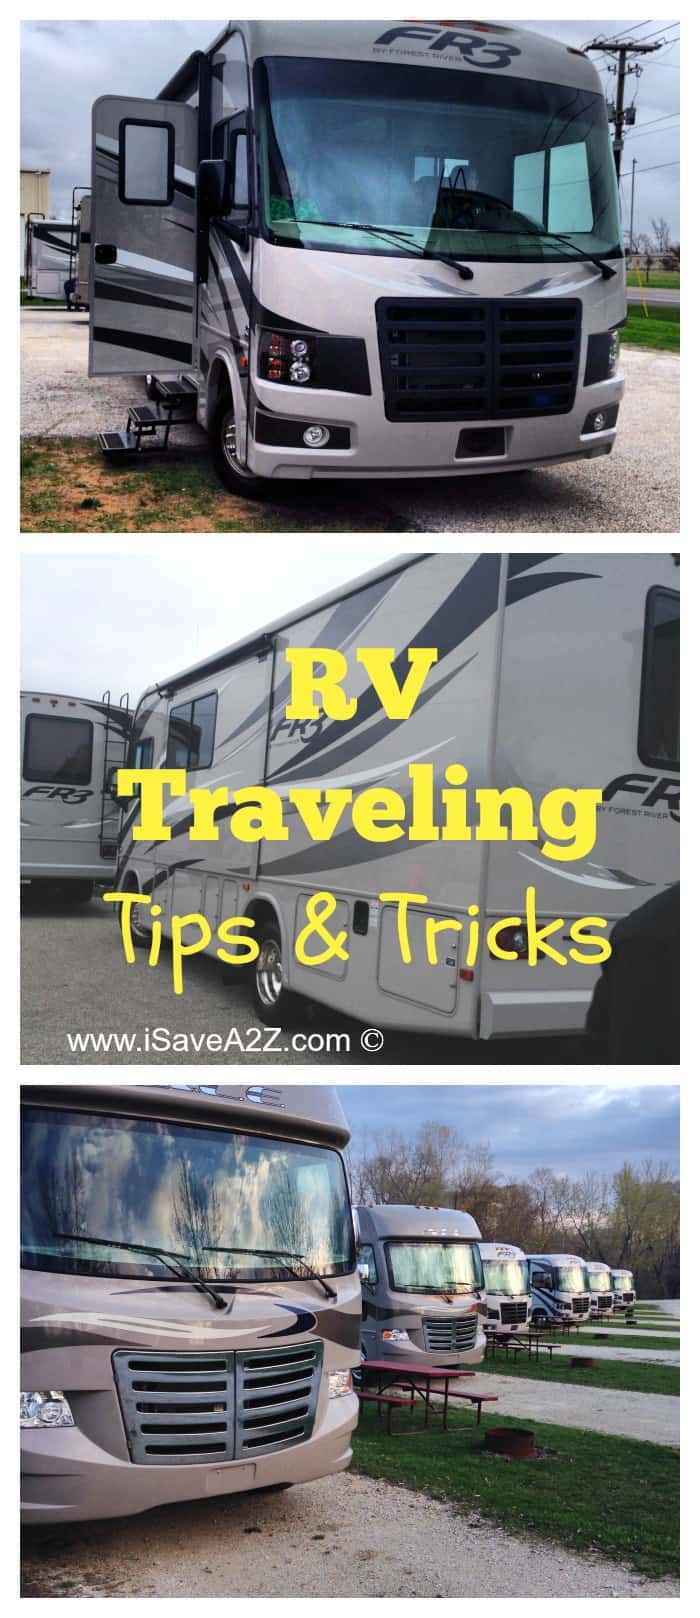
I have a few RV Connection Tips & Tricks I learned that I just had to share with all of you! My family and I recently rented an RV Motor home for the first time. I recommend renting first before buying to see if this is something you will want to do often. We went with a group of different families in separate RV’s. I utterly enjoyed it, however some families I doubt would never do it again.
We picked up these RV’s brand new from the manufacturer so you would think that everything would work flawless. But as you know there always can be some bugs that need to be worked out. Depending on where you rent or buy your RV be sure to check everything out before driving away.
RV Orientation
Some of the things to check are:
- the lights
- windshield wipers
- fluids
- but it is also a good idea to turn on the water pump to the RV and check the water pressure, function of the toilet and look for leaks in the system.
- Also some RV’s have hydraulic leveling jacks that level the RV at your camp sight. It would be a good idea to check this system and where to add hydraulic fluid if needed.
Be sure that all the components are present for camp sight hook ups, which include:
- Electrical connection cord, and adapters
- Water hose for water service and regulator
- Waste water sewer hose with coupling
Once at your camp sight equipped with RV electrical and water connections, the first thing I do is level the RV at a spot I know my connections will reach the terminals and water source, as well as sewer dump drain.
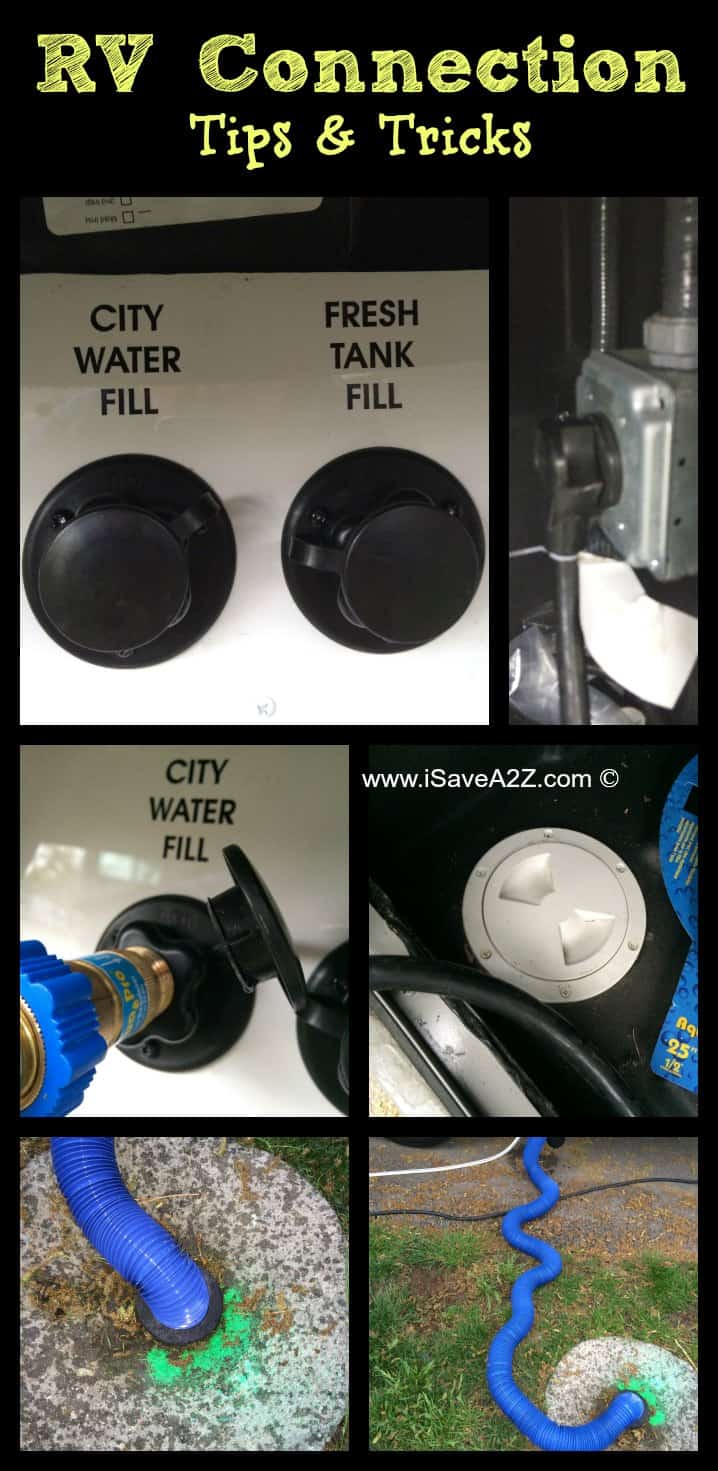
Electric hook up:
My 25’ RV was equipped with a 30amp electrical connection cord. This can be identified as a 3-prong plug; the 50 amps as a 4-prong plug and the 15 or 20 amp is a household style plug. During our rental travel we stayed at 4 different KOA locations and all had a 30 amps and 50-amp connection. However you will need converters (just like these adapters seen on Amazon here) if your sight does not have the specific outlet for your plug. So it would be a good idea to call the location(s) you will be hooking up to and assure a converter is not needed.
Before connecting the RV plug be sure that the breaker at the camp sight connection is off. In RV’s where the connections come out of a closed compartment there should be an access door at the bottom of the storage compartment where the electrical plug is located. Be sure to run the cord out of this instead of the compartment door, so you can close and secure the door. This is the same with the water hose compartment. Once connected to the appropriate plug, turn the breaker on. My RV automatically changed from battery power to shore power, but you may need to manually make the connection switch. Most switches are located inside the RV near the entrance steps. After this connection is complete is when I extend my RV slide outs.
If camping without electrical connections then you can use the RV’s generator if equipped. Be sure the plug is connected to the outlet inside the plug compartment. This connects the power plug to the generator. Some RV generators have altitude range settings. Be sure to check that this is on the correct setting for your altitude. In my RV there was a switch on the main panel to start the generator. If it has not been run in a while it may take a couple tries. The generator will use fuel from the RV’s fuel tank.
PRO TIP: If going to a location where you are going to run your generator for a period of time, be sure you have plenty of fuel in the gas tank. Most RV generators will shut off when the gas tank reaches ¼ tank to prevent stranding.
Water connection:
Before connecting city water it the RV I turn off the RV’s water pump, as this is only needed to retrieve water from the RV’s fresh water tank. My RV was equipped with a hose, which is much like a standard water hose. However a water pressure regulator is needed to control the pressure going into the RV.
This regulator is placed onto your RV city water connection, and then the hose is connected to the regulator. Before connecting to the sight water source, let it run for a bit to evacuate any rust or sediment in the water line. Once connected to the water you will have an endless water supply.
Before leaving the sight for a long trip be sure that your fresh water tank if filled. Inserting the hose from the sight to the city water fill connection can do this. Once fill the water will overflow onto the ground.
PRO TIP: Purchase a water pressure regulator before you hit the road because some places require them.
Sewer connections:
There are two separate used water collection tanks on the RV.
Black water- toilet waste only
Grey water- Water that goes down the sink drains and shower drain.
The release valve for each tank is usually near the water connection and is appropriately colored black and grey. Using rubber gloves for this process is recommended. Remove the sewer hose from the compartment. This is the larger hose that looks like a heavy-duty dryer hose. There should be a coupling on one end that fits to the RV sewer outlet. Before removing the cap on this outlet be sure both grey and black water valves are closed. After removing the cap connect the hose with the coupling.
Now what was not provided to me, but recommended is a stopper fitting that goes on the hose portion that enters the sewer drain at the camp sight. Without this it is very likely that those will extend down the sewer drain when releasing the flow of water and way submerge the end of the hose in raw sewage. They make couplings for the sewer drains which I would buy if I owned an RV, but the rubber stopper only cost $4.00 and I left it with the RV.
Once connected to the sewer dump then it is time to lose the poop. Always release the black water valve first. It may be helpful to have someone run the toilet or dump a bucket of water down the toilet to assure the entire solid waste leaves the tank. Once that is complete then release the grey water. Grey water which usually consists of soapy water from baths and washing hands and dishes will push the remaining black water out of the hose, and will make hose disconnect cleaner. After this process close both valves and then remove the sewer hose.
IMPORTANT TIP: Always run the black water first and wash it down with the grey water last! It will wash the waste in the hose and you won’t be left with a smelly mess when you head down the road. Eeeww!
Some will leave the hose connected and the grey water valve open while camping. I can see this for long stays, but be sure to hold the grey water for at least a day before leaving so you can use it to flush the hose.
Don’t for get to put the cap back on the sewer dump and the RV sewer connection.
PRO TIPS:
- Always have Disposable Rubber Gloves handy when changing the sewer connections.
- Get the RV Sewer Hose Seal (it’s only $4 and it will stop your hose from landing down in the sewer causing a big disgusting mess!