
DIY: Magnetic Menu Board
DIY: Magnetic Menu Board
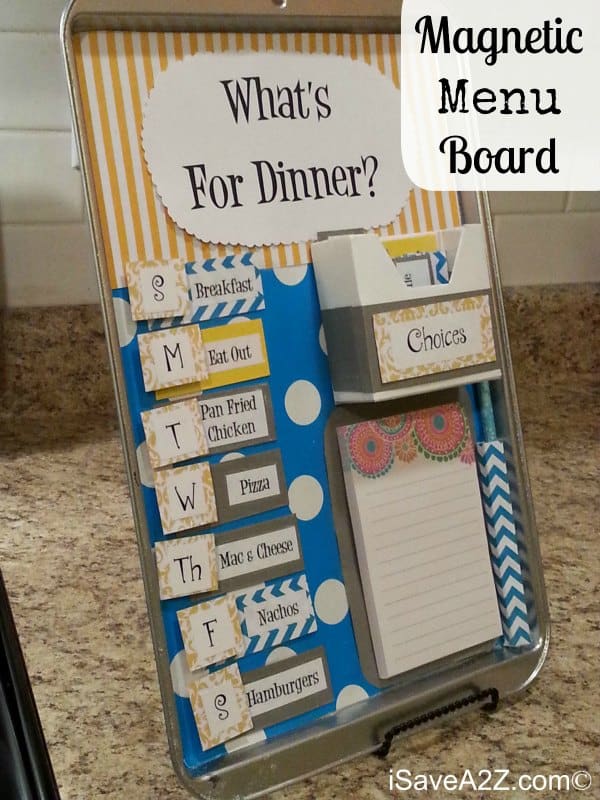
I have seen several versions of this Magnetic Menu Board all over Pinterest and decided I HAD TO make one! Our kids are a big part of choosing what we have for dinner anyway, and this would not only help me get my weekly shopping list together but also kind of give us a plan for the week. Like most families, we are busy all during the week, and…I am a planner anyway. This Magnetic Menu Board is a fairly easy project once you decide on what colors you want to use (which is a task in itself for me). By taking a little extra time on your magnets and menu choices, this menu board will last a long time!
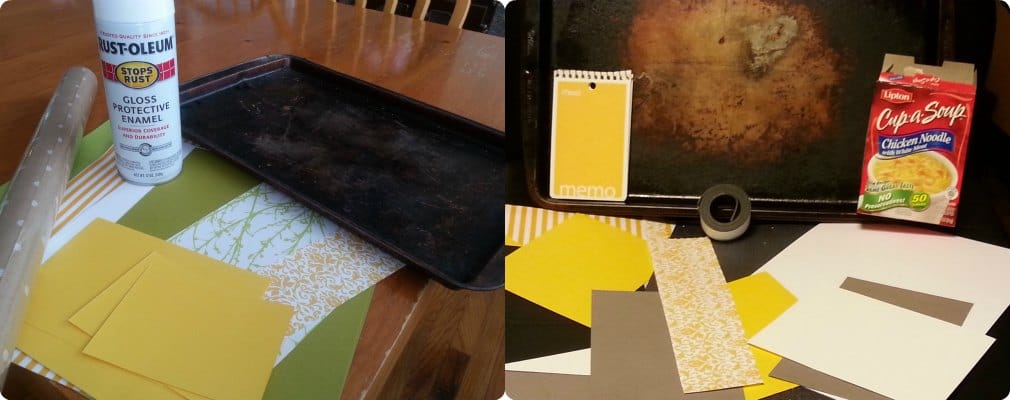
Step one is to get your supplies together! Look through your crafting supplies, because it’s likely that you already have everything you need. You can see below that I had a hard time deciding what colors I was going with. I picked out two different sets…and then still ended up using something different. The good thing about this craft is that it can easily be changed.
Supplies:
1 old cookie sheet that probably could have been thrown out a long time ago but for some reason you have kept it. I actually had a few 🙁
spray paint in whatever color you want
different sheets of craft paper, scrapbook paper or even wrapping paper. Just gather different patterns that are in the color scheme you want to use.
scotch tape
Small empty cardboard box – You can cut down a box to fit.
Notepad and pencil (this is optional)
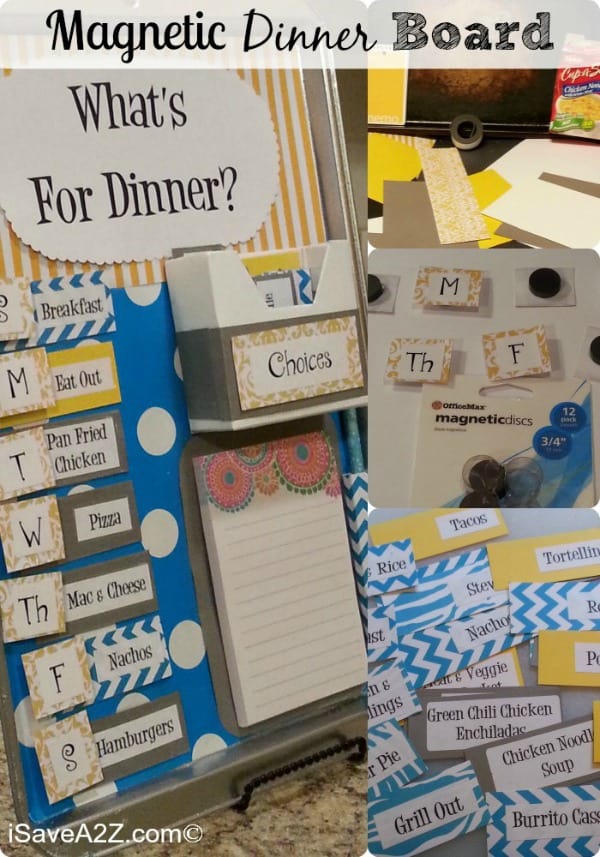
Make sure your baking sheet is clean. You may want to use some steel wool to smooth out some spots. You’ll see that I didn’t do that which caused some spots not to dry good…but you can learn from my mistake. Then spray paint your baking sheet and let it dry completely. While that is drying, you can work on your “Menu Choices”. Make a list of 30 to 40 meals that you regularly make. We included eating out for our choices too. I printed this list onto address sized labels, stuck them to card stock for a decorative touch and cut them into strips.
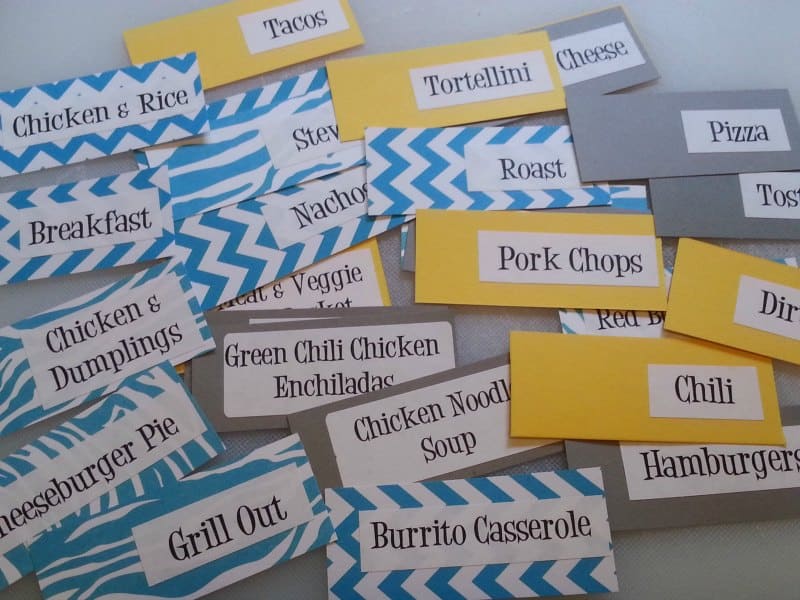
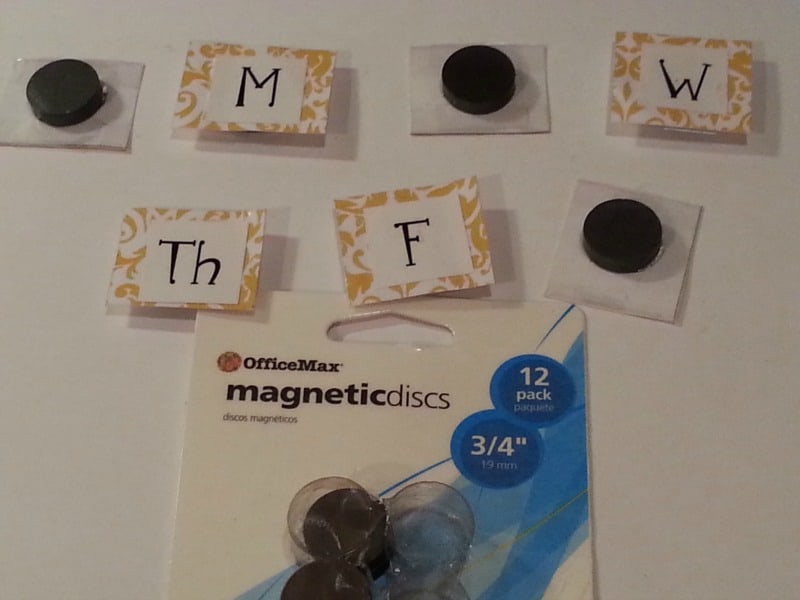
I also went ahead and made magnets, unless you already have some that you want to use. Again I printed out the abbreviated days of the week and stuck it to decorative paper. **TIP** Once the magnets and menu choices are done, I covered all of mine in clear packing tape for extra protection. This will keep them from getting dirty or torn so you can use them for a long time. Then take your days of the week and hot glue them to small magnets. I tried to use magnetic tape (because I already had some around the house), but it was not strong enough. So I did go buy some small round magnets for this.
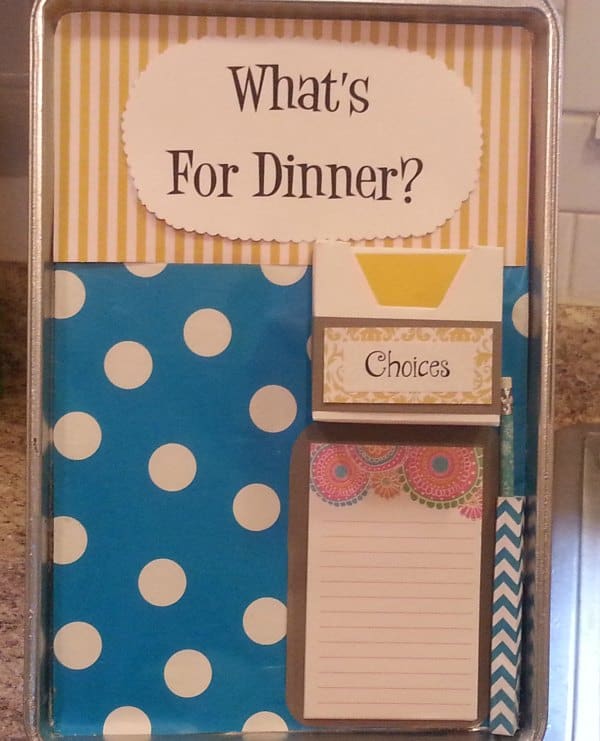
By now, your baking sheet should be all dry and ready to decorate. Just trace out the size of your pan and tape your paper to the inside. You can do the whole pan in one color or mix it up any way you like. I also made a space for a note pad (which I got at the Dollar Store and already had a magnet on the back) and a place to put a pencil, but this is optional. I made a “What’s For Dinner?” banner for the top, cut it out with my kids craft scissors and taped it in place.
You’ll need to make some sort of box to hold all of your menu choices. I used and empty instant soup box, covered it in cute paper and stuck a label on it. I took four squares of the magnetic tape that I had, put one in each corner on the back of the decorated box and stuck it in place.
That’s basically it! Now all you have to do is go ahead and pick out what you’re having for dinner for that week and put it on your Magnetic Menu Board! Put all of your extra menu choices in the box and display your board wherever you like. I have seen where some people hang them on their fridge (with magnets), but ours is stainless so this wasn’t an option. You can also string a ribbon through the hole on top and hang it. I used a picture frame holder that I had and just set it on our counter.
We love up-cycling crafts! See our really popular Tin Can Crafts to get an easy tutorial!
Happy Crafting!
Also check out some of our other crafts! Such as our:


Nice magnetic menu boards for different things. Thank you for sharing.