Shrinky Dinks DIY Project Idea
Create fun and easy Shrinky Dinks DIY projects with this step-by-step tutorial. Learn how to make custom keychains, charms, ornaments, and creative shrink plastic crafts for kids and adults.
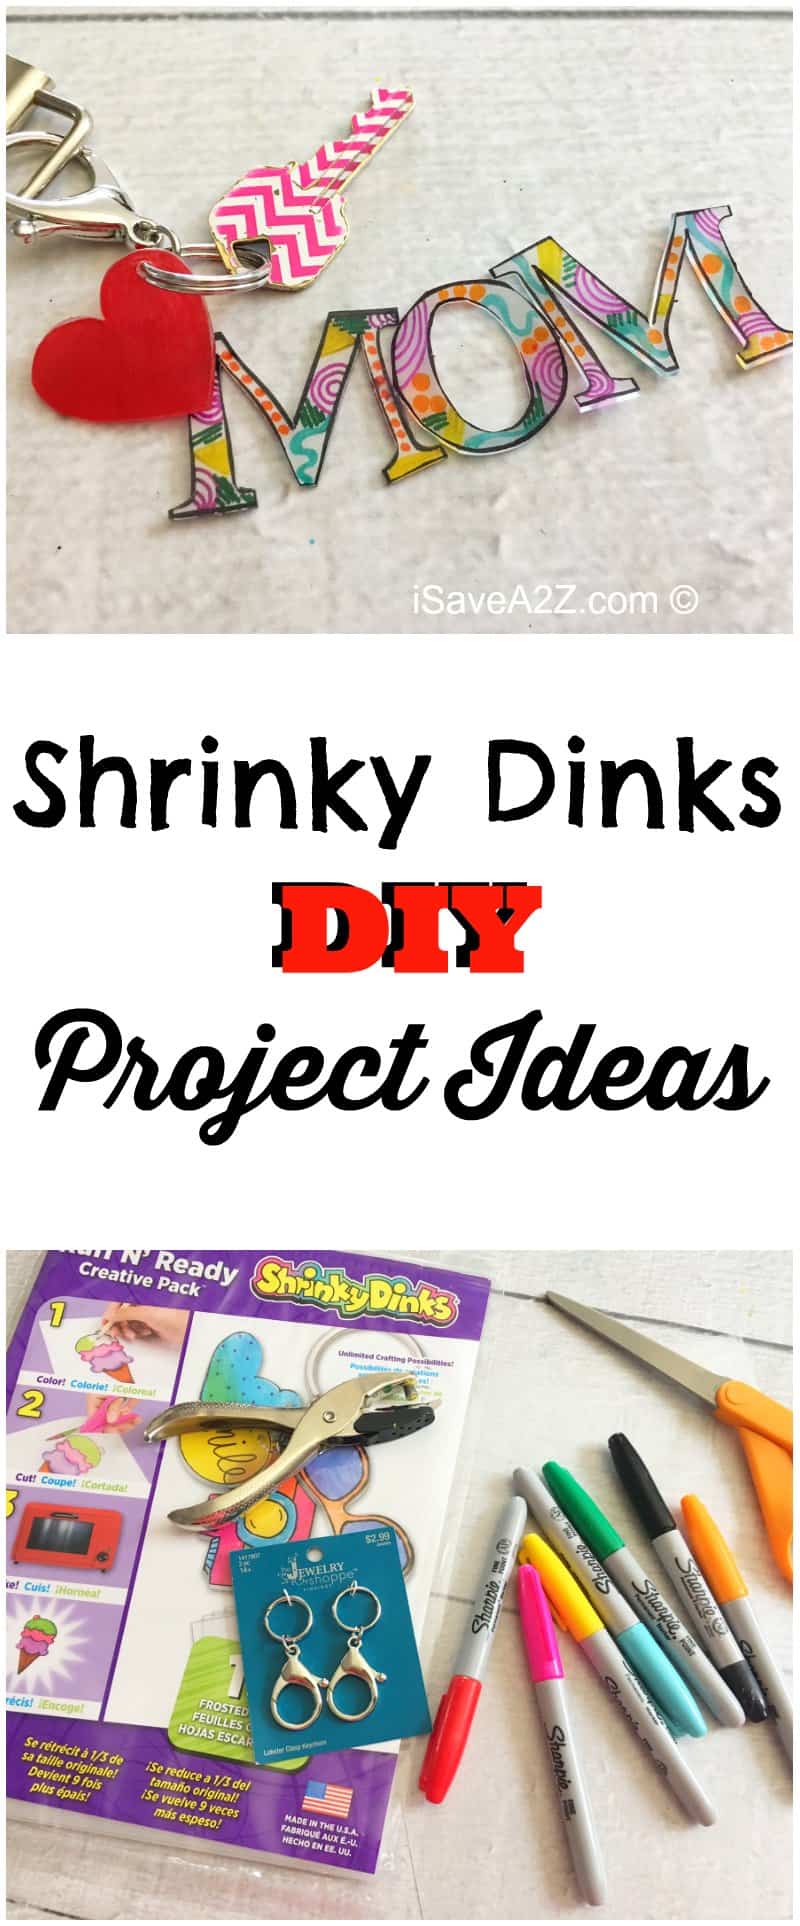
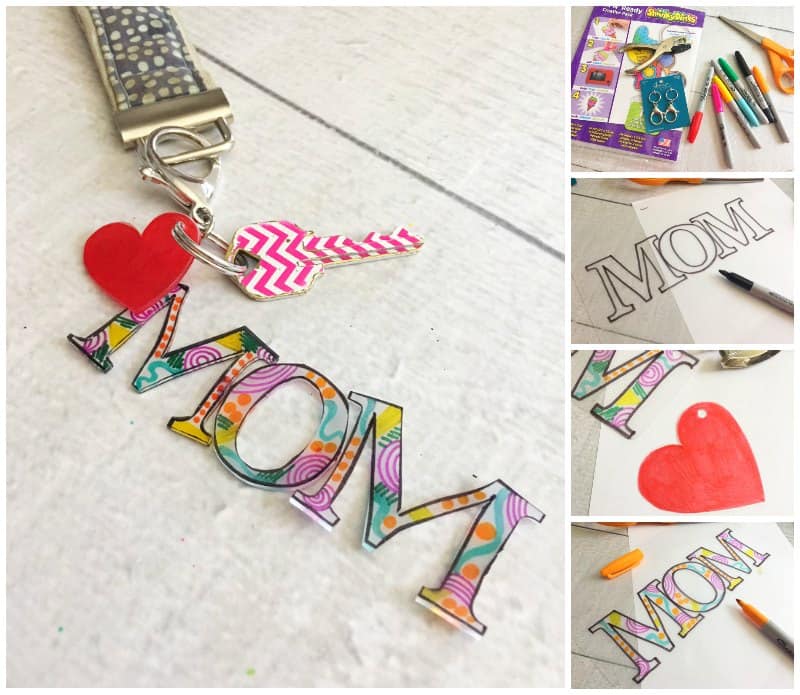
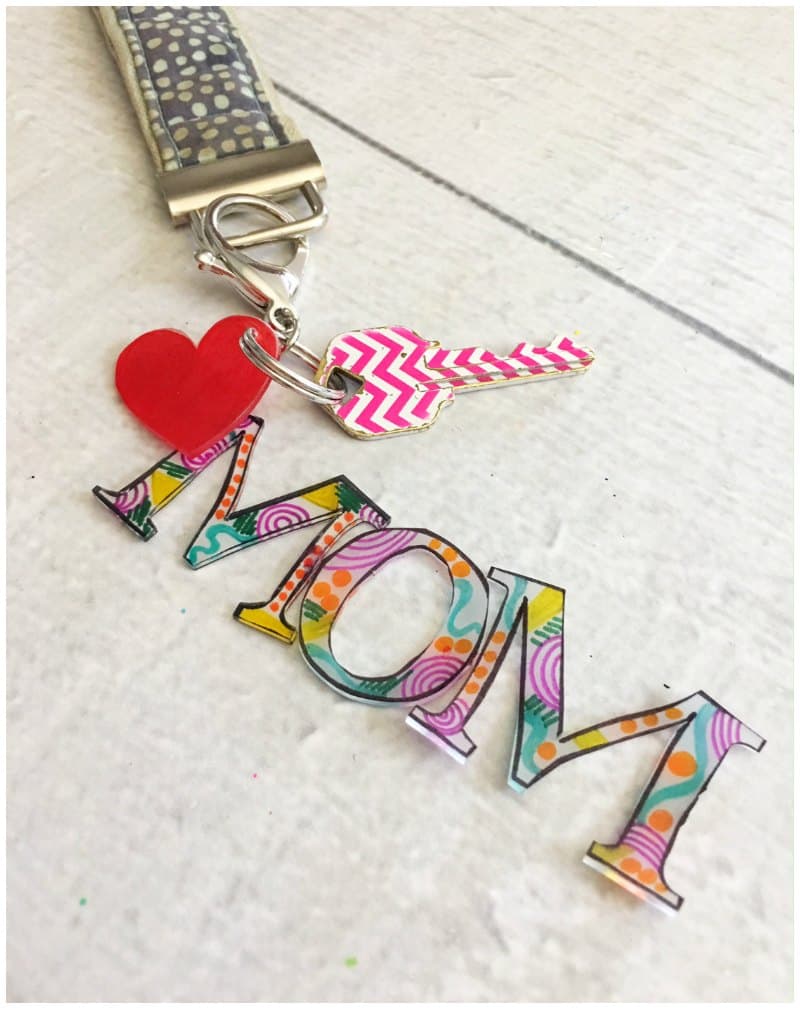
We just made a Shrinky Dinks DIY Project Idea that I know you will love! This was a gift idea for Mother’s Day but honestly, this could be a simple craft idea for any day of the week! I know we plan to make a few more designs during the summer when kids tend to get a bit bored.
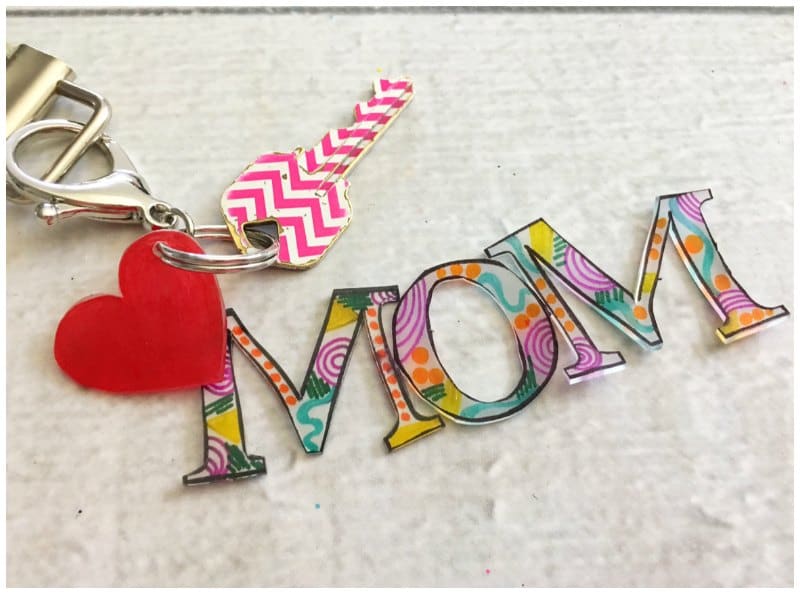
This best part about this craft is you get to let your imagination run wild! You can design all different kinds of words or objects. Anything you are into could be made into art! We made a keychain here in this tutorial but we’ve also make necklaces, bracelets, earrings, bookmarks, backpack charms, wine glass labels and more!
Once you make your first design, you will be hooked! It’s so much fun for kids and adults alike. My kids love to make emoji symbols or even their favorite game symbols into backpack keychains.
Note: I have tried this project with a plastic to-go container and even though it does work, it’s not as easy as the Shrinky Dink paper sheets. I prefer those any day!
Besides, I won’t feel like I am going to cut myself on the edges of the container when I’m cutting out my design. If you do use the to-go containers, I would make sure the adult cuts out the design.
TIP: You can grab a generic brand of Shrinky Dink Paper sheets as seen here and save a few bucks too!
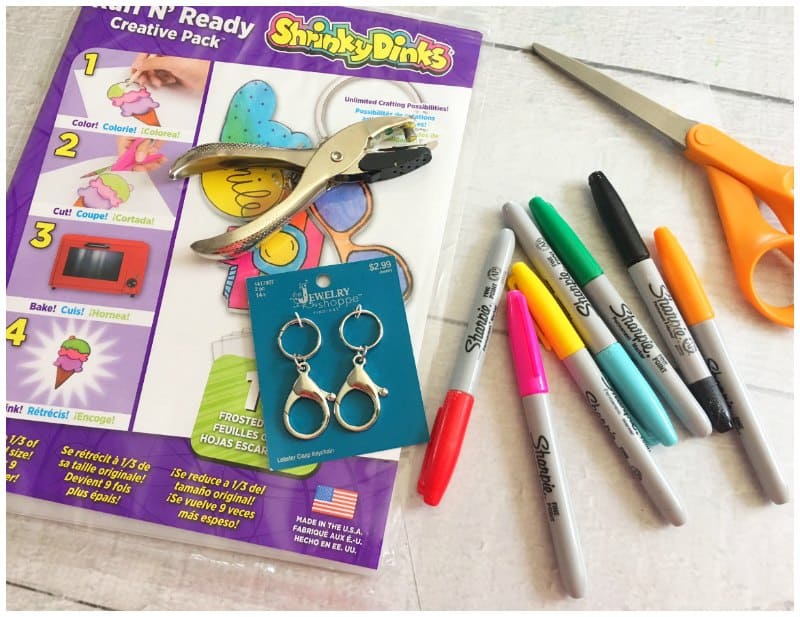
Shrinky Dinks DIY Project Items List:
- Frosted Shrinky Dink Sheet
- Hole puncher
- Sharpie markers or colored pencils
- Keychains
- Scissors
Shrinky Dinks DIY Project Instructions:
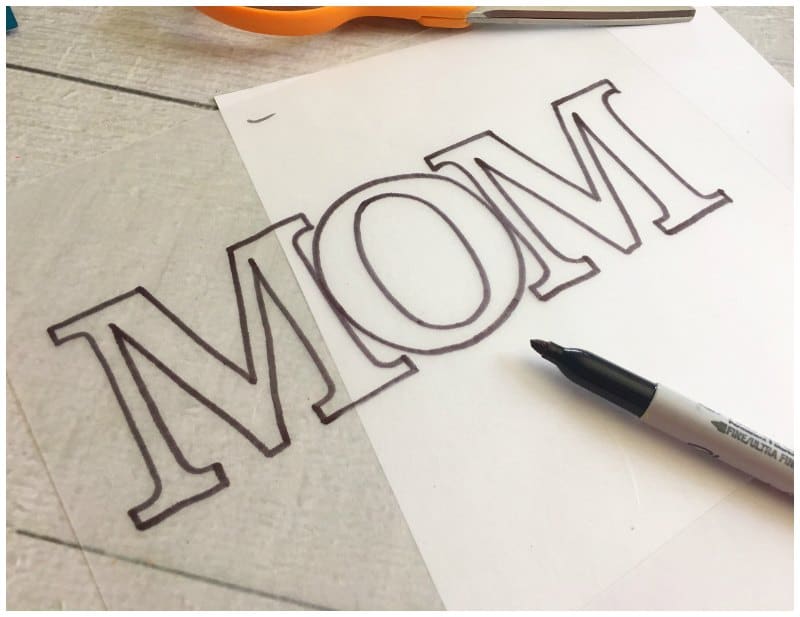
1. Draw “MOM” (or any other phrase you prefer) onto your frosted shrinky sink paper with a black sharpie, make sure the letters touch each other.
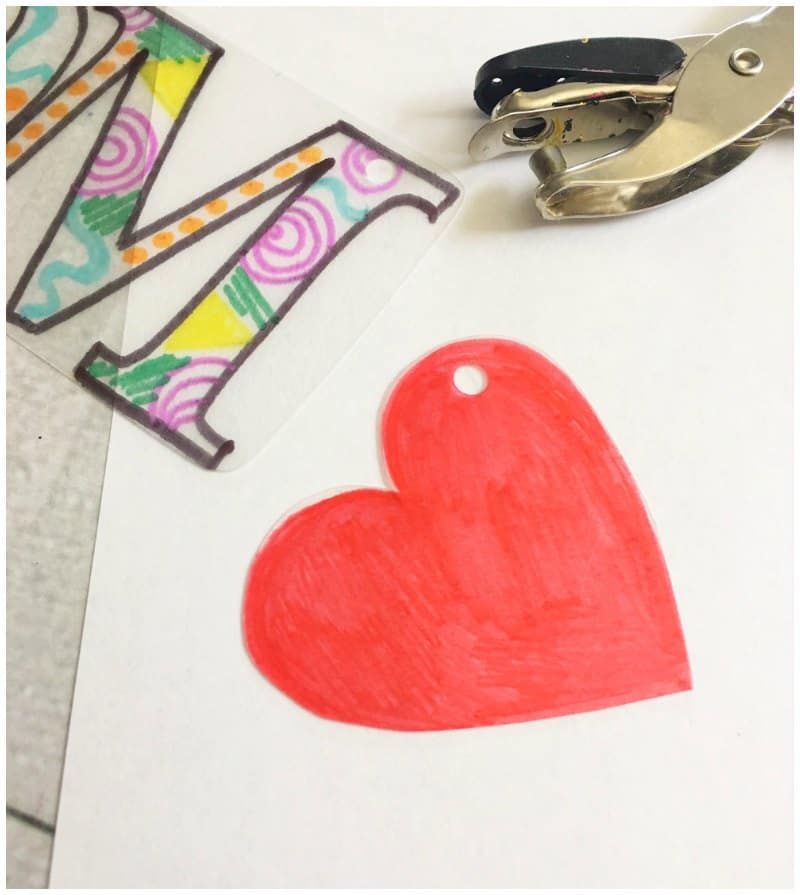
2. Use your colorful Sharpies or colored pencils to draw fun designs inside the letters.
3. Draw and color in a heart with a red Sharpie
4. Carefully cut out your designs with scissors.
5. Use a hole punch to punch a hole onto one “M” and onto the corner of your heart.
6. Place onto a foil lined baking sheet and wrap the edges of the foil over top your Shrinky Dink designs to ensure they lay flat.
7. Bake in a preheated 325-degree oven for 3 minutes, remove your pan from the oven and immediately press flat with an oven mitt.
8. Let cool and remove from the foil.
9. Place a keychain hook into the holes and attach to your keys.
Tip: I should also mention the differences in the Sharpie markers. They have all sorts of colors and tip sizes. I love to mix up the bold colors with the pastel colors to give each design a pop of color!
If you have a small design with lots of little details, you may want to use the fine tip markers. I use the fine tip Sharpie Markers set and the Regular Sharpie Markers set.
Most of the time you can find the best deal on Sharpie Markers in stores around back to school time but if it’s outside of the timeframe, I find the best deals on Amazon.